HP AH558A HP StorageWorks 1/8 G2 Tape Autoloader chassis replacement (AH163-96 - Page 1
HP AH558A - StorageWorks 1/8 G2 Tape Autoloader Ultrium 920 Manual
 |
UPC - 808736893589
View all HP AH558A manuals
Add to My Manuals
Save this manual to your list of manuals |
Page 1 highlights
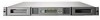
HP StorageWorks 1/8 G2 Tape Autoloader chassis replacement CAUTION! Parts can be damaged by electrostatic discharge. Keep parts in electrostatic containers until needed. Ensure you are properly grounded when touching static sensitive components. WARNING! The HP StorageWorks 1/8 G2 Tape Autoloader weighs 11.5 kg (25.4 lb.) without media, and 13.1 kg (28.9 lb.) with media (8 cartridges). When moving the Autoloader, to reduce the risk of personal injury or damage to the Autoloader: 1) observe local health and safety requirements and guidelines for manual material handing, 2) always remove all tapes to reduce the overall weight of the Autoloader, and 3) obtain adequate assistance to lift and stabilize the Autoloader during installation or removal. 1 Preparation You will need a #3 Phillips screwdriver and a paper clip to remove and replace the base chassis assembly. 4 Removing cables 2 2 Recording configuration settings If the Operator Control Panel (OCP) or Remote Management Interface (RMI) works, write down the system, drive, and network configuration settings. 3 Removing the tape cartridge from the drive Using the Operator Control Panel or the Remote Management Interface, unload the tape cartridge from the drive if necessary. 1 Power off the Autoloader (1) and unplug the power cord from the wall outlet. Remove the power cord from the Autoloader (2). Remove the SCSI cable and Ethernet cable.
-
 1
1 -
 2
2 -
 3
3 -
 4
4
 |
 |
