HP Color LaserJet Enterprise CM4540 HP Color LaserJet Enterprise CM4540 MFP - - Page 9
Install the software, Connect through a wired network, Finish, More Options, Close, System Preferences
 |
View all HP Color LaserJet Enterprise CM4540 manuals
Add to My Manuals
Save this manual to your list of manuals |
Page 9 highlights
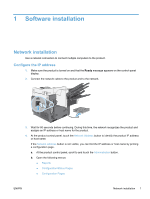
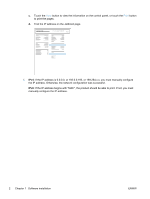
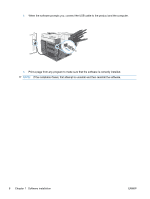
Install the software Windows 1. Quit all programs on the computer. 2. Install the software from the CD. 3. Follow the onscreen instructions. 4. When prompted, select the Connect through a wired network option. 5. From the list of available printers, select the printer that has the correct IP address. 6. At the end of the installation, click the Finish button, or click the More Options button to install more software or configure basic digital sending features for the product. ● Install the HP PC Send Fax driver to enable sending faxes from your computer. (Fax models only) ● Use the HP Scan to Email Setup Wizard to configure basic E-mail settings. ● Use the HP Save to Folder Setup Wizard to set up a shared folder on the network where you can store scanned documents. 7. Print a page from any program to make sure that the software is correctly installed. Mac 1. Quit all programs on the computer. 2. Install the software from the CD. 3. Click the product icon, and follow the onscreen instructions. 4. Click the Close button when the installation is complete. 5. At the computer, open the Apple menu , click the System Preferences menu, and then click the Print & Fax icon. 6. Click the plus symbol (+). By default, Mac OS X uses the Bonjour method to find the driver and add the product to the printer pop-up menu. This method is best in most situations. If Mac OS X cannot find the HP printer driver, an error message displays. Reinstall the software. If you are connecting the product to a large network, you might need to use IP printing to connect rather than Bonjour. Follow these steps: a. Click the IP Printer button. b. From the Protocol drop-down list, select the HP Jetdirect-Socket option. Enter the IP address or host name for the product. From the Print Using drop-down list, select the product model if one is not already selected. 7. To configure the product to recognize the installed accessories, complete these steps: ENWW Network installation 3
-
 1
1 -
2
-
3
-
 4
4 -
 5
5 -
 6
6 -
 7
7 -
 8
8 -
 9
9 -
 10
10 -
 11
11 -
 12
12 -
 13
13 -
 14
14 -
15
-
16
-
17
-
18
-
19
-
20
-
21
-
22
 |
 |