HP D1660 User Guide - Page 17
Print On Both Sides, Left Edge Booklet - printer stops printing
 |
UPC - 884420931249
View all HP D1660 manuals
Add to My Manuals
Save this manual to your list of manuals |
Page 17 highlights
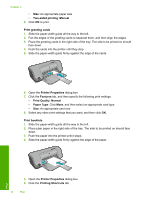
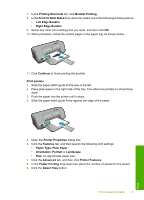
7. In the Printing Shortcuts list, click Booklet Printing. 8. In the Print On Both Sides drop-down list, select one of the following binding options: • Left Edge Booklet • Right Edge Booklet 9. Select any other print settings that you want, and then click OK. 10. When prompted, reload the printed pages in the paper tray as shown below. 11. Click Continue to finish printing the booklet. Print posters 1. Slide the paper-width guide all the way to the left. 2. Place plain paper in the right side of the tray. The side to be printed on should face down. 3. Push the paper into the printer until it stops. 4. Slide the paper-width guide firmly against the edge of the paper. 5. Open the Printer Properties dialog box. 6. Click the Features tab, and then specify the following print settings: • Paper Type: Plain Paper • Orientation: Portrait or Landscape • Size: An appropriate paper size 7. Click the Advanced tab, and then click Printer Features. 8. In the Poster Printing drop-down list, select the number of sheets for the poster. 9. Click the Select Tiles button. Print on specialty media 15 Print
-
 1
1 -
2
-
3
-
4
-
5
-
6
-
7
-
8
-
9
-
10
-
11
-
 12
12 -
 13
13 -
 14
14 -
 15
15 -
 16
16 -
 17
17 -
 18
18 -
 19
19 -
 20
20 -
 21
21 -
 22
22 -
23
-
24
-
25
-
26
-
27
-
28
-
29
-
30
-
31
-
32
-
33
-
34
-
35
-
36
-
37
-
38
-
39
-
40
-
41
-
42
-
43
-
44
-
45
-
46
-
47
-
48
-
49
-
50
-
51
-
52
-
53
-
54
-
55
-
56
-
57
-
58
-
59
-
60
 |
 |
