HP D310v HP Guide to System Recovery and Restore - Page 4
To start the computer in Safe Mode - drivers
 |
View all HP D310v manuals
Add to My Manuals
Save this manual to your list of manuals |
Page 4 highlights
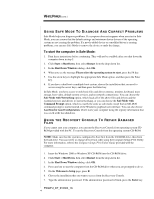
WHITE PAPER (cont.) ... USING SAFE MODE TO DIAGNOSE AND CORRECT PROBLEMS Safe Mode helps you diagnose problems. If a symptom does not reappear when you start in Safe Mode, you can assume that the default settings and minimum device drivers of the operating system are not causing the problem. If a newly-added device or a modified driver is causing problems, you can use Safe Mode to remove the device or undo the change. To start the computer in Safe Mode: 1. Print these instructions before continuing. They will not be available after you shut down the computer down in step 2. 2. Click Start > Shut Down, then select Restart from the drop-down list. 3. In the Shut Down Windows dialog, click OK. 4. When you see the message Please select the operating system to start, press the F8 key. 5. Use the arrow keys to highlight the appropriate Safe Mode option, and then press the Enter key. 6. If you have a dual-boot or multiple-boot system, choose the installation that you need to access using the arrow keys, and then press the Enter key. In Safe Mode, you have access to only basic files and drivers (mouse, monitor, keyboard, mass storage, base video, default system services, and no network connections). You can choose the Safe Mode with Networking option, which loads all of the above files and drivers and the essential services and drivers to start networking, or you can choose the Safe Mode with Command Prompt option, which is exactly the same as safe mode except that an MS-DOS command prompt is started instead of the Windows graphical user interface. You can also choose Last Known Good Configuration, which starts your computer using the registry information that was saved at the last shutdown. USING THE RECOVERY CONSOLE TO REPAIR DAMAGED FILES If you cannot start your computer, you can run the Recovery Console from operating system CDROM provided with the PC. To run the Recovery Console from the operating system CD-ROM: NOTE: Make sure that the system is configured to boot first from the CD-ROM drive, then from the hard drive. You can verify or change device boot order using the Computer Setup (F10) Utility. For more information, refer to the Computer Setup (F10) Utility Guide provided with the computer. 1. Insert the Windows 2000 or Windows XP CD-ROM into the CD-ROM drive. 2. Click Start > Shut Down, then select Restart from the drop-down list. 3. In the Shut Down Windows dialog, click OK. 4. Press any key to start the computer from the CD-ROM drive when you are prompted to do so. 5. On the Welcome to Setup page, press R. 6. Choose the installation that you want to access from the Recovery Console. 7. Type the administrator password. If the administrator password is blank, press the Enter key. PSG#HJ_DT_010303_1A 4
-
 1
1 -
 2
2 -
 3
3 -
 4
4 -
 5
5 -
 6
6
 |
 |