HP D5063H HP FX50 Flat Panel Display - (English) User's Guide - Page 12
Automatic Setup, Manual Setup
 |
View all HP D5063H manuals
Add to My Manuals
Save this manual to your list of manuals |
Page 12 highlights
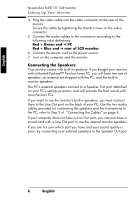
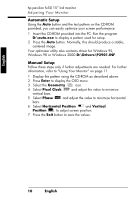
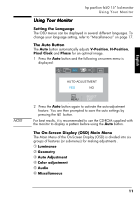
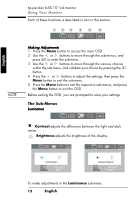
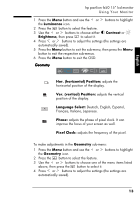
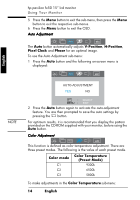
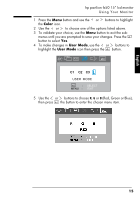
English hp pavilion fx50 15" lcd monitor Adjusting Your Monitor Automatic Setup Using the Auto button and the test pattern on the CD-ROM provided, you can easily optimize your screen performance. 1 Insert the CD-ROM provided into the PC. Run the program D:\auto.exe to display a pattern used for setup. 2 Press the Auto button. Normally, this should produce a stable, centered image. Your optimizer utility also contains driver for Windows 95, Windows 98 or Windows 2000 D:\Drivers\P3901.INF. Manual Setup Follow these steps only if further adjustments are needed. For further information, refer to "Using Your Monitor" on page 11. 1 Display the pattern using the CD-ROM as described above. 2 Press Enter to display the OSD menu. 3 Select the Geometry icon. 4 Select Pixel Clock and adjust the value to minimize vertical bars. 5 Select Phase and adjust the value to minimize horizontal bars. 6 Select Horizontal Position and Vertical Position to adjust screen position. 7 Press the Exit button to save the values. 10EnglishEnglish X
-
 1
1 -
2
-
3
-
4
-
5
-
6
-
 7
7 -
 8
8 -
 9
9 -
 10
10 -
 11
11 -
 12
12 -
 13
13 -
 14
14 -
 15
15 -
 16
16 -
 17
17 -
18
-
19
-
20
-
21
-
22
-
23
-
24
-
25
-
26
-
27
-
28
-
29
-
30
-
31
 |
 |