HP D5460 Basics Guide - Page 5
Control panel features, Label, Description, Name and Description - photosmart
 |
UPC - 883585857739
View all HP D5460 manuals
Add to My Manuals
Save this manual to your list of manuals |
Page 5 highlights
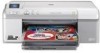
(continued) Label 13 14 15 Description Rear door Rear USB port Power connection* * Use only with the power adapter supplied by HP. Control panel features The following diagram and related table provide a quick reference to the HP Photosmart control panel features. Overview Label 1 2 3 Icon 4 5 6 7 8 9 Name and Description Color graphics display (also referred to as the display): Shows photos on a memory card. Also shows status and error messages. Attention light: Indicates a problem occurred. See the display for more information. Left arrow: The left arrow button returns to the previous display screen or photo on the memory card. OK: Selects a photo for printing or selects a menu option. Right arrow: The right arrow button advances to the next display screen or photo on the memory card. Print Photos: Prints the photos selected on your memory card. If no photos are currently selected, the product prints the photo currently showing on the display. Red-Eye Removal: Turns the Red-Eye Removal feature On or Off. This feature turns on when a memory card is inserted. The product automatically corrects red-eye coloring in the photo currently shown on the display. Cancel: Stops the current operation and returns to the main screen. On: Turns the product on or off. When the product is off, a minimal amount of power is still used. To completely remove power, turn off the product, and then unplug the power cord. Control panel features 3
-
 1
1 -
 2
2 -
 3
3 -
 4
4 -
 5
5 -
 6
6 -
 7
7 -
 8
8 -
 9
9 -
 10
10 -
 11
11 -
12
-
13
-
14
-
15
-
16
-
17
-
18
-
19
-
20
-
21
-
22
-
23
-
24
-
25
 |
 |
