HP DF800B2 HP df800 Digital Picture Frame - User Manual - Page 14
on the HP Digital Picture Frame and connect the HP Digital
 |
View all HP DF800B2 manuals
Add to My Manuals
Save this manual to your list of manuals |
Page 14 highlights
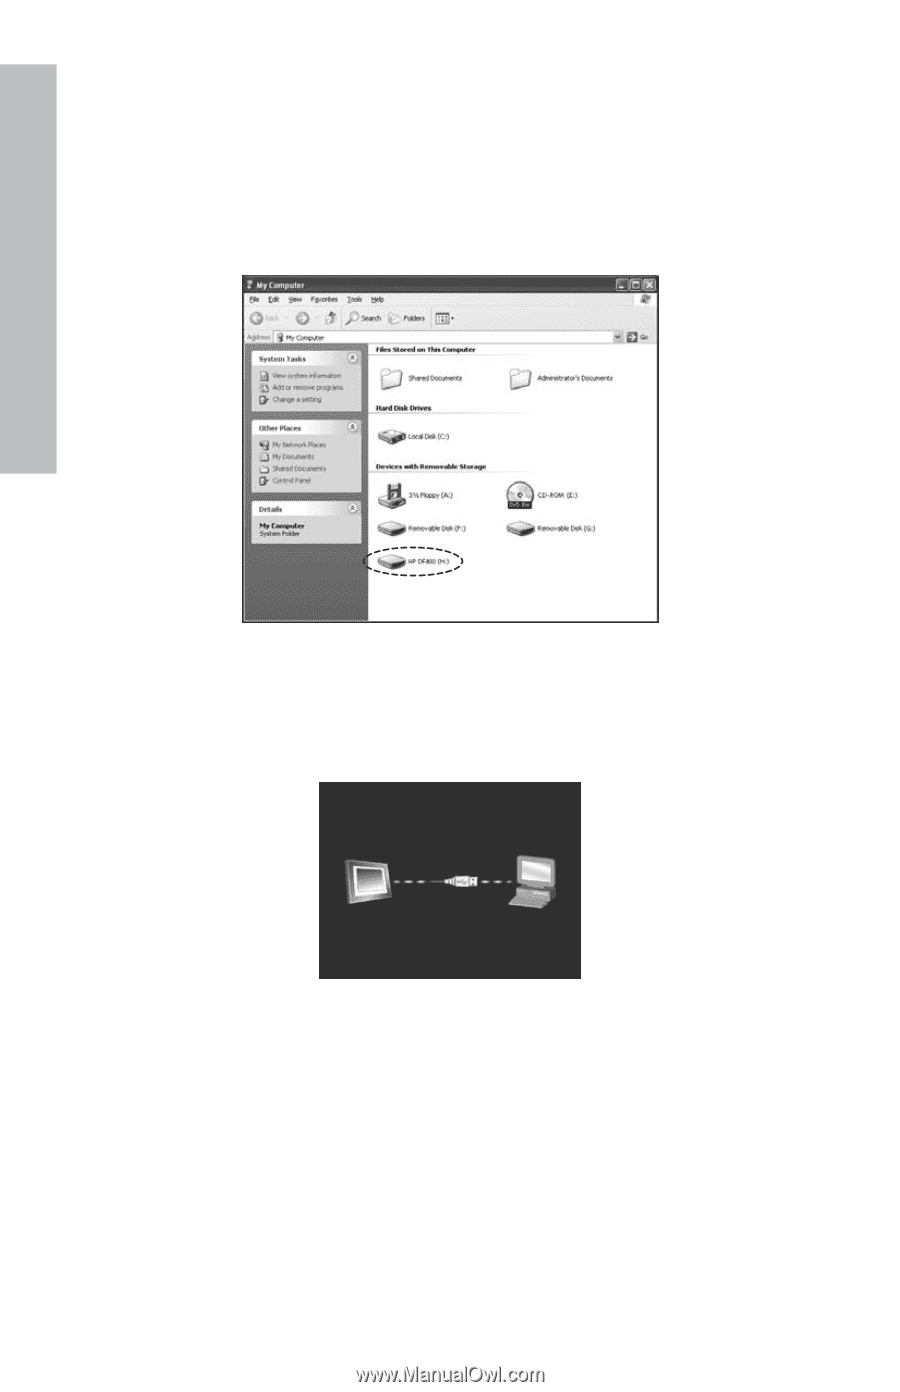
English From a PC/notebook: For the first connection, it is recommended to remove all external memory sources. Power on the HP Digital Picture Frame and connect the HP Digital Picture Frame to your Windows™ 2000 (with service pack 4 or greater), Windows™ XP (with Service Pack 2 or greater), or Windows™ Vista PC/notebook by using the USB cable provide with product (see illustration below): 3 new drive letters will appear in Windows Explorer. These new drive letters represent the Digital Picture Frame's internal memory, Memory card slot 1 and Memory card slot 2. The digital picture frame will display the graphic below: 1 of the 3 new drive letters is the HP Digital Picture Frame's internal memory and will be labeled HP df800. Drive letter assignment MAY vary from PC to PC. Use standard Windows™ copy and paste procedures to move content onto the frame's internal memory. To check the picture frame's available memory, right click on the internal memory drive letter and select Properties. A properties menu will appear displaying the available/Free space (in Mega Bytes[MB]). Disconnect the PC/notebook when desired content has been copied successfully. 12
-
 1
1 -
2
-
3
-
4
-
5
-
6
-
7
-
8
-
 9
9 -
 10
10 -
 11
11 -
 12
12 -
 13
13 -
 14
14 -
 15
15 -
 16
16 -
 17
17 -
 18
18 -
 19
19 -
20
-
21
-
22
-
23
-
24
-
25
-
26
-
27
-
28
-
29
-
30
-
31
-
32
-
33
-
34
-
35
-
36
-
37
-
38
-
39
-
40
-
41
-
42
-
43
-
44
-
45
-
46
-
47
-
48
-
49
-
50
-
51
-
52
-
53
-
54
-
55
-
56
-
57
-
58
-
59
-
60
-
61
-
62
-
63
-
64
-
65
-
66
-
67
-
68
 |
 |