HP DL145 Implementing Microsoft Windows Server 2003 with Service Pack 1 on Pro - Page 17
Install Version 7.30A or later of the ProLiant Support Pack PSP for Microsoft Windows Server
 |
UPC - 829160273594
View all HP DL145 manuals
Add to My Manuals
Save this manual to your list of manuals |
Page 17 highlights
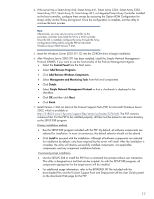
4. If the server has a Smart Array 642, Smart Array 641, Smart Array 5304, Smart Array 5302, Smart Array 531, Smart Array 5i, Smart Array 431, or Integrated Smart Array Controller installed as the boot controller, configure these arrays by accessing the Option ROM Configuration for Arrays utility via the F8 key during boot. Once the configuration is complete, exit the utility to continue the boot process. Note: Alternatively, you may set your array controller as the secondary controller and install the OS to a SCSI controller. Once the OS is installed, configure the array through the Array Configuration Utility (ACU) using the PSP for Microsoft Windows Server 2003 Version 7.30A 5. Insert the Windows Server 2003 SP1 CD into the CD-ROM drive to begin installation. 6. After Windows Server 2003 SP1 has been installed, install the Simple Network Management Protocol (SNMP), if you want to use the functionality of the ProLiant Management Agents. • Select the Control Panel from the Start menu. • Select Add/Remove Programs. • Click Add/Remove Windows Components. • Select Management and Monitoring Tools from the list of components. • Click Details. • Select Simple Network Management Protocol so that a checkmark is displayed in the checkbox. • Click OK and then click Next. • Click Finish. 7. Install Version 7.30A (or later) of the ProLiant Support Pack (PSP) for Microsoft Windows Server 2003, which is available at http://h18023.www1.hp.com/support/files/server/us/locate/3376.html. The PSP contains numerous files. For the PSP to be installed properly, all files must be present in the same directory as the SETUP.EXE program. Primary installation method • Run the SETUP.EXE program included with the PSP. By default, all software components are selected for installation. In most circumstances, this default selection should not be altered. • Click Install to proceed with the installation. Although all software components are selected for installation by default, only those required by the server will install. After the installation is complete, the utility will display successfully installed components, non-applicable components, and any component installation failures. Command prompt installation • Use the SETUPC.EXE to install the PSP from a command line prompt without user interaction. This utility is designed as a tool that can be scripted. As with the SETUP.EXE program, all components appropriate for the target server will be installed. • For additional usage information, refer to the BPXXXXXX.TXT file included with the downloaded files and the ProLiant Support Pack and Deployment Utilities User Guide posted on the download Web page for the PSP. 17
-
 1
1 -
2
-
3
-
4
-
5
-
6
-
7
-
8
-
9
-
10
-
11
-
 12
12 -
 13
13 -
 14
14 -
 15
15 -
 16
16 -
 17
17 -
 18
18 -
 19
19 -
 20
20 -
 21
21 -
 22
22 -
23
 |
 |
