HP Deskjet F2200 Basics Guide - Page 5
Control panel buttons, Label, Name and Description
 |
View all HP Deskjet F2200 manuals
Add to My Manuals
Save this manual to your list of manuals |
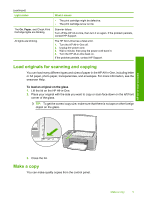
Page 5 highlights
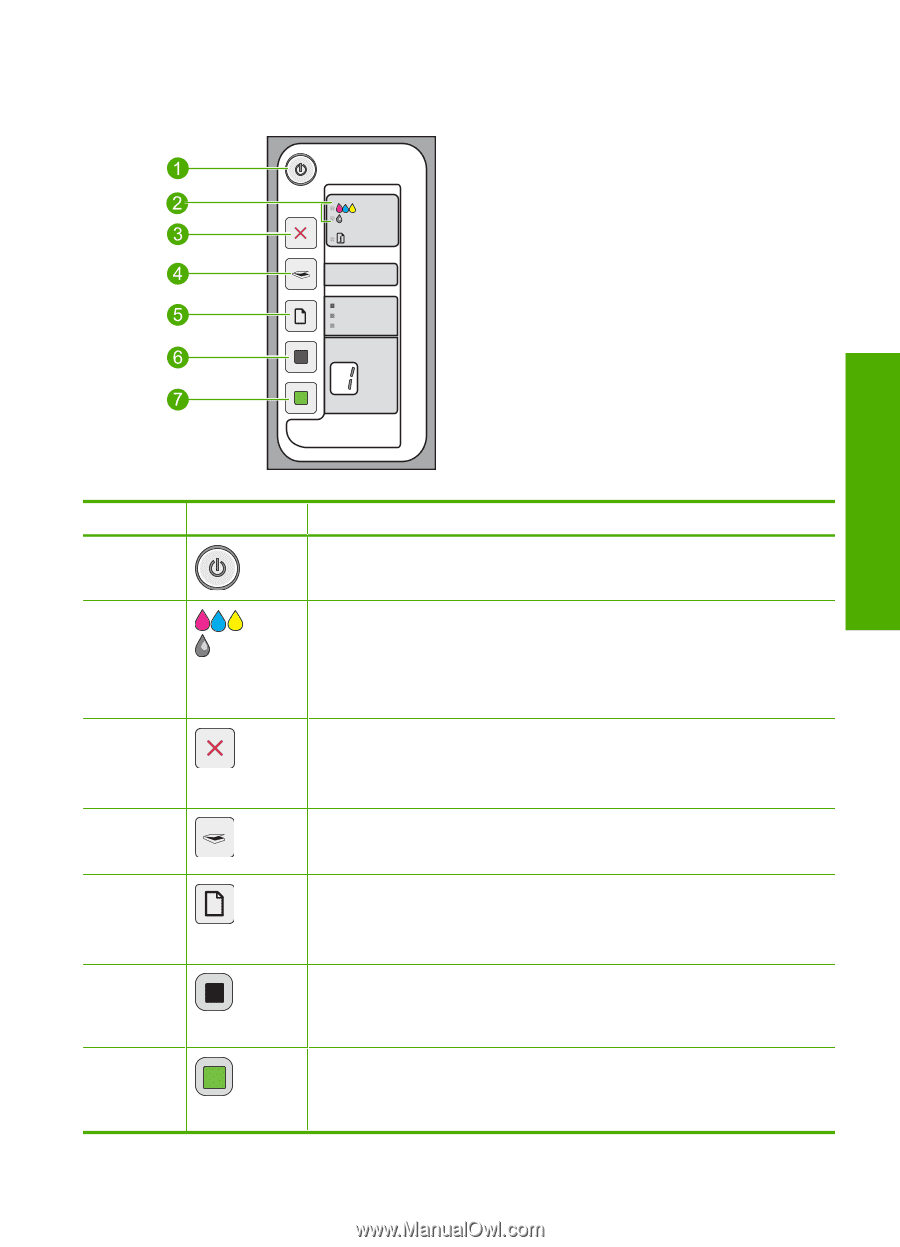
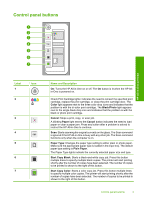
Control panel buttons HP All-in-One overview Label 1 2 Icon 3 4 5 6 7 Name and Description On: Turns the HP All-in-One on or off. The On button is lit when the HP Allin-One is powered on. Check Print Cartridge lights: Indicates the need to reinsert the specified print cartridge, replace the print cartridge, or close the print cartridge door. The Color light appears next to the three color drop icons and indicates that the problem is with the tri-color print cartridge. The Black/Photo light appears next to the single black drop icon and indicates that the problem is with the black or photo print cartridge. Cancel: Stops a print, copy, or scan job. A blinking Paper light next to the Cancel button indicates the need to load paper or clear a paper jam. Press any button after a problem is solved to instruct the HP All-in-One to continue. Scan: Starts scanning the original currently on the glass. The Scan command is ignored if the HP All-in-One is busy with any other job. The Scan command functions only when the computer is on. Paper Type: Changes the paper type setting to either plain or photo paper. Make sure the appropriate paper type is loaded in the input tray. The default paper type setting is Plain Paper. The Paper Type lights indicate the currently selected paper size and type. Start Copy Black: Starts a black-and-white copy job. Press this button multiple times to specify multiple black copies. The printer will start printing shortly after the number of copies have been selected. The number of copies to be printed is shown to the right of this button. Start Copy Color: Starts a color copy job. Press this button multiple times to specify multiple color copies. The printer will start printing shortly after the number of copies have been selected. The number of copies to be printed is shown to the right of this button. Control panel buttons 3
-
 1
1 -
 2
2 -
 3
3 -
 4
4 -
 5
5 -
 6
6 -
 7
7 -
 8
8 -
 9
9 -
 10
10 -
 11
11 -
12
-
13
-
14
-
15
-
16
-
17
 |
 |