HP ENVY 700-400 Upgrading and Servicing Guide - Page 8
screw holes are aligned., computer until it stops 2, ensuring that the three
 |
View all HP ENVY 700-400 manuals
Add to My Manuals
Save this manual to your list of manuals |
Page 8 highlights
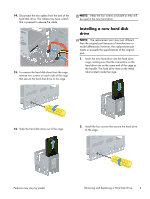
3. Reattach the cables to the bottom end of the hard disk drive. 5. Once the cage is set on the slots (1), press down and slide the cage toward the bottom of the computer until it stops (2), ensuring that the three screw holes are aligned. 4. Set the hard drive cage down into the bay, aligning the tabs on the bottom of the cage with the slots on the chassis. 6. Using a flathead or Torx screwdriver, secure the hard disk drive cage in place. 6 Upgrading and Servicing Guide Features may vary by model.
-
 1
1 -
2
-
 3
3 -
 4
4 -
 5
5 -
 6
6 -
 7
7 -
 8
8 -
 9
9 -
 10
10 -
 11
11 -
 12
12 -
 13
13 -
14
-
15
-
16
-
17
-
18
-
19
-
20
-
21
-
22
-
23
-
24
-
25
 |
 |
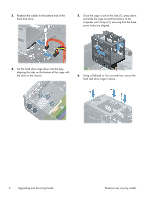
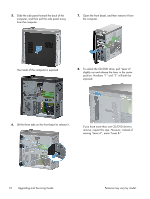
3.
Reattach the cables to the bottom end of the
hard disk drive.
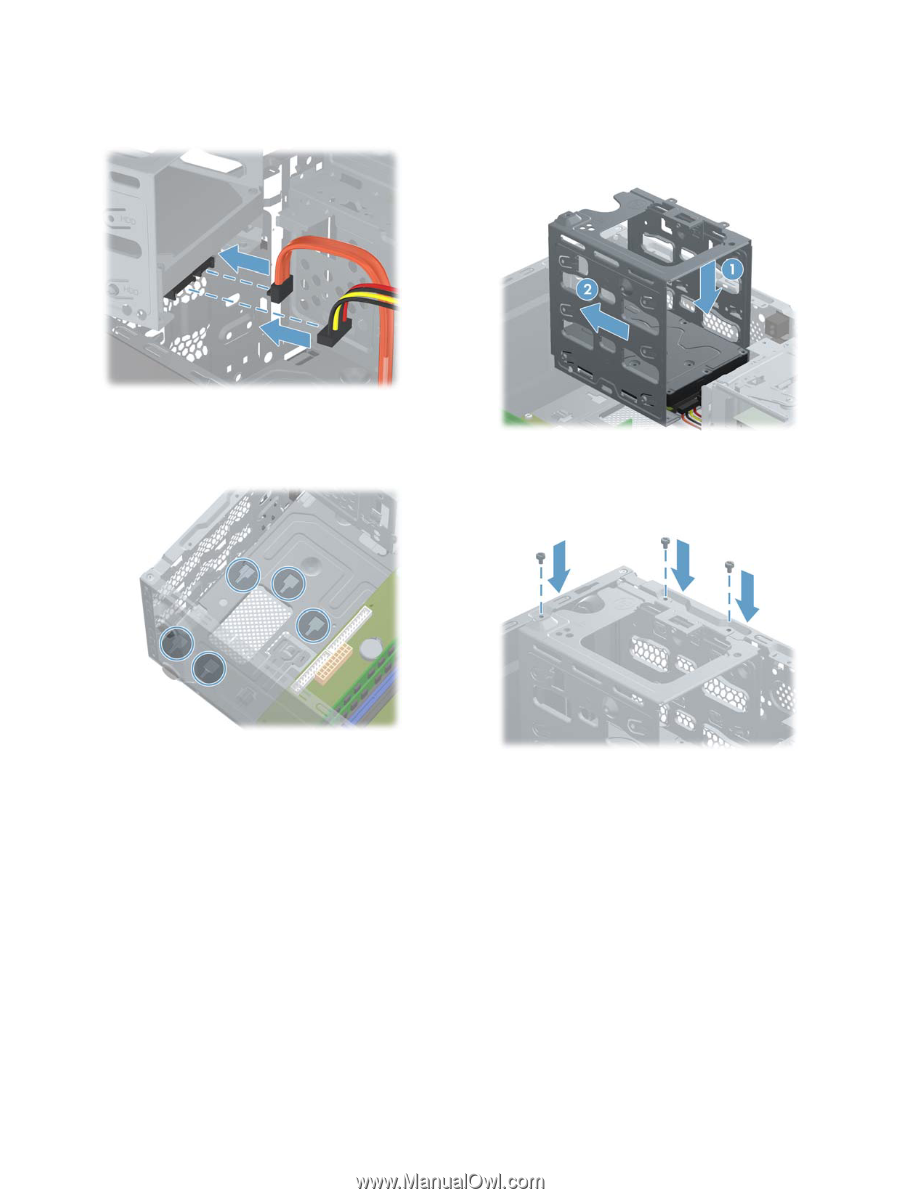
4.
Set the hard drive cage down into the bay,
aligning the tabs on the bottom of the cage with
the slots on the chassis.
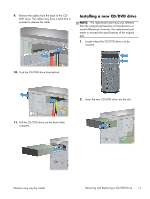
5.
Once the cage is set on the slots (1), press down
and slide the cage toward the bottom of the
computer until it stops (2), ensuring that the three
screw holes are aligned.
6.
Using a flathead or Torx screwdriver, secure the
hard disk drive cage in place.
6
Upgrading and Servicing Guide
Features may vary by model.