HP ENVY h8-1427 Upgrading and Servicing Guide - Page 18
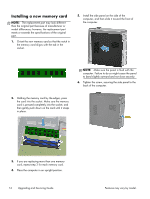
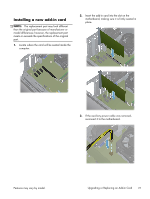
Installing a new memory card
 |
View all HP ENVY h8-1427 manuals
Add to My Manuals
Save this manual to your list of manuals |
Page 18 highlights
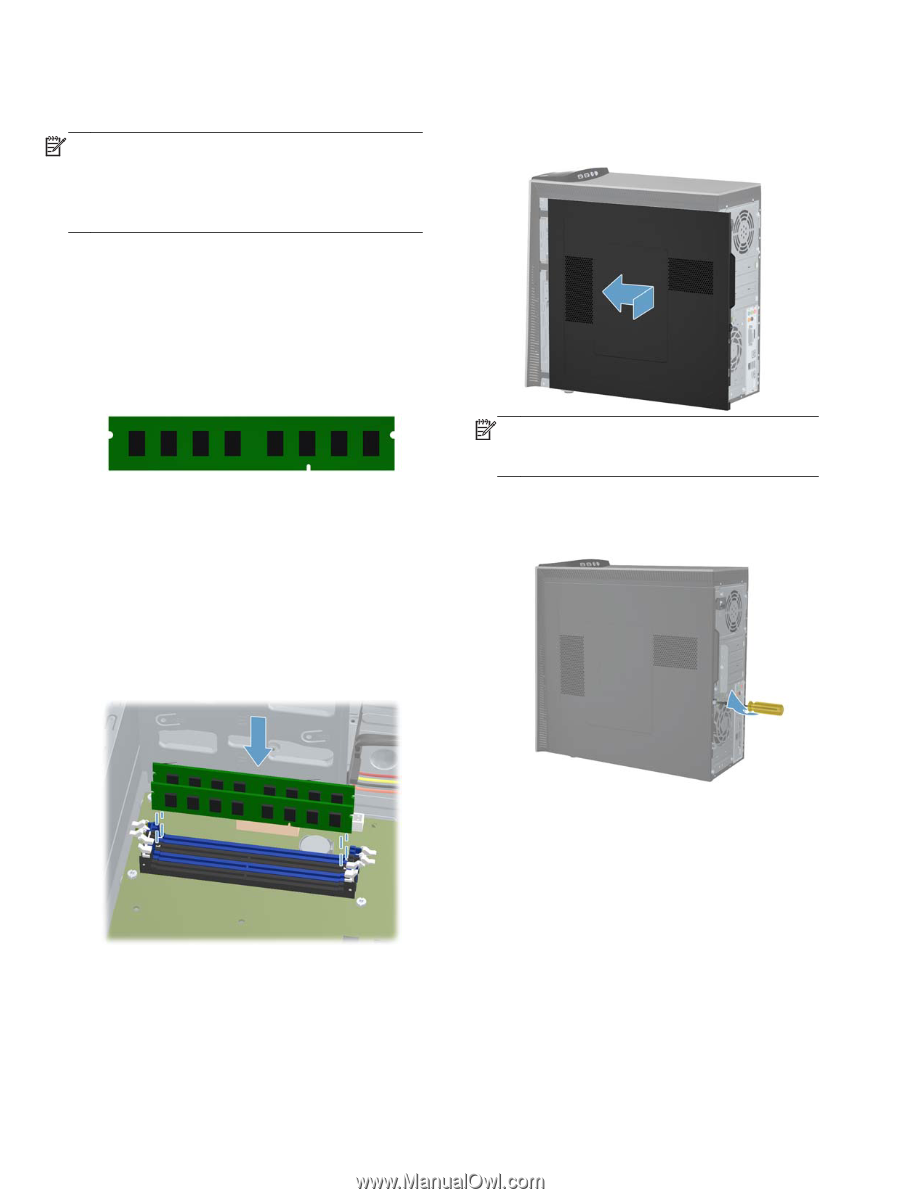
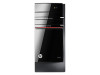
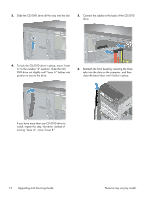
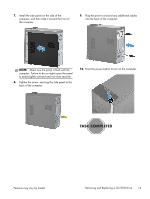
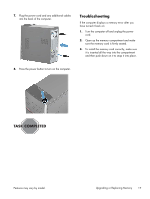
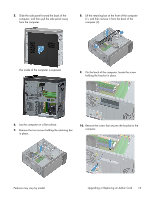
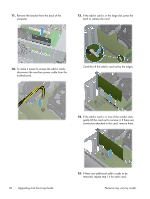
Installing a new memory card NOTE: The replacement part may look different than the original part because of manufacturer or model differences; however, the replacement part meets or exceeds the specifications of the original part. 1. Orient the new memory card so that the notch in the memory card aligns with the tab in the socket. 5. Install the side panel on the side of the computer, and then slide it toward the front of the computer. NOTE: Make sure the panel is flush with the computer. Failure to do so might cause the panel to bend slightly outward and not close securely. 6. Tighten the screw, securing the side panel to the back of the computer. 2. Holding the memory card by the edges, press the card into the socket. Make sure the memory card is pressed completely into the socket, and then gently push down on the card until it snaps in place. 3. If you are replacing more than one memory card, repeat step 2 for each memory card. 4. Place the computer in an upright position. 16 Upgrading and Servicing Guide Features may vary by model.
-
 1
1 -
2
-
3
-
4
-
5
-
6
-
7
-
8
-
9
-
10
-
11
-
12
-
 13
13 -
 14
14 -
 15
15 -
 16
16 -
 17
17 -
 18
18 -
 19
19 -
 20
20 -
 21
21 -
 22
22 -
 23
23 -
24
-
25
 |
 |