HP EY904AA HP Personal Media Drive - User Guide - Page 10
Formatting the Drive, for Windows
 |
View all HP EY904AA manuals
Add to My Manuals
Save this manual to your list of manuals |
Page 10 highlights
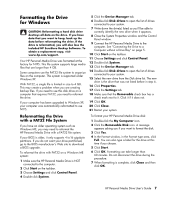
Formatting the Drive for Windows CAUTION: Reformatting a hard disk drive destroys all data on the drive. If you have data that you want to keep, back up the data before reformatting the drive. If the drive is reformatted, you will also lose the included HP SureStore Backup Software. To obtain a replacement copy, visit www.hp.com/support. Your HP Personal Media Drive was formatted at the factory for NTFS. This file system supports large media files that are larger than 4 GB. Some computers use the FAT32 file system to organize files on the computer. This system is supported under Windows XP. With FAT32, a single file is limited in size to 4 GB. This may create a problem when you are creating backup files. If you need to use this disk drive on a computer that requires FAT32, you need to reformat the drive. If your computer has been upgraded to Windows XP, your computer was automatically reformatted to use NTFS. 5 Click the Device Manager tab. 6 Double-click Disk drives to open the list of drives connected to your system. 7 Write down the drive(s) listed so you'll be able to correctly identify the new drive when it appears. 8 Close the System Properties window and the Control Panel window. 9 Connect the HP Personal Media Drive to the computer. See "Connecting the Drive to a Computer without a Drive Bay" on page 5. 10 Click Start on the taskbar. 11 Choose Settings and click Control Panel. 12 Double-click System. 13 Click the Device Manager tab. 14 Double-click Disk drives to open the list of drives connected to your system. 15 Select the new drive from the Disk drive list. The new drive is the drive that was not listed before in step 6. 16 Click Properties. 17 Click the Settings tab. 18 Make sure that the Removable check box has a check mark next to it. Click it if it does not. 19 Click OK. 20 Click Close. 21 Restart your system. Reformatting the Drive with a FAT32 File System If you have an older operating system such as Windows ME, you may need to reformat the HP Personal Media Drive with a FAT32 file system. If your BIOS is older, it only supports 4 to 16 gigabyte partitions. If you do not want your drive partitioned, go to the BIOS manufacturer's Web site to download a BIOS upgrade. To reformat the drive with FAT32 on a Windows ME system: 1 Make sure the HP Personal Media Drive is NOT connected to the computer. 2 Click Start on the taskbar. 3 Choose Settings and click Control Panel. 4 Double-click System. To format your HP Personal Media Drive disk: 1 Double-click the My Computer icon. 2 Click the Removable Disk icon. A message appears asking you if you want to format the disk. 3 Click Yes. 4 In the Format window, in the Format type area, click Full. You can also type a label for the drive at this time if you choose. 5 Click Start. 6 Click OK. Formatting can take longer than 60 minutes. Do not disconnect the drive during the procedure. 7 When formatting is complete, click Close and then click OK. HP Personal Media Drive User's Guide 7
-
 1
1 -
2
-
3
-
4
-
 5
5 -
 6
6 -
 7
7 -
 8
8 -
 9
9 -
 10
10 -
 11
11 -
 12
12 -
 13
13 -
 14
14
 |
 |
