HP EliteBook 2760p Installing SATA Drivers on HP EliteBook Notebook PCs - Page 13
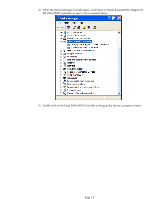
Storage Controller and select 'Update Driver'. If more than one Intel ICH9M Serial ATA - specification
 |
View all HP EliteBook 2760p manuals
Add to My Manuals
Save this manual to your list of manuals |
Page 13 highlights
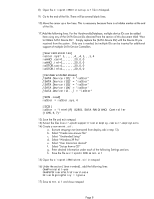
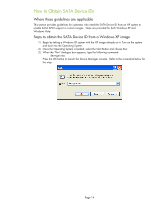
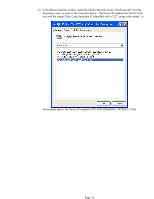
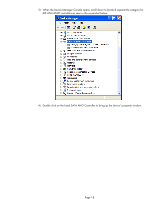
f. txtsetup.oem a. 6) Download and run the "Intel Chipset Installation Utility for ICH9 for Microsoft Windows 2000 and XP" for your models from www.hp.com. 7) In Device Manager, right-click the IDE ATA/ATAPI controllers/Intel ® ICH9M Serial ATA Storage Controller and select 'Update Driver'. If more than one Intel ICH9M Serial ATA Storage Controller is listed this process only needs to be done once. 8) Follow these steps to complete the Hardware Update Wizard: a. At the first dialog, select 'No, not this time' when prompted to connect to Windows Update. b. At the next dialog, select 'Install from a list or specific location (Advanced). c. At the next dialog, select 'Don't search. I will choose the driver to install'. d. When prompted to select the device driver you want to install for this hardware, choose the first one in the list: Intel® ICH9M Serial ATA Storage Controller. e. When prompted to insert the manufacturer's installation disk, select "Have Disk" and when prompted, browse to the location of the "Intel Matrix Storage Manager" files extracted from the softpaq on your removable media. f. Select iaAHCI.inf and click Open, then OK. g. When prompted to select the device driver you want to install for this hardware, select the Intel® ICH9M-E/M SATA AHCI Controller. h. A warning that Windows cannot verify that the device is compatible with your hardware will appear. When asked if you want to continue installing the driver, select Yes, then Finish. i. The installation will complete. 9) Shut down Windows and restart the computer. Enter F10 setup when prompted during the boot. 10) Go to System Configuration/Device Configurations/SATA Native Mode and change it to Enable, then save settings and exit F10 Setup. 11) After Windows restarts, the additional SATA components will be updated. A System Settings Change will appear. When asked "Do you want to restart your computer now?" click Yes. 12) When Windows restarts, the SATA AHCI drivers will be completely installed. Page 13
-
 1
1 -
2
-
3
-
4
-
5
-
6
-
7
-
 8
8 -
 9
9 -
 10
10 -
 11
11 -
 12
12 -
 13
13 -
 14
14 -
 15
15 -
 16
16 -
 17
17 -
 18
18 -
19
-
20
 |
 |