HP EliteBook 735 Sure Admin User Guide - Page 7
Save Policy, Key Name, Passphrase, Azure AD Login, Azure AD Group Name, Browse, Create Key, OneDrive
 |
View all HP EliteBook 735 manuals
Add to My Manuals
Save this manual to your list of manuals |
Page 7 highlights
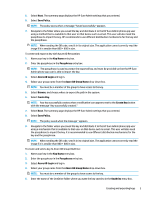
5. Select Next. The summary page displays the HP Sure Admin settings that you entered. 6. Select Save Policy. NOTE: The policy saves when a message "Saved successfully" appears. 7. Navigate to the folder where you saved the key and distribute it to the HP Sure Admin phone app user using a method that is available to that user on that device such as email. This user will also need the passphrase to import the key. HP recommends to use different distribution mechanisms for the key and the passphrase. NOTE: When sending the QR code, send it in its original size. The application cannot correctly read the image if it is smaller than 800 × 600 in size. To create and export a key with Azure AD Revocation: 1. Name your key in the Key Name entry box. 2. Enter the passphrase in the Passphrase entry box. NOTE: The passphrase is used to protect the exported key and must be provided so that the HP Sure Admin phone app user is able to import the key. 3. Select Azure AD Login and log in. 4. Select your group name from the Azure AD Group Name drop-down box. NOTE: You must be a member of the group to have access to the key. 5. Select Browse, and choose where to export the path in the system. 6. Select Create Key. NOTE: Your key successfully creates when a notification icon appears next to the Create Key button with the message "Key successfully created." 7. Select Next. The summary page displays the HP Sure Admin settings that you entered. 8. Select Save Policy. NOTE: The policy saved when the message " appears. 9. Navigate to the folder where you saved the key and distribute it to the HP Sure Admin phone app user using a mechanism that is available to that user on that device such as email. This user will also need the passphrase to import the key. It is recommended to use different distribution mechanisms for the key and the passphrase. NOTE: When sending the QR code, send it in its original size. The application cannot correctly read the image if it is smaller than 800 × 600 in size. To create and send a key to Azure AD Group OneDrive: 1. Name your key in the Key Name entry box. 2. Enter the passphrase in the Passphrase entry box. 3. Select Azure AD Login and log in. 4. Select your group name from the Azure AD Group Name drop-down box. NOTE: You must be a member of the group to have access to the key. 5. Enter the name of the OneDrive folder where you want the key saved to in the OneDrive entry box. Creating and exporting keys 3
-
 1
1 -
 2
2 -
 3
3 -
 4
4 -
 5
5 -
 6
6 -
 7
7 -
 8
8 -
 9
9 -
 10
10
 |
 |