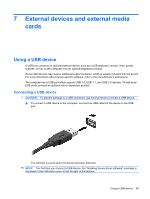
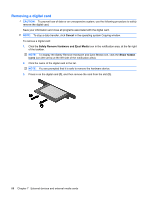
HP G72-b62US Notebook PC User Guide - Windows 7 - Page 100
and gently pull the module out of the memory
 |
View all HP G72-b62US manuals
Add to My Manuals
Save this manual to your list of manuals |
Page 100 highlights
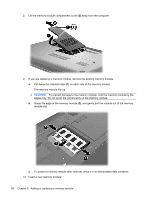
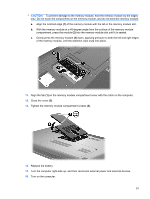
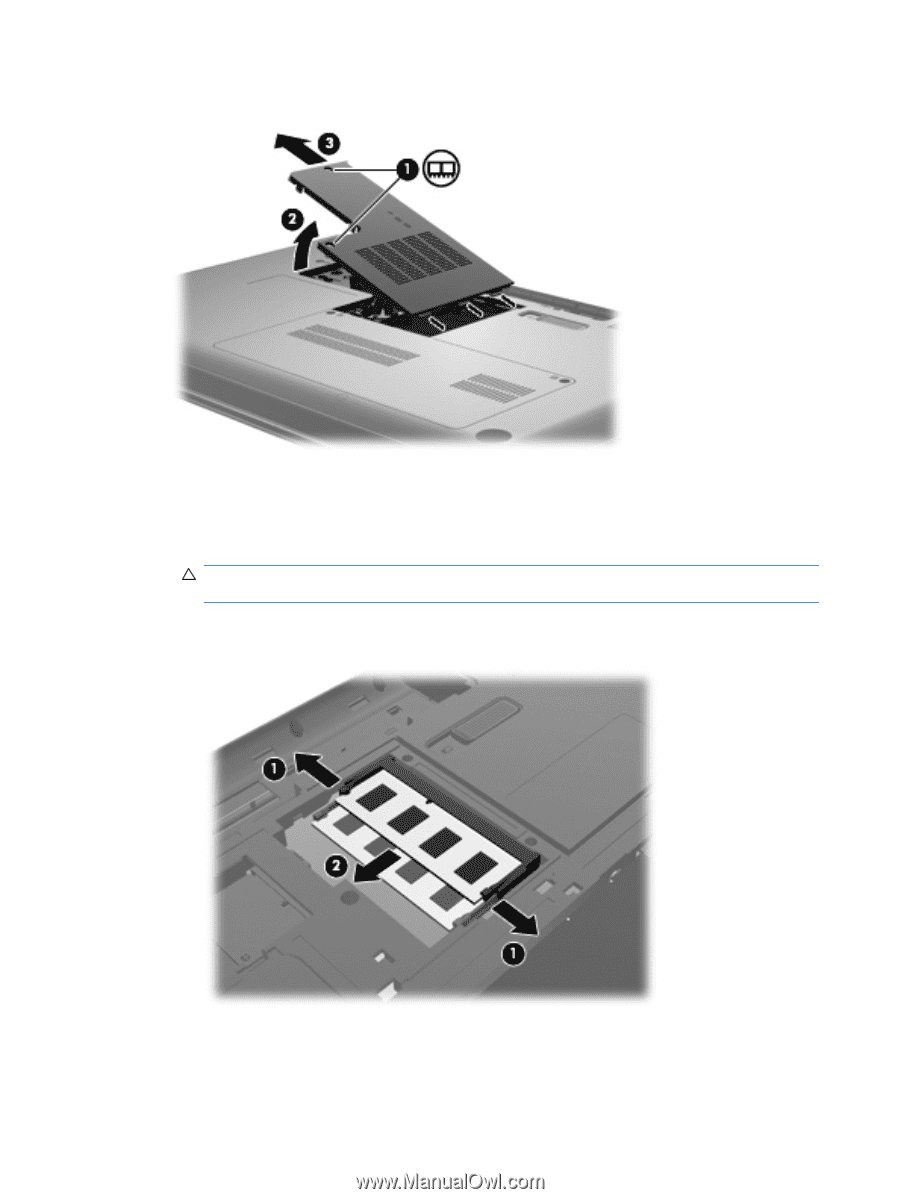
8. Lift the memory module compartment cover (2) away from the computer. 9. If you are replacing a memory module, remove the existing memory module: a. Pull away the retention clips (1) on each side of the memory module. The memory module tilts up. CAUTION: To prevent damage to the memory module, hold the memory module by the edges only. Do not touch the components on the memory module. b. Grasp the edge of the memory module (2), and gently pull the module out of the memory module slot. c. To protect a memory module after removal, place it in an electrostatic-safe container. 10. Insert a new memory module: 90 Chapter 8 Adding or replacing a memory module
-
 1
1 -
2
-
3
-
4
-
5
-
6
-
7
-
8
-
9
-
10
-
11
-
12
-
13
-
14
-
15
-
16
-
17
-
18
-
19
-
20
-
21
-
22
-
23
-
24
-
25
-
26
-
27
-
28
-
29
-
30
-
31
-
32
-
33
-
34
-
35
-
36
-
37
-
38
-
39
-
40
-
41
-
42
-
43
-
44
-
45
-
46
-
47
-
48
-
49
-
50
-
51
-
52
-
53
-
54
-
55
-
56
-
57
-
58
-
59
-
60
-
61
-
62
-
63
-
64
-
65
-
66
-
67
-
68
-
69
-
70
-
71
-
72
-
73
-
74
-
75
-
76
-
77
-
78
-
79
-
80
-
81
-
82
-
83
-
84
-
85
-
86
-
87
-
88
-
89
-
90
-
91
-
92
-
93
-
94
-
 95
95 -
 96
96 -
 97
97 -
 98
98 -
 99
99 -
 100
100 -
 101
101 -
 102
102 -
 103
103 -
 104
104 -
 105
105 -
106
-
107
-
108
-
109
-
110
-
111
-
112
-
113
-
114
-
115
-
116
-
117
-
118
-
119
-
120
-
121
-
122
-
123
-
124
-
125
-
126
-
127
 |
 |
8.
Lift the memory module compartment cover
(2)
away from the computer.
9.
If you are replacing a memory module, remove the existing memory module:
a.
Pull away the retention clips
(1)
on each side of the memory module.
The memory module tilts up.
CAUTION:
To prevent damage to the memory module, hold the memory module by the
edges only. Do not touch the components on the memory module.
b.
Grasp the edge of the memory module
(2)
, and gently pull the module out of the memory
module slot.
c.
To protect a memory module after removal, place it in an electrostatic-safe container.
10.
Insert a new memory module:
90
Chapter 8
Adding or replacing a memory module