HP HD3000S HP Personal Media Drive User's Guide - Page 10
Locating the Drive, Disconnecting the Drive Safely - not recognized
 |
UPC - 882780673526
View all HP HD3000S manuals
Add to My Manuals
Save this manual to your list of manuals |
Page 10 highlights
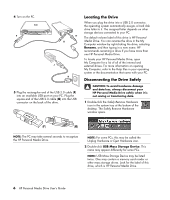
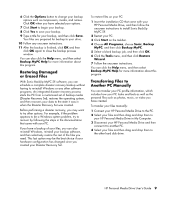
4 Turn on the PC. F H G J K 5 Plug the rectangular end of the USB 2.0 cable (F) into an available USB port on your PC. Plug the square end of the USB 2.0 cable (G) into the USB connector on the back of the drive. Locating the Drive When you plug the drive into a USB 2.0 connector, the operating system automatically assigns a hard disk drive letter to it. The assigned letter depends on other storage devices connected to your PC. The default volume label of this drive is HP Personal Media Drive. You can rename the drive in the My Computer window by right-clicking the drive, selecting Rename, and then typing in a new name. HP recommends renaming a drive if you have more than one HP Personal Media Drive. To locate your HP Personal Media Drive, open My Computer for a list of all of the internal and external drives. For more information on opening My Computer, refer to the Help files in your operating system or the documentation that came with your PC. Disconnecting the Drive Safely CAUTION: To avoid hardware damage and data loss, always disconnect your HP Personal Media Drive safely when it is not saving or transferring data. 1 Double-click the Safely Remove Hardware icon in the system tray at the bottom of the desktop. The Safely Remove Hardware window opens. (F) (G) NOTE: The PC may take several seconds to recognize the HP Personal Media Drive. NOTE: For some PCs, this may be called the Unplug Hardware or Eject Hardware icon. 2 Double-click USB Mass Storage Device. This name may appear differently for some PCs. NOTE: USB Mass Storage Device may be listed twice. One may contain a memory card reader or other mass storage drives. Look for the label of this drive, which is HP Personal Media Drive. 6 HP Personal Media Drive User's Guide
-
 1
1 -
2
-
3
-
4
-
 5
5 -
 6
6 -
 7
7 -
 8
8 -
 9
9 -
 10
10 -
 11
11 -
 12
12 -
 13
13 -
 14
14 -
 15
15 -
16
 |
 |
