HP J6039C HP Jetdirect 200m Print Server (English) User Guide - Page 66
Managing network printing, HP LaserJet Utility
 |
UPC - 829160056487
View all HP J6039C manuals
Add to My Manuals
Save this manual to your list of manuals |
Page 66 highlights
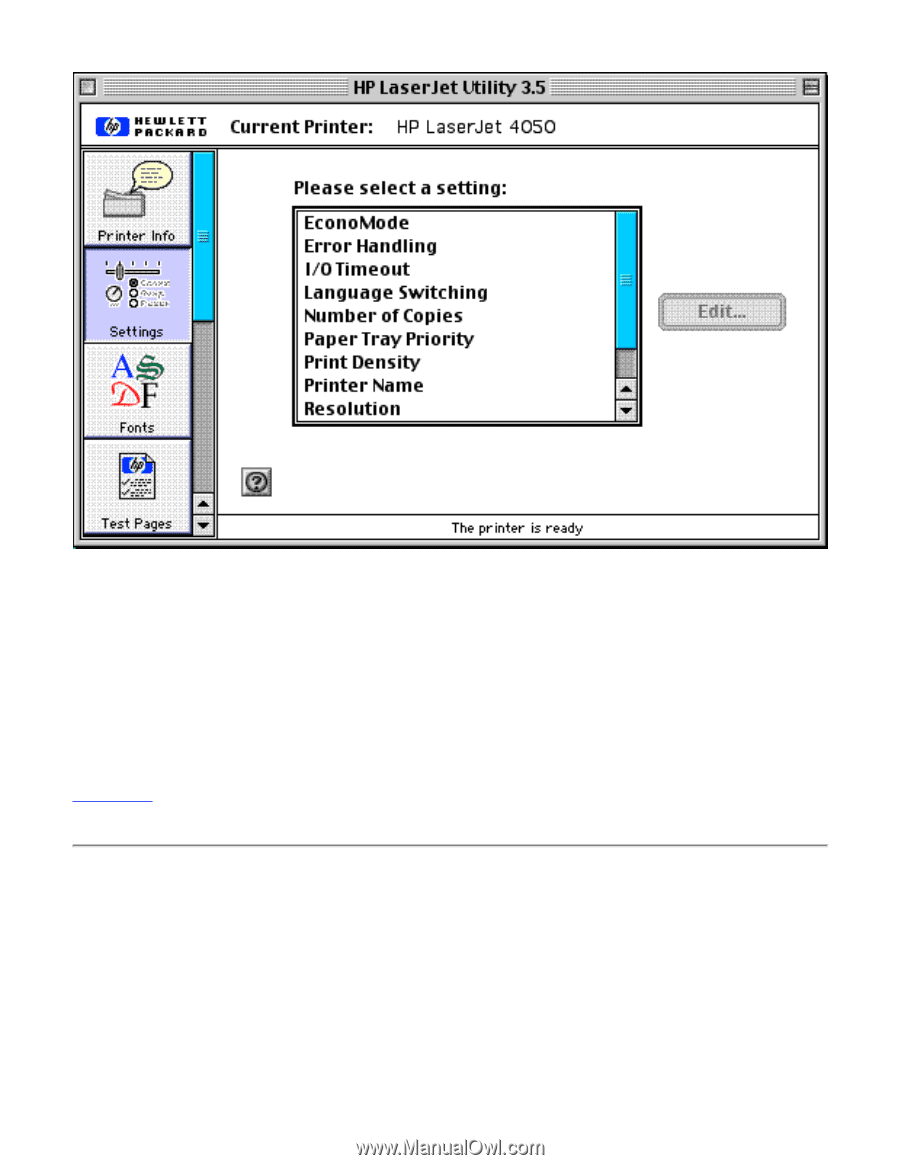
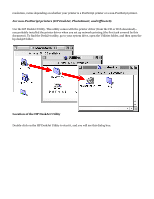
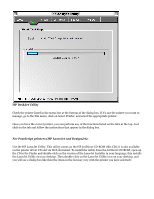
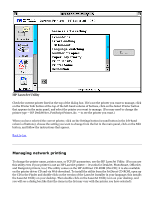
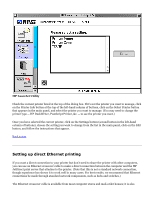
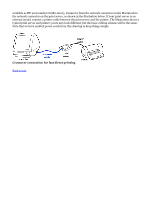
HP LaserJet Utility Check the current printer listed at the top of the dialog box. If it's not the printer you want to manage, click on the Printer Info button at the top of the left-hand column of buttons, click on the Select Printer button that appears in the main panel, and select the printer you want to manage. (You may need to change the printer type -- HP DeskWriter, PostScript Printer, &c. -- to see the printer you want.) When you have selected the correct printer, click on the Settings button (second button in the left-hand column of buttons), choose the setting you want to change from the list in the main panel, click on the Edit button, and follow the instructions that appear. Back to top Managing network printing To change the printer name, printer zone, or TCP/IP parameters, use the HP LaserJet Utility. (You can use this utility even if your printer is not an HP LaserJet printer -- it works for DeskJet, PhotoSmart, OfficeJet, and DesignJet printers, too.) The utility comes on the HP JetDirect CD-ROM (this CD); it is also available on the printer driver CD and via Web download. To install the utility from the JetDirect CD-ROM, open up the CD in the Finder and double-click on the version of the LaserJet Installer in your language; this installs the LaserJet Utility on your desktop. Then double-click on the LaserJet Utility icon on your desktop, and you will see a dialog box like this (the items in the list may vary with the printer you have selected):
-
 1
1 -
2
-
3
-
4
-
5
-
6
-
7
-
8
-
9
-
10
-
11
-
12
-
13
-
14
-
15
-
16
-
17
-
18
-
19
-
20
-
21
-
22
-
23
-
24
-
25
-
26
-
27
-
28
-
29
-
30
-
31
-
32
-
33
-
34
-
35
-
36
-
37
-
38
-
39
-
40
-
41
-
42
-
43
-
44
-
45
-
46
-
47
-
48
-
49
-
50
-
51
-
52
-
53
-
54
-
55
-
56
-
57
-
58
-
59
-
60
-
 61
61 -
 62
62 -
 63
63 -
 64
64 -
 65
65 -
 66
66 -
 67
67 -
 68
68 -
 69
69 -
 70
70 -
 71
71 -
72
-
73
-
74
-
75
-
76
-
77
-
78
-
79
-
80
-
81
-
82
-
83
-
84
-
85
-
86
-
87
-
88
-
89
-
90
-
91
-
92
-
93
-
94
-
95
-
96
-
97
-
98
-
99
-
100
-
101
-
102
-
103
-
104
-
105
-
106
-
107
-
108
-
109
-
110
-
111
-
112
-
113
-
114
-
115
-
116
-
117
-
118
-
119
-
120
-
121
-
122
-
123
-
124
-
125
-
126
-
127
-
128
-
129
-
130
-
131
-
132
-
133
-
134
-
135
-
136
-
137
-
138
-
139
-
140
-
141
-
142
-
143
-
144
-
145
-
146
-
147
-
148
-
149
-
150
-
151
-
152
-
153
-
154
-
155
-
156
-
157
-
158
-
159
-
160
-
161
-
162
-
163
-
164
-
165
-
166
-
167
-
168
-
169
-
170
-
171
-
172
-
173
-
174
-
175
-
176
-
177
-
178
-
179
-
180
-
181
 |
 |