HP Kayak XU 03xx HP Kayak XU Series 03xx, FastRAID2 User's Guide - Page 6
Installing HP FastRAID, Locate the RAID
 |
View all HP Kayak XU 03xx manuals
Add to My Manuals
Save this manual to your list of manuals |
Page 6 highlights
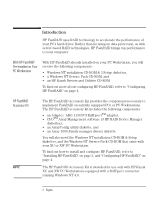
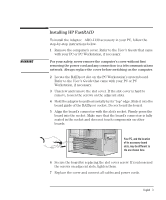
WARNING Installing HP FastRAID To install the Adaptec® ARO-1130 accessory in your PC, follow the step-by-step instructions below. 1 Remove the computer's cover. Refer to the User's Guide that came with your PC or PC Workstation, if necessary. For your safety, never remove the computer's cover without first removing the power cord and any connection to a telecommunications network. Always replace the cover before switching on the computer. 2 Locate the RAIDport slot on the PC Workstation's system board. Refer to the User's Guide that came with your PC or PC Workstation, if necessary. 3 Unscrew and remove the slot cover. If the slot cover is hard to remove, loosen the screws on the adjacent slots. 4 Hold the adapter board horizontally by its "top" edge. Slide it into the board guide of the RAIDport socket. Do not bend the board. 5 Align the board's connector with the slot's socket. Firmly press the board into the socket. Make sure that the board's connector is fully seated in the socket and does not touch components on other boards. Your PC, and the location of its accessory board slots, may be different to the one shown here. 6 Secure the board by replacing the slot cover screw. If you loosened the screws on adjacent slots, tighten them. 7 Replace the cover and connect all cables and power cords. English English 3
-
 1
1 -
 2
2 -
 3
3 -
 4
4 -
 5
5 -
 6
6 -
 7
7 -
 8
8 -
 9
9 -
 10
10 -
 11
11 -
 12
12 -
13
-
14
-
15
-
16
-
17
-
18
-
19
-
20
-
21
-
22
-
23
-
24
-
25
-
26
-
27
-
28
-
29
-
30
 |
 |
