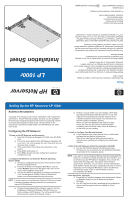
HP LH4r HP Netserver LP 1000r Installation Sheet - Page 2
Installing the PCI Accessory, Board Continued, Installing Memory, Installing the PCI Accessory Board
 |
View all HP LH4r manuals
Add to My Manuals
Save this manual to your list of manuals |
Page 2 highlights
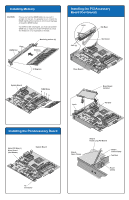
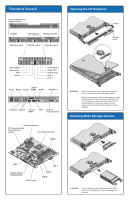
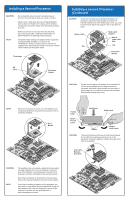
Installing Memory CAUTION) Ensure you hold the DIMM tightly as you push it straight into the slot. It is possible to turn or bend the DIMM slightly while inserting it, which would damage or break the DIMM socket. If a DIMM socket is damaged, you must use another DIMM slot or replace the entire HP Netserver, since this NetServer is not repairable in the field. Keys DIMM Slot Retaining latches (2) Notches Installing the PCI Accessory Board (Continued) Latch Tabs (2) Tab Rest Slot Cover 30 Degrees System Board DIMM Slots 0 12 3 Riser Board Latch Riser Board Installed PCI Slot Installing the PCI Accessory Board 64-bit PCI Slot (1) Riser Board (Not Shown) System Board Step A Open Clamp Step B Insert Long PCI Board Step C Close Clamp Tab Rest Board Clamp I2C Connector
-
 1
1 -
 2
2 -
 3
3 -
 4
4 -
 5
5 -
 6
6
 |
 |
