HP LH4r Installation Guide for Compaq Racks
HP LH4r - NetServer - 256 MB RAM Manual
 |
View all HP LH4r manuals
Add to My Manuals
Save this manual to your list of manuals |
HP LH4r manual content summary:
- HP LH4r | Installation Guide for Compaq Racks - Page 1
HP NetServer LH 3r, LH 4r, LH 3000r, and LH 6000r Installation Guide for Compaq® 4000/7000 Racks HP Part Number 5969-5924 Printed in November 1999 - HP LH4r | Installation Guide for Compaq Racks - Page 2
Cupertino, CA 95014 USA © Copyright 1999, Hewlett-Packard Company. Audience Assumptions The user guide is for the person who installs, administers, and troubleshoots network servers. Hewlett-Packard Company assumes you are qualified in the servicing of computer equipment and trained in recognizing - HP LH4r | Installation Guide for Compaq Racks - Page 3
12 Optional for HP NetServer LH 3000r and LH 6000r, Install Cable Management Arm 16 Installing the Recessed Mounting Brackets 18 Relocating the Control Panel 19 Installing the Bezel 22 4 Warranty and Support 23 Hardware Accessories Limited Warranty 23 Hewlett-Packard Hardware Accessories 23 - HP LH4r | Installation Guide for Compaq Racks - Page 4
- HP LH4r | Installation Guide for Compaq Racks - Page 5
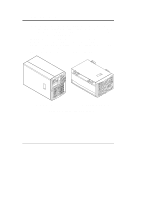
1 Introduction This document describes how to mount an HP NetServer LH 3r, LH 4r, LH3000r, or LH 6000r into a Compaq® model 4000- or 7000-series rack enclosure. Refer to the documentation that came with the HP NetServer for instructions on adding accessories to, and configuring the NetServer. The HP - HP LH4r | Installation Guide for Compaq Racks - Page 6
Chapter 1 Introduction WARNING To prevent the rack from tipping over and causing equipment damage or , anti-tip feature is installed on the rack enclosure in which you are installing the HP NetServer. This option consists of two "feet" at the front of the base of the enclosure and, if you are - HP LH4r | Installation Guide for Compaq Racks - Page 7
Chapter 1 Introduction Figure 1-2. Single Rack Enclosure with the Anti-Tip Stabilizing Feature Installed 3 - HP LH4r | Installation Guide for Compaq Racks - Page 8
such as monitors, keyboards, switchboxes, and PDUs often work. • Use APC® uninterruptable power supplies (UPS) with HP NetServers. APC offers mounting kits for Compaq rack enclosures. This NetServer is not supported in a rack enclosure under circumstances other than those listed above. See the - HP LH4r | Installation Guide for Compaq Racks - Page 9
NetServer. • Reinstall the power supply modules and hot-swap drives. • Push the NetServer back into the rack enclosure. • For HP NetServer LH 3000r and LH 6000r, attach the optional cable management arm. • Install the recessed mounting brackets on the two front columns only. • Relocate the control - HP LH4r | Installation Guide for Compaq Racks - Page 10
document are defined in the table below. Term Bar nut Bezel Control Panel EIA unit Cage nut Rack (rack chassis, rack enclosure) fascia panel that covers entire front of the NetServer. This NetServer includes two bezels: one for installation in HP rack enclosures, and one for installation in - HP LH4r | Installation Guide for Compaq Racks - Page 11
3 Installation This section contains detailed instructions for installing an HP NetServer NetServer LH 3r, LH 4r, LH 3000r, or LH 6000r in the model 4000/7000 series of Compaq rack enclosures. Preparation Before beginning the installation of the NetServer into the rack, you must prepare the rack - HP LH4r | Installation Guide for Compaq Racks - Page 12
columns to use for rack nuts where the two recessed mounting brackets attach to the columns. When the installation is complete, these brackets secure the NetServer in the rack enclosure. To mark the bracket mounting holes refer to Figure 3-1: 1. On the left front column, count up from the top of the - HP LH4r | Installation Guide for Compaq Racks - Page 13
Chapter 3 Installation Installing the Bar Nuts, Screws, and Cage Nuts Once you have marked the appropriate holes, install the bar nuts and screws on the columns: 1. Position one bar nut behind holes 20 and 22 (previously marked). 2. Insert the two screws, with flat washers, through the two holes - HP LH4r | Installation Guide for Compaq Racks - Page 14
Chapter 3 Installation Mounting the Slides 1. Orient each slide so that the front of the slide attaches to the front column and the rear attaches to the rear column. This ensures that once installed, the slides will extend correctly, toward the front of the rack see Figure 3-3. NOTE The slides - HP LH4r | Installation Guide for Compaq Racks - Page 15
the screws. Tightening the screws without lifting up on the slides will result in interference between the HP NetServer and other equipment in the rack; you may not be able to slide the HP NetServer into the rack enclosure after completing the installation. 6. Repeat for the other slide. 11 - HP LH4r | Installation Guide for Compaq Racks - Page 16
the hard disk drives and power supply modules are removed. The HP NetServer LH 3000r weighs approximately 118 pounds (54 kg) after the hard disk drives and power supply modules are removed. The HP NetServer LH 6000r weighs approximately 148 pounds (67 kg) after the hard disk drives and power supply - HP LH4r | Installation Guide for Compaq Racks - Page 17
3. Using two people, lift the NetServer using the handles on each side. Move the NetServer in between the extended slide members and position the it so that the handles are resting on the slide members see Figure 3-5 and Figure 3-6. Figure 3-5. Lifting the Server onto the Slide Members 13 - HP LH4r | Installation Guide for Compaq Racks - Page 18
Chapter 3 Installation 4. Line up the mounting holes in the slide members with the holes in the NetServer chassis, insert three screws on each side, and tighten them see Figure 3-6. Figure 3-6. Attaching the Slides to the Server Chassis 14 - HP LH4r | Installation Guide for Compaq Racks - Page 19
each of the four handles and remove handles see Figure 3-7. Keep these handles and screws for later use, in case you need to remove the NetServer and ship it. Figure 3-7. Remove Mounting Handles 6. Reinstall power supply modules and hard disk modules removed earlier. 15 - HP LH4r | Installation Guide for Compaq Racks - Page 20
LH 3000r and LH 6000r, Install Cable Management Arm The HP NetServer Cable Management Arm supplied with the HP LH 3000r and LH 6000r allows the cables, including the power cord, to move in and out with the HP NetServer chassis on its slides without being accidentally disconnected. See Figure - HP LH4r | Installation Guide for Compaq Racks - Page 21
up with the rack nuts previously mounted on the rack columns. 10. Plug the HP NetServer's power cable and all available data cables into the back of the HP NetServer. Refer to the rack assembly and cabling reference guide for your HP NetServer, for information about cable dressing and routing. 17 - HP LH4r | Installation Guide for Compaq Racks - Page 22
brackets. These are attached to the face of the NetServer chassis and the two front rack columns. To install these brackets: 1. On both slide members, simultaneously depress the lockout releases and push the NetServer completely into the rack enclosure see Figure 3-9. Lockout Release Figure - HP LH4r | Installation Guide for Compaq Racks - Page 23
Recessed Mounting Brackets Relocating the Control Panel The control panel and the control panel bezel must be relocated to fit the Compaq rack-compatible NetServer bezel. Relocate the control panel and its bezel, as follows: 1. Remove the control panel bezel from the NetServer by pressing in on the - HP LH4r | Installation Guide for Compaq Racks - Page 24
To avoid damaging the ribbon cable, verify that the ribbon cable goes completely back inside the NetServer before mounting the control panel. NOTE There are two possible locations for the control panel. Only the leftmost position is correct for Compaq rack installations. Mounting Slots for Compaq - HP LH4r | Installation Guide for Compaq Racks - Page 25
Chapter 3 Installation 6. Mount the control panel bezel over the control panel see Figure 3-12. Install the bezel tabs into the leftmost slots. Mounting Slots for Compaq racks (on left) Mounting Slots for HP rack (on right) Figure 3-12. Reinstall the Control Panel Bezel 21 - HP LH4r | Installation Guide for Compaq Racks - Page 26
Chapter 3 Installation Installing the Bezel Align the locating tabs on the Compaq rack-compatible bezel with the holes in the NetServer front panel, and clip the bezel onto the front of the NetServer see Figure 3-13. Figure 3-13. Installing the Compaq Rack-Compatible Bezel 22 - HP LH4r | Installation Guide for Compaq Racks - Page 27
and Service/Support Booklet for the warranty limitations, customer responsibilities, and other terms and conditions. Hardware Accessories Limited Warranty Hewlett-Packard Hardware Accessories An HP NetServer Hardware Accessory is an internal HP hardware product that is specifically designated - HP LH4r | Installation Guide for Compaq Racks - Page 28
system processor unit (such as LAN cabling)-are subject to standard per-incident travel and labor charges. HP Repair and Telephone Support Refer to the Warranty and Service/Support Booklet supplied with your HP NetServer system documentation for instructions on how to obtain HP repair and telephone - HP LH4r | Installation Guide for Compaq Racks - Page 29
management arm, 16 Compaq, 1 Control panel, 19 Control panel bezel, 21 F Fastening server to rack front, 18 Fastening server to slides, 14 H Handles, removing after mounting, 15 Hardware accessories limited warranty, 23 I Installing the NetServer, 12 L Lifting server into rack, 13 Lockout releases
-
 1
1 -
 2
2 -
 3
3 -
 4
4 -
 5
5 -
 6
6 -
 7
7 -
8
-
9
-
10
-
11
-
12
-
13
-
14
-
15
-
16
-
17
-
18
-
19
-
20
-
21
-
22
-
23
-
24
-
25
-
26
-
27
-
28
-
29
 |
 |

HP NetServer LH 3r, LH 4r,
LH 3000r, and LH 6000r
Installation Guide for
Compaq
®
4000/7000 Racks
HP Part Number 5969-5924
Printed in November 1999