HP LaserJet Enterprise 700 HP LaserJet Enterprise 700 M712 - User Guide - Page 73
Change print-job settings (Mac OS X)
 |
View all HP LaserJet Enterprise 700 manuals
Add to My Manuals
Save this manual to your list of manuals |
Page 73 highlights
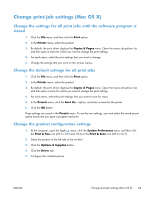
Change print-job settings (Mac OS X) Change the settings for all print jobs until the software program is closed 1. Click the File menu, and then click the Print option. 2. In the Printer menu, select the product. 3. By default, the print driver displays the Copies & Pages menu. Open the menus drop-down list, and then open a menu for which you want to change the print settings. 4. For each menu, select the print settings that you want to change. 5. Change the settings that you want on the various menus. Change the default settings for all print jobs 1. Click the File menu, and then click the Print option. 2. In the Printer menu, select the product. 3. By default, the print driver displays the Copies & Pages menu. Open the menus drop-down list, and then open a menu for which you want to change the print settings. 4. For each menu, select the print settings that you want to save for reuse. 5. In the Presets menu, click the Save As... option, and enter a name for the preset. 6. Click the OK button. These settings are saved in the Presets menu. To use the new settings, you must select the saved preset option every time you open a program and print. Change the product configuration settings 1. At the computer, open the Apple menu, click the System Preferences menu, and then click the Print & Fax icon (OS X v10.5 and 10.6) or the Print & Scan icon (OS X v10.7). 2. Select the product in the left side of the window. 3. Click the Options & Supplies button. 4. Click the Driver tab. 5. Configure the installed options. ENWW Change print-job settings (Mac OS X) 63
-
 1
1 -
2
-
3
-
4
-
5
-
6
-
7
-
8
-
9
-
10
-
11
-
12
-
13
-
14
-
15
-
16
-
17
-
18
-
19
-
20
-
21
-
22
-
23
-
24
-
25
-
26
-
27
-
28
-
29
-
30
-
31
-
32
-
33
-
34
-
35
-
36
-
37
-
38
-
39
-
40
-
41
-
42
-
43
-
44
-
45
-
46
-
47
-
48
-
49
-
50
-
51
-
52
-
53
-
54
-
55
-
56
-
57
-
58
-
59
-
60
-
61
-
62
-
63
-
64
-
65
-
66
-
67
-
 68
68 -
 69
69 -
 70
70 -
 71
71 -
 72
72 -
 73
73 -
 74
74 -
 75
75 -
 76
76 -
 77
77 -
 78
78 -
79
-
80
-
81
-
82
-
83
-
84
-
85
-
86
-
87
-
88
-
89
-
90
-
91
-
92
-
93
-
94
-
95
-
96
-
97
-
98
-
99
-
100
-
101
-
102
-
103
-
104
-
105
-
106
-
107
-
108
-
109
-
110
-
111
-
112
-
113
-
114
-
115
-
116
-
117
-
118
-
119
-
120
-
121
-
122
-
123
-
124
-
125
-
126
-
127
-
128
-
129
-
130
-
131
-
132
-
133
-
134
-
135
-
136
-
137
-
138
-
139
-
140
-
141
-
142
-
143
-
144
-
145
-
146
-
147
-
148
-
149
-
150
-
151
-
152
-
153
-
154
-
155
-
156
-
157
-
158
-
159
-
160
-
161
-
162
-
163
-
164
-
165
-
166
-
167
-
168
-
169
-
170
-
171
-
172
-
173
-
174
-
175
-
176
-
177
-
178
-
179
-
180
-
181
-
182
-
183
-
184
-
185
-
186
 |
 |
