HP LaserJet M1319 User Guide
HP LaserJet M1319 - Multifunction Printer Manual
 |
View all HP LaserJet M1319 manuals
Add to My Manuals
Save this manual to your list of manuals |
HP LaserJet M1319 manual content summary:
- HP LaserJet M1319 | User Guide - Page 1
HP LaserJet M1319 MFP Series User Guide - HP LaserJet M1319 | User Guide - Page 2
- HP LaserJet M1319 | User Guide - Page 3
HP LaserJet M1319 MFP Series User Guide - HP LaserJet M1319 | User Guide - Page 4
Copyright and License © 2008 Copyright Hewlett-Packard Development Company, L.P. Reproduction, adaptation, HP products and services are set forth in the express warranty statements accompanying such products and services. Nothing herein should be construed as constituting an additional warranty. HP - HP LaserJet M1319 | User Guide - Page 5
for print settings ...20 Open the printer driver and change the print settings 21 Software installation types for Windows 22 Remove software for Windows ...22 Supported utilities for Windows ...23 HP Toolbox software ...23 Status Alerts software ...23 Other Windows components and utilities - HP LaserJet M1319 | User Guide - Page 6
Macintosh 26 Supported printer drivers for Macintosh 26 Priority for print settings for Macintosh 26 Change printer-driver settings for Macintosh 26 Software installation types for Macintosh 27 Use features in the Macintosh printer driver 28 Print ...28 Scan from the product and HP Director - HP LaserJet M1319 | User Guide - Page 7
-sided) copy jobs ...64 9 Scan Load originals for scanning ...68 Use scan ...69 Scan methods ...69 Canceling a scan job ...70 Scan settings ...71 Scan file format ...71 Scanner resolution and color 71 Scan quality ...72 10 Fax Fax features ...76 Setup ...77 Install and connect the hardware 77 - HP LaserJet M1319 | User Guide - Page 8
Receive a fax ...107 Solve fax problems ...109 Fax error messages ...109 Fax Problems sending faxes 116 Problems receiving faxes 117 Performance problems ...120 11 Manage and maintain the product Information pages ...122 Use the HP Toolbox software ...123 View HP panel display problems ...141 - HP LaserJet M1319 | User Guide - Page 9
-connection problems 163 Solve software problems ...164 Solve common Windows problems 164 Solve common Macintosh problems 164 Appendix A Accessories and ordering information Supplies ...168 Cable and interface accessories ...168 Appendix B Service and support Hewlett-Packard limited warranty - HP LaserJet M1319 | User Guide - Page 10
Disposal of waste equipment by users in private households in the European Union ...181 Chemical substances ...181 Material Safety Data Sheet (MSDS 182 For more information ...182 Telephone Consumer Protection Act (United States 183 IC CS-03 requirements ...183 EU statement for telecom operation - HP LaserJet M1319 | User Guide - Page 11
1 Product basics ● Product comparison ● Product features ● Product walkaround ● Supported operating systems ● Supported product software ENWW 1 - HP LaserJet M1319 | User Guide - Page 12
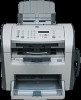
. HP LaserJet M1319 MFP ● Prints letter-size pages at speeds up to 19 pages per minute (ppm) and A4-size pages at speeds up to 18 ppm. ● Tray 1 holds up to 250 sheets of print media or up to 10 envelopes. ● The priority input tray holds up to 10 sheets of print media. ● Manual two - HP LaserJet M1319 | User Guide - Page 13
Copy Scan Fax Memory Paper handling Printer driver features toner. ● The product ships with a 1,000-page (average yield) starter cartridge. The average yield for replacement cartridges is 2,000 pages. ● Online user guide that is compatible with text screen-readers. ● Print cartridges can be installed - HP LaserJet M1319 | User Guide - Page 14
bin 4 Automatic document feeder (ADF) output bin 5 Automatic document feeder (ADF) input tray 6 ADF media lever 7 Control panel 8 Telephone handset 9 Print-cartridge door latch Back view 11 12 10 13 10 Interface ports 11 Kensington lock 12 Power switch 13 Power connector 4 Chapter 1 Product - HP LaserJet M1319 | User Guide - Page 15
Interface ports The product has a Hi-Speed USB 2.0 port, fax and phone ports, and a handset port. 1 2 3 1 Handset port 2 Hi-Speed USB 2.0 port 3 Fax ports Serial number and model number location The serial number and product model number label is at the back of the product. ENWW Product walkaround - HP LaserJet M1319 | User Guide - Page 16
install. Easy installation will complete the installation with default settings. Advanced installation allows you to review the license agreements and the default settings. Easy installation for Windows ● HP drivers ◦ Printer driver ◦ Scan driver ◦ Fax driver ● HP MFP software ◦ HP LaserJet Scan - HP LaserJet M1319 | User Guide - Page 17
● HP Uninstaller ● HP LaserJet software ◦ HP Scan ◦ HP Director ◦ Scan to e-mail program Supported printer drivers The product comes with software for Windows and Macintosh that allows the computer to communicate with the product. This software is called a printer driver. Printer drivers provide - HP LaserJet M1319 | User Guide - Page 18
8 Chapter 1 Product basics ENWW - HP LaserJet M1319 | User Guide - Page 19
2 Control panel ● Control-panel walkaround ● Control-panel menus ENWW 9 - HP LaserJet M1319 | User Guide - Page 20
Control-panel walkaround 1 2 3 4 1 Fax controls. Use the fax controls to change commonly used fax settings. 2 Alphanumeric buttons. Use the alphanumeric buttons to type data into the product control-panel display and dial telephone numbers for faxing. 3 Setup and cancel controls. Use these - HP LaserJet M1319 | User Guide - Page 21
for all faxes. ● Use the System setup menu to establish basic product settings such as language, print quality, or volume levels. ● Use the Service menu to restore default settings, clean the product, and activate special modes that affect print output. NOTE: To print a detailed list of the entire - HP LaserJet M1319 | User Guide - Page 22
Table 2-2 Fax functions menu (continued) Menu item Description Polling receive Allows the product to call another fax machine that has polling send enabled. Clear saved faxs Clears all faxes in the product memory. Table 2-3 Copy setup menu Menu item Sub-menu item Default Quality Text - HP LaserJet M1319 | User Guide - Page 23
Description Sets the identifying information that is sent to the receiving product. Edits the fax phone book speed dials and group-dial entries. The product supports up to 120 phone book entries, which can be either individual or group entries. ENWW Control-panel menus 13 - HP LaserJet M1319 | User Guide - Page 24
Table 2-5 Fax setup menu (continued) Menu Item Sub-menu item Sub-menu item Fax Send setup Def. Resolution Fine Superfine Photo Standard Def. light/dark Dialing Mode Tone Pulse Redial if busy On Off Redial-no answer On Off Redial Comm Err. On Off Dial Prefix On Off Detect dial - HP LaserJet M1319 | User Guide - Page 25
automatically answers an incoming call on the configured number of rings. ● Manual : The user must press the Start Fax button or use an each with a different ring pattern (on a phone system with distinctive-ring service). ● All Rings: The product answers any calls that come through the telephone - HP LaserJet M1319 | User Guide - Page 26
job that does not specify a size. Sets the type for printing internal reports or any print job that does not specify a type. Sets how much toner the product should use to darken lines and edges. 16 Chapter 2 Control panel ENWW - HP LaserJet M1319 | User Guide - Page 27
. Sets the time and date setting for the product. Table 2-7 Service menu Menu item Sub-menu item Restore defaults Cleaning Mode USB speed mode that reduces toner smearing and dusting. The default setting is Off. Prints or schedules a report that is used to troubleshoot fax transmission issues. - HP LaserJet M1319 | User Guide - Page 28
18 Chapter 2 Control panel ENWW - HP LaserJet M1319 | User Guide - Page 29
3 Software for Windows ● Supported operating systems for Windows ● Printer driver ● Priority for print settings ● Open the printer driver and change the print settings ● Software installation types for Windows ● Remove software for Windows ● Supported utilities for Windows ENWW 19 - HP LaserJet M1319 | User Guide - Page 30
product supports the following Windows operating systems: Full software installation ● Windows XP (32-bit) ● Windows Vista (32-bit) Print and scan drivers only ● Windows XP (64-bit) ● Windows Vista (64-bit) ● Windows 2000 ● Windows 2003 Server (32-bit and 64-bit) Printer driver Printer drivers - HP LaserJet M1319 | User Guide - Page 31
Click Start, click Settings, Server 2003, and software program, click and then click Printers and then click Printers Vista Print. (Windows 2000) or (Windows 2000) or 2. Select the driver, and then click Properties or Preferences. Printers and Faxes (Windows XP Professional and Server 2003 - HP LaserJet M1319 | User Guide - Page 32
to select which software and drivers to install. Remove software for Windows 1. Click Start, and then click All Programs. 2. Click HP, and then click HP LaserJet M1319. 3. Click Uninstall, and then follow the onscreen instructions to remove the software. 22 Chapter 3 Software for Windows ENWW - HP LaserJet M1319 | User Guide - Page 33
events occur, such as an empty tray or a problem with the product. The alert includes information about solving the problem. Other Windows components and utilities ● Software installer - automates the printing system installation ● Online Web registration ENWW Supported utilities for Windows 23 - HP LaserJet M1319 | User Guide - Page 34
24 Chapter 3 Software for Windows ENWW - HP LaserJet M1319 | User Guide - Page 35
4 Use the product with Macintosh ● Software for Macintosh ● Use features in the Macintosh printer driver ● Scan from the product and HP Director (Macintosh) ● Fax a document from a Macintosh computer ENWW 25 - HP LaserJet M1319 | User Guide - Page 36
OS v10.4 and later, PPC and Intel Core Processor Macs are supported. Supported printer drivers for Macintosh The HP installer provides PostScript® Printer Description (PPD) files, Printer Dialog Extensions (PDEs), and the HP Printer Utility for use with Macintosh computers. The PPDs, in combination - HP LaserJet M1319 | User Guide - Page 37
the Installer icon in the HP LaserJet Installer folder. 4. Follow the instructions on the computer screen. USB printer queues are created automatically when the product is attached to the computer. However, the queue will use a generic PPD if the installer has not been run before the USB cable is - HP LaserJet M1319 | User Guide - Page 38
the preset. 5. Click OK. Use printing presets 1. On the File menu, click Print. 2. Select the driver. 3. In the Presets box, select the printing preset that you want to use. NOTE: To use printer-driver default settings, select Factory Default. Resize documents or print on a custom paper size You can - HP LaserJet M1319 | User Guide - Page 39
type of border to print around each page on the sheet. Print on both sides of the page (duplex printing) 1. On the Print dialog, select Manual Duplex. 2. In the Manual Duplex area, select Print on Both Sides (Manually). 3. Print the document. ENWW Use features in the Macintosh printer driver 29 - HP LaserJet M1319 | User Guide - Page 40
4. After one side has been printed, remove the remaining media from the input tray, and set it aside until after you finish the duplexing job. 5. Without changing the orientation, remove the printed stack from the output bin, and then straighten the stack. 6. Maintaining the same orientation, - HP LaserJet M1319 | User Guide - Page 41
(Macintosh) For more information about tasks and settings described in this section, see the HP Director online Help. Scanning tasks To scan to a software program, scan an item using the program itself. Any TWAIN-compliant program can scan an image. If the program is not TWAIN-compliant, save the - HP LaserJet M1319 | User Guide - Page 42
Fax a document from a Macintosh computer 1. In the software program, on the File menu, select Print. 2. Click PDF, and then select Fax PDF. 3. Enter a fax number in the To field. 4. To include a fax cover - HP LaserJet M1319 | User Guide - Page 43
5 Connectivity ● Connect the product directly to a computer with USB ENWW 33 - HP LaserJet M1319 | User Guide - Page 44
cable from the product to the computer until the installer prompts you to do so. 1. Insert the product CD into your computer. If the software installer does not start, navigate to the setup.exe file on the CD and double-click the file. 2. Follow the installer instructions. 3. Allow the installation - HP LaserJet M1319 | User Guide - Page 45
6 Paper and print media ● Understand paper and print media use ● Supported paper and print media sizes ● Special paper or print media guidelines ● Load paper and print media ● Configure trays ENWW 35 - HP LaserJet M1319 | User Guide - Page 46
not use paper or print media made for inkjet printers. Hewlett-Packard Company cannot recommend the use of other brands of media because HP cannot control their quality. It is possible for paper to meet all of the guidelines in this user guide and still not produce satisfactory results. This might - HP LaserJet M1319 | User Guide - Page 47
it adapts to various media. NOTE: To obtain best print results, select the appropriate paper size and type in the print driver before printing. Table 6-1 Supported paper and print media sizes Size Dimensions Priority input tray Tray 1 Letter 216 x 279 mm (8.5 x 11 inches) Legal 216 x 356 - HP LaserJet M1319 | User Guide - Page 48
supports printing on special media. Use the following guidelines to obtain satisfactory results. When using special paper or print media, be sure to set the type and size in your print driver to obtain the best print results. CAUTION: HP LaserJet printers use fusers to bond dry toner particles - HP LaserJet M1319 | User Guide - Page 49
laser printers than the recommended media and meets the weight specifications specification for this product unless for this product. it is HP paper first page on media different from the remainder of the document. Media guides ensure that the media is correctly fed into the product and that - HP LaserJet M1319 | User Guide - Page 50
that the media feeds correctly into the product and that the print is not skewed. Tray 1 has side and rear media guides. When loading media, adjust the media guides to match the length and width of the media that you are using. NOTE: When you add new media, make sure that you - HP LaserJet M1319 | User Guide - Page 51
keys to select a default type or size for the tray, and then press OK. NOTE: To configure the product trays for print jobs, use the printer driver. ENWW Configure trays 41 - HP LaserJet M1319 | User Guide - Page 52
42 Chapter 6 Paper and print media ENWW - HP LaserJet M1319 | User Guide - Page 53
provides information about common printing tasks. ● Change the print driver to match the media type and size ● Get help for paper source ● Select a paper type ● Set the print orientation ● Use watermarks ● Save toner ● Print on both sides of the paper (duplex printing) ● Print multiple pages on one - HP LaserJet M1319 | User Guide - Page 54
. 1. On the File menu in the software program, click Print. 2. Select the driver, and then click Properties or Preferences. 3. size and paper type settings in the printer driver before printing. Type is Plain Color Preprinted supported. Up to 250 sheets Up to 200 sheets Up to 200 sheets. Not - HP LaserJet M1319 | User Guide - Page 55
help provides explanations for the buttons, check boxes, and drop-down lists that are in the printer driver. It also includes instructions for performing common printing tasks, such as printing on both sides, printing multiple pages on one sheet, and printing the first page or covers on - HP LaserJet M1319 | User Guide - Page 56
print job, press and release Cancel on the product control panel. ● Software program: Typically, a dialog box appears briefly on the computer screen, allowing XP or Server 2003: Click Start, click Settings, and then click Printers and Faxes. Double-click the product icon to open the window, right - HP LaserJet M1319 | User Guide - Page 57
and Faxes (Windows XP Professional and Server 2003) or Printers and Other Hardware Devices (Windows XP Home). For Windows Vista, click Start, click Control Panel, and then click Printer. 2. Right-click the driver icon, and then select Properties. 3. Click the Configure tab. 4. Change the settings - HP LaserJet M1319 | User Guide - Page 58
the original document has eight pages, the device prints pages 1 and 8 on the same sheet. 1. On the File menu in the software program, click Print. 2. Select the driver, and then click Properties or Preferences. 3. Click the Finishing tab. 4. Select Print On Both Sides. 5. In the drop-down box for - HP LaserJet M1319 | User Guide - Page 59
sure that the paper or print media that you are using meets HP specifications. Generally, smoother paper provides better results. 1. Open the printed on is facing up. 3. Adjust the media guides to the length and width of the media. 4. On the printer driver, on the Paper tab or the Paper/Quality tab, - HP LaserJet M1319 | User Guide - Page 60
paper size must be the same for all pages of the print job. Print a blank first page 1. On the File menu in the software program, click Print. 2. Select the driver, and then click Properties or Preferences. 3. On the Paper/Quality tab, click Use different paper. 4. In the list box, click Front or - HP LaserJet M1319 | User Guide - Page 61
, make sure that the Scale to Fit option is not selected. 6. Click OK. Select a paper size 1. On the File menu in the software program, click Print. 2. Select the driver, and then click Properties or Preferences. 3. On the Paper/Quality tab, select the size from the Size is drop-down list. 4. Click - HP LaserJet M1319 | User Guide - Page 62
Page Only. 6. Click OK. To remove the watermark, click (none) in the Watermarks drop-down list. Save toner 1. On the File menu in the software program, click Print. 2. Select the driver, and then click Properties or Preferences. 3. On the Paper/Quality tab, click EconoMode. 4. Click OK. 52 Chapter - HP LaserJet M1319 | User Guide - Page 63
sides of the paper (duplex printing) NOTE: The printer driver also contains instructions and graphics for manually duplexing. 1. In the software program, open the properties (printer driver). 2. On the Finishing tab, select Print on Both Sides (Manually). NOTE: If the Print on Both Sides option is - HP LaserJet M1319 | User Guide - Page 64
6. Maintaining the same orientation, place the stack of media in the input tray again. The printed side should be facing down. 7. On the product control panel, press OK and wait for the second side to print. 54 Chapter 7 Print tasks ENWW - HP LaserJet M1319 | User Guide - Page 65
of paper in Windows You can print more than one page on a single sheet of paper. 1. On the File menu in the software program, click Print. 2. Select the driver, and then click Properties or Preferences. 3. Click the Finishing tab. 4. In the Document Options drop-down list, select the number of pages - HP LaserJet M1319 | User Guide - Page 66
the product printer driver conserves toner. Archive print Archive print produces output that is less susceptible to toner smearing and dusting. Use archive print to create documents that you want to preserve or archive. 1. On the control panel, press Setup. 2. Use the arrow buttons to select Service - HP LaserJet M1319 | User Guide - Page 67
8 Copy ● Load originals ● Use copy ● Copy settings ● Duplex (two-sided) copy jobs ENWW 57 - HP LaserJet M1319 | User Guide - Page 68
documents. 3. Slide the stack into the ADF until it does not move any farther. Document loaded appears on the control-panel display. 4. Adjust the media guides until they are snug against the media. 58 Chapter 8 Copy ENWW - HP LaserJet M1319 | User Guide - Page 69
Use copy One-touch copy 1. Load the document into the ADF input tray. 2. Press Start Copy on the product control panel to start copying. 3. Repeat the process for each copy. Multiple copies Change the number of copies for the current job 1. On the product control panel, use the alphanumeric buttons - HP LaserJet M1319 | User Guide - Page 70
NOTE: The change in the setting remains active for about 2 minutes after the copy job has been completed. During this time, Custom settings appears on the product control-panel display. You must change the default media size in the media input tray to match the output size, or part of your copy - HP LaserJet M1319 | User Guide - Page 71
When making a copy of a photo or graphic, you can select the Film photo setting for photos or the Picture setting for other graphics to increase the quality of your copy. Select the Mixed setting for documents that include both text and graphics. Adjust the copy quality for the current job 1. On the - HP LaserJet M1319 | User Guide - Page 72
4. Use the arrow buttons button to adjust the setting. Move the slider to the left to make all of the copies lighter than the original, or move the slider to the right to make all of the copies darker than the original. 5. Press OK to save the selection. Change copy job print density Increasing the - HP LaserJet M1319 | User Guide - Page 73
● Bond ● Recycled ● Color ● Light ● Heavy ● Cardstock ● Envelope #10 ● Rough Change the default media-size setting 1. On the product control panel, press Setup. 2. Use the arrow buttons to select System setup, and then press OK. 3. Use the arrow buttons to select Paper setup, and then press OK. 4. - HP LaserJet M1319 | User Guide - Page 74
Duplex (two-sided) copy jobs Copy a two-sided original to a one-sided document Copies resulting from these procedures are printed on one side, and need to be hand-collated. 1. Load the first page of the document to be copied face-down into the ADF. 2. Press Start Copy. 3. Flip the original, and - HP LaserJet M1319 | User Guide - Page 75
face down into the priority input tray. 5. Press Start Copy. 6. Remove the copied page from the output bin, and then set it aside for manual collating. 7. Repeat steps 1 through 6, following the original document page order, until all pages of the original are copied. ENWW Duplex (two-sided) copy - HP LaserJet M1319 | User Guide - Page 76
66 Chapter 8 Copy ENWW - HP LaserJet M1319 | User Guide - Page 77
9 Scan ● Load originals for scanning ● Use scan ● Scan settings ENWW 67 - HP LaserJet M1319 | User Guide - Page 78
Load originals for scanning NOTE: The ADF capacity is up to 30 sheets of 80 g/m2 or 20 lb media. CAUTION: To prevent into the ADF until it does not move any farther. Document loaded appears on the control-panel display. 4. Adjust the media guides until they are snug against the media. 68 Chapter - HP LaserJet M1319 | User Guide - Page 79
-recognition software, install the Readiris program from the software CD-ROM. Text-recognition software is also known as optical character recognition (OCR) software. Scan by using HP LaserJet Scan (Windows) 1. In the HP program group, select Scan to to start HP LaserJet Scan. 2. Select a scanning - HP LaserJet M1319 | User Guide - Page 80
on a separate CD-ROM that shipped with the product. To use the Readiris program, install it from the appropriate software CD-ROM, and then follow the instructions in the online Help. Canceling a scan job To cancel a scan job, use one of the following procedures. ● On the product control panel, press - HP LaserJet M1319 | User Guide - Page 81
results in the file being saved as a .JPEG file. NOTE: Different file types can be selected when using the scan software program. Scanner resolution and color If you are printing a scanned image, and the quality is not what you expected, you might have selected a resolution or color setting in the - HP LaserJet M1319 | User Guide - Page 82
. Use this setting for text documents. Use this setting when file size is an issue or when you want a document or photograph to be scanned quickly. Scan quality Clean the scanner glass strip and platen Over time, specks of debris might collect on the scanner glass and white platen, which can affect - HP LaserJet M1319 | User Guide - Page 83
platen with a chamois or a cellulose sponge to prevent spotting. 5. Plug in the product, and then use the power switch to turn on the product. ENWW Scan settings 73 - HP LaserJet M1319 | User Guide - Page 84
74 Chapter 9 Scan ENWW - HP LaserJet M1319 | User Guide - Page 85
10 Fax ● Fax features ● Setup ● Change fax settings ● Use fax ● Solve fax problems For information about the fax controls on the control panel, see Control panel on page 9. ENWW 75 - HP LaserJet M1319 | User Guide - Page 86
to answer and distinctive ring compatibility (service required through local telecommunications company) ● Fax confirmation report ● Junk fax blocking ● Eight cover page templates available NOTE: Not all features are listed. The product software might need to be installed for some features to be - HP LaserJet M1319 | User Guide - Page 87
Install and connect the hardware Connect to a telephone line The product is an analog device. HP the telephone line. NOTE: Voicemail is not supported with this product. 1. Unplug the power cords a telephone line, see the getting started guide before proceeding. The product should already be connected - HP LaserJet M1319 | User Guide - Page 88
4. To connect an internal or external modem on a computer, plug one end of a telephone cord into the product "telephone" port ( ). Plug the other end of the telephone cord into the modem "line" port. NOTE: Some modems have a second "line" port to connect to a dedicated voice line. If you have two " - HP LaserJet M1319 | User Guide - Page 89
for the product environment. Configure fax settings The product fax settings can be set from the control panel, from HP Toolbox, or from HP Director. At the initial set-up process, the HP Fax Setup Wizard can be used to configure the settings. In the United States and many other countries/regions - HP LaserJet M1319 | User Guide - Page 90
process at the time you installed the software, you can complete it at any time by using the Fax Setup Wizard. 1. Click Start, and then click Programs. 2. Click HP, click the name of the product, and then click HP Fax Setup Wizard. 3. Follow the onscreen instructions in the HP Fax Setup Wizard to - HP LaserJet M1319 | User Guide - Page 91
be imported, you must use the export feature in that other program. HP Toolbox can import contact information from other software program phone books. The following table shows which programs are supported for HP Toolbox. Program Description Microsoft Outlook Personal Address Book (PAB) entries - HP LaserJet M1319 | User Guide - Page 92
entry and ":(H)" will be added to the name in the home entry. Goldmine version 4.0 is supported. HP Toolbox imports the file last used by Goldmine. Act! versions 4.0 and 2000 are supported. HP Toolbox imports the database last used by Act!. Complete the following steps to import a phone book - HP LaserJet M1319 | User Guide - Page 93
NOTE: To gain access to all of the speed dials, you must use the Shift button. Speed dials 6 through 10 are all available by pressing Shift and the associated one-touch key on the control panel. Complete the following steps to program speed dials from the control panel: 1. On the control panel, - HP LaserJet M1319 | User Guide - Page 94
Manage group-dial entries Create and edit group-dial entries 1. Assign a speed-dial entry to each fax number that you want in the group. (For instructions, see Create and edit speed dials on page 82.) 2. On the control panel, press Setup. 3. Use the arrow buttons to select Fax setup, and then - HP LaserJet M1319 | User Guide - Page 95
5. Use the arrow buttons to select Del. # in group, and then press OK. 6. Use the arrow buttons to select the individual that you want to delete from the group. 7. Press OK to confirm the deletion. 8. Repeat steps 6 and 7 to delete other individuals from the group. -orPress Cancel if you are - HP LaserJet M1319 | User Guide - Page 96
Change fax settings Set the sound-volume settings Control the volume of the fax sounds from the control panel. You can make changes to the following sounds: ● The fax sounds that are associated with incoming and outgoing faxes ● The ring for incoming faxes The factory-set default for the fax-sounds - HP LaserJet M1319 | User Guide - Page 97
of every fax number you enter at the control panel or from the software. The maximum number of characters for a dial prefix is 50. The default you can dial a fax number without the dial prefix by using manual dial. For instructions, see Manual dial faxing on page 101. 1. On the control panel, press - HP LaserJet M1319 | User Guide - Page 98
Set autoredial If the product was unable to send a fax because the receiving fax machine did not answer or was busy, the product attempts to redial based on the redial-on-busy, redial-on-no-answer, and redial-oncommunication-error options. Use the procedures in this section to turn these options on - HP LaserJet M1319 | User Guide - Page 99
The default light/dark setting is the contrast that is normally applied to items that are being faxed. The slider is set to the middle as the default setting. 1. On the control panel, press Setup. 2. Use the arrow buttons to select Fax setup, and then press OK. 3. Use the arrow buttons to select Fax - HP LaserJet M1319 | User Guide - Page 100
controlpanel display. (The minimum and maximum number of rings allowed varies by country/region.) One line with two separate numbers and a ring-pattern service One or two rings. (If you have an answering machine or computer voicemail for the other telephone number, make sure that the product is - HP LaserJet M1319 | User Guide - Page 101
mode Depending on the situation, set the product answer mode to Automatic or Manual. The factory-set default is Automatic. ● Automatic: In this answer mode, of rings, see Set the number of rings-to-answer on page 91. ● Manual: In this answer mode, the product never answers calls. You must start the - HP LaserJet M1319 | User Guide - Page 102
support unique ring patterns. Contact the telephone company to determine if this service is available in your country/region. NOTE: If you do not have ring-pattern service After product installation is complete, ask someone to send a fax to you in order to verify that the ring-pattern service is - HP LaserJet M1319 | User Guide - Page 103
is not supported for Macintosh. Receiving faxes to a computer is available only if a full software installation was performed during initial product setup. To receive faxes to your computer, turn on the receive-to-PC setting in the software. 1. Open HP - HP LaserJet M1319 | User Guide - Page 104
Use autoreduction for incoming faxes If the fit-to-page option is turned on, the product automatically reduces long faxes up to 75% to fit the information on the default paper size (for example, the fax is reduced from legal to letter size). If the fit-to-page option is turned off, long faxes print - HP LaserJet M1319 | User Guide - Page 105
Create stamp-received faxes The product prints the sender identification information at the top of each received fax. You can also choose to stamp the incoming fax with your own header information to confirm the date and time that the fax was received. The factory-set default for stamp-received - HP LaserJet M1319 | User Guide - Page 106
The default setting is On. Turn this setting off only if you use pulse dialing or if you have a service from your telephone company that also uses the 1-2-3 sequence. The telephone company service does not work if it conflicts with the product. 1. On the control panel, press Setup. 2. Use the arrow - HP LaserJet M1319 | User Guide - Page 107
software Supported fax programs The PC fax program that came with the product is the only PC fax program that works with the product. In order to continue to use a PC fax program previously installed sending the fax. Cancel a fax Use these instructions to cancel a single fax that is currently dialing - HP LaserJet M1319 | User Guide - Page 108
are not designed to work on DSL, PBX, ISDN lines, or VoIP services, but they might work with the proper setup and equipment. NOTE: HP recommends discussing DSL, PBX, ISDN, and VoIP setup options with the service provider. The HP LaserJet product is an analog device that is not compatible with all - HP LaserJet M1319 | User Guide - Page 109
, it might be necessary to contact the PBX provider for assistance. HP does not guarantee that the product will be compatible with digital environments it supports fax over IP services. If the product experiences problems getting a fax to work on a VoIP network, verify that all cables and - HP LaserJet M1319 | User Guide - Page 110
. 3. Slide the stack into the ADF until it does not move any farther. Document loaded appears on the control-panel display. 4. Adjust the media guides until they are snug against the media. 5. Use the alphanumeric buttons on the control panel to dial the number. -orIf the fax number you are - HP LaserJet M1319 | User Guide - Page 111
the product control panel. Send a fax to a group manually (ad hoc faxing) Use the following instructions to send a fax to a group of recipients that has go to the next step. 5. Press Start Fax. 6. If you have more pages to scan, press 1 to select Yes, and then repeat step 5 for each page of the fax - HP LaserJet M1319 | User Guide - Page 112
fax has exited the product, you can start sending another fax, copying, or scanning. You can assign a speed dial to numbers that you use regularly. See to select recipients. Electronic phone books are generated by using third-party software programs. Send a fax by using a group-dial entry 1. Load - HP LaserJet M1319 | User Guide - Page 113
If you are finished, press 2 to select No. The product scans the document into memory and sends the fax to each number specified. If a number in the group is busy or does not answer, the product - HP LaserJet M1319 | User Guide - Page 114
The product is connected directly to the computer. ● The product software is installed on the computer. ● The computer operating system is Microsoft Windows in Windows XP), and then click Hewlett-Packard. 2. Click the product name, and then click Send fax. The fax software appears. 3. Enter the fax - HP LaserJet M1319 | User Guide - Page 115
a document in a third-party program. 2. Click the File menu, and then click Print. 3. Select the fax print driver from the printer driver drop-down list. The fax software appears. 4. Complete one of the following procedures: ● Windows a. Enter the fax number of one or more recipients. b. Include - HP LaserJet M1319 | User Guide - Page 116
a fax to a person whose device is in the manual receive mode, you can precede the fax with a the telephone keypad. 3. When the recipient answers, instruct the person to start the fax machine. 4. When . When this procedure is completed, the product scans the document into memory and then returns to - HP LaserJet M1319 | User Guide - Page 117
support undefined (ad hoc) groups. 9. Press OK or Start Fax. The product scans the document into memory and sends it at the designated time. Use access codes, credit cards, or calling cards To use access codes, credit cards, or calling cards, dial manually because the print cartridge was empty or if - HP LaserJet M1319 | User Guide - Page 118
on a computer, the product must be configured to receive faxes to the computer. See Set up the computer to receive faxes on page 93. 1. Open HP Toolbox. 2. Select the product. 3. Click Fax. 4. Click Fax Receive Log. 5. In the Fax Image column, click the "view" link of the fax that you want - HP LaserJet M1319 | User Guide - Page 119
Solve fax problems Fax error messages Alert and warning messages appear try sending the fax again. Try a different phone cord. If the error persists, contact HP. See www.hp.com/support/ljm1319 or the support flyer that came in the product box. Fax is busy Redial pending The fax line to - HP LaserJet M1319 | User Guide - Page 120
into a jack for another phone line, and try sending the fax again. Try a different phone cord. If the error persists, contact HP. See www.hp.com/support/ljm1319 or the support flyer that came in the product box. Fax memory full Canceling recv. During the fax transmission, the product ran out of - HP LaserJet M1319 | User Guide - Page 121
of Fine. See Set resolution settings on page 89. If the error persists, contact HP. See www.hp.com/support/ljm1319 or the support flyer that came in the product box. Group dial not allowed in group The speed phone line. See Connect to a telephone line on page 77. ENWW Solve fax problems 111 - HP LaserJet M1319 | User Guide - Page 122
(continued) Control panel message Description Recommended action If the error persists, contact HP. See www.hp.com/support/ljm1319 or the support flyer that came in the product box. No document sent The product did not scan any pages, or it did Try sending the fax again. not receive any - HP LaserJet M1319 | User Guide - Page 123
HP. See www.hp.com/support/ljm1319 or the support flyer that came in the product box. Fax memory is retained when there is a loss of power The HP LaserJet M1319 MFP power applied. Fax logs and reports Use the following instructions to print fax logs and reports: Print all fax reports problems 113 - HP LaserJet M1319 | User Guide - Page 124
1. On the control panel, press Setup. 2. Use the arrow buttons to select Reports, and then press OK. 3. Use the arrow buttons to select Fax Reports, and then press OK. 4. Use the arrow buttons to select the report to be printed, and then press OK. The product exits the menu settings and prints the - HP LaserJet M1319 | User Guide - Page 125
-set default for error correction is On. You should turn off error correction only if you are having trouble sending or receiving a fax, and you are willing to accept the errors in the transmission. Turning off the arrow buttons to select Fax setup, and then press OK. ENWW Solve fax problems 115 - HP LaserJet M1319 | User Guide - Page 126
is High (V.34). You should change the setting only if you are having trouble sending a fax to or receiving a fax from a particular device. Decreasing buttons to select a speed setting, and then press OK. Problems sending faxes Problem The document stops feeding in the middle of faxing. Faxes stop - HP LaserJet M1319 | User Guide - Page 127
Problem Cause Solution The product is receiving faxes but is not If the product is on a digital system, the sending them. system might be generating a dial tone that the product cannot detect. Disable the detect-dial-tone setting. If the error persists, contact the system service provider. A - HP LaserJet M1319 | User Guide - Page 128
correctly. Problem Cause Solution service and the feature is not set correctly. Check the answer-ring pattern feature to verify that it is set properly. The fax cord might not be correctly See the getting started guide to check connected, or the fax cord is not working. the installation - HP LaserJet M1319 | User Guide - Page 129
service. ● Get a telephone line that is dedicated to fax calls. ● Set the product answer mode to Manual. In manual are blank, The product ran out of toner while or have poor print quality. printing a .) As soon as possible, replace the print cartridge, and then reprint the fax. The fax - HP LaserJet M1319 | User Guide - Page 130
Performance problems Problem Cause Solution Faxes are transmitting or being received very slowly. check the telephone line. If the fax is being sent via a digital phone line, contact the service provider. The fax is being sent via an international Allow more time to transmit fax jobs call. - HP LaserJet M1319 | User Guide - Page 131
11 Manage and maintain the product ● Information pages ● Use the HP Toolbox software ● Manage supplies ENWW 121 - HP LaserJet M1319 | User Guide - Page 132
the product memory. These pages help diagnose and solve problems with the product. NOTE: If the product language was not correctly set during installation, you can set the language manually so the information pages print in one of the supported languages. Change the language by using the System - HP LaserJet M1319 | User Guide - Page 133
-click the product icon ( ). ● On the Windows Start menu, click Programs (or All Programs in Windows XP), click HP, click HP LaserJet M1319, and then click HP Toolbox. The HP Toolbox software contains the following sections for each product in the Devices window: ● Status ● Fax In addition to these - HP LaserJet M1319 | User Guide - Page 134
following main pages: ● Device Status. View product status information. This page indicates product conditions such as a jam or an empty tray. After you correct a product problem, click Refresh status to update the product status. 124 Chapter 11 Manage and maintain the product ENWW - HP LaserJet M1319 | User Guide - Page 135
to another fax machine. NOTE: You must click Apply before the changes take effect. Fax phone book Use the HP Toolbox Fax phone book to add and remove individuals or groups on your speed-dial list, import phone books not have a check mark in the Select column. ENWW Use the HP Toolbox software 125 - HP LaserJet M1319 | User Guide - Page 136
. ● To import contacts from a phone book that exists in Lotus Notes, Outlook, or Outlook Express, click Import Phone Book. Select the appropriate software program, navigate to the appropriate file, and then click OK. You can also select individual entries from the phone book instead of importing the - HP LaserJet M1319 | User Guide - Page 137
was not sent. NOTE: You must click Apply before the changes take effect. Fax receive log The HP Toolbox Fax receive log provides a list of all recently received faxes and information about them including the date must click Apply before the changes take effect. ENWW Use the HP Toolbox software 127 - HP LaserJet M1319 | User Guide - Page 138
. Connecting might require that you close the HP Toolbox and reopen it. ● HP Instant Support. Connects to the HP Instant Support Web site. ● Product Support. Connects to the support site for the product where you can search for help with a specific problem. ● Shop for Supplies. Order supplies at the - HP LaserJet M1319 | User Guide - Page 139
HP Toolbox. Hewlett-Packard recommends that you place an order for a replacement print cartridge when Low message for a print cartridge first appears. Use a new, authentic HP print cartridge cartridge is low or empty. The control panel also indicates when a non-HP print cartridge is first installed. - HP LaserJet M1319 | User Guide - Page 140
after the beginning of the call. The language line interpreter is a service that will translate between you and the representative for the HP fraud hotline. Recycle supplies To install a new HP print cartridge, follow the instructions that are included in the box that contains the new supply, or - HP LaserJet M1319 | User Guide - Page 141
cold water. Hot water sets toner into the fabric. 3. Reinsert the print cartridge into the printer, and close the print cartridge door. If the print is still light or unacceptable, install a new print cartridge. Replace supplies Print cartridge 1. Open the print-cartridge door. 2. Grasp the handle - HP LaserJet M1319 | User Guide - Page 142
tape. 4. Insert the cartridge into the product until it is firmly in place. 5. Close the print-cartridge door. CAUTION: If toner gets on any clothing, toner, and dust particles can accumulate inside the product. Over time, this buildup can cause print-quality problems such as toner specks - HP LaserJet M1319 | User Guide - Page 143
1. Press Setup. 2. Use the arrow buttons to find the Service menu, and then press OK. 3. Use the arrow buttons to installation instructions for this product are available at www.hp.com/support/ ljm1319. Click Downloads and drivers, click the operating system, and then select the firmware download - HP LaserJet M1319 | User Guide - Page 144
134 Chapter 11 Manage and maintain the product ENWW - HP LaserJet M1319 | User Guide - Page 145
12 Problem solve ● Problem-solving checklist ● Restore the factory-set defaults ● Control-panel messages ● Control-panel display problems ● Clear jams ● Solve image-quality problems ● Solve connectivity problems ● Solve software problems ENWW 135 - HP LaserJet M1319 | User Guide - Page 146
problem with the product. Step number 1 2 3 4 5 6 Verification step Possible problems Solutions Is the power on? No power due to failed power source, cable problems. Paper jams when printing. Clean the ADF scanning in, Make sure that the HP LaserJet M1319 MFP or telephone devices are not - HP LaserJet M1319 | User Guide - Page 147
cable. An incorrect driver is selected. Select the proper driver. There is a port driver problem in Microsoft Windows. Uninstall and then reinstall the product software. Verify that you are using the correct installation procedure and the correct port setting. Does the product scan Service, - HP LaserJet M1319 | User Guide - Page 148
to guide receiving print data or scanning commands, control-panel messages too complex Press [OK] Printer jam clear paper path panel, and then follow the control-panel instructions. See Clear jams on page 141. The follow the control panel instructions. See Clear jams on page 141. - HP LaserJet M1319 | User Guide - Page 149
on the power might fix the problem. If a critical error persists, the product might require service. Critical error message-tables Control the product to initialize. If the error persists, contact HP. See www.hp.com/support/ljm1319 or the support flyer that came in the product box. Turn off the - HP LaserJet M1319 | User Guide - Page 150
it. Plug the product directly into the wall socket. 3. Turn on the power and wait for the product to initialize. If the error persists, contact HP. See www.hp.com/support/ljm1319 or the support flyer that came in the product box. 140 Chapter 12 Problem solve ENWW - HP LaserJet M1319 | User Guide - Page 151
magnetic field. To resolve this problem, perform the following procedure: improperly or overfilled, or the media guides are not set properly. ● Media product during a print job. ● The cartridge door is opened during a print job. is being used does not meet HP specifications. See Paper and print - HP LaserJet M1319 | User Guide - Page 152
the product Find and remove the jam by using the instructions on the following pages. If the location of the jam is not obvious, first look inside the product. Loose toner might remain in the product after a jam. This problem typically resolves itself after a few sheets have been printed. Clear - HP LaserJet M1319 | User Guide - Page 153
is located, some of the following steps might not be necessary. 1. Open the print-cartridge door. 2. Do one of the following: ● If media is visible, use both is visible, remove the print cartridge, and rotate the upper media guide. Carefully pull the media up and out of the product. ENWW - HP LaserJet M1319 | User Guide - Page 154
3. Close the print-cartridge door. 4. Open tray 1. 144 Chapter 12 Problem solve ENWW - HP LaserJet M1319 | User Guide - Page 155
5. With both hands, grasp the side of the media that is most visible (this includes the middle), and carefully pull it free from the product. 6. Close tray 1. Clear jams from the output bin CAUTION: Do not use sharp objects, such as tweezers or needle-nose pliers, to remove jams. Damage caused by - HP LaserJet M1319 | User Guide - Page 156
print cartridge, minimize its exposure to direct light. 2. With both hands, grasp the side of the media that is most visible (this includes the middle), and carefully pull it free from the product. 3. Replace the print cartridge, and then close the print-cartridge door. 146 Chapter 12 Problem solve - HP LaserJet M1319 | User Guide - Page 157
that you are using. ● Verify that the media guides are properly adjusted. ● Check that the input tray tray while the product is printing. ● Use only HP-recommended media types and sizes. See Paper and print . The print media type and the amount of toner used affect the output bin capacity. ● Check - HP LaserJet M1319 | User Guide - Page 158
printers. See Paper and print media on page 35. The print cartridge might be defective or low. Replace the print cartridge. See Print cartridge on page 131. If the error persists, contact HP. See www.hp.com/support/ljm1319 or the support flyer that came in the product box. 148 Chapter 12 Problem - HP LaserJet M1319 | User Guide - Page 159
the print cartridge. See Print cartridge on page 131. The fuser temperature might be too low. In the printer driver, make sure the appropriate media type is selected. Use the archive print feature to improve toner fusing. See Archive print on page 56. ENWW Solve image-quality problems 149 - HP LaserJet M1319 | User Guide - Page 160
intended for laser printers. See Paper and print media on page 35. If characters are incorrectly formed so that they produce a wavy effect, the laser scanner might need service. Verify that the problem also occurs on the configuration page. If so, contact HP. See www.hp.com/support/ljm1319 or the - HP LaserJet M1319 | User Guide - Page 161
curled or wavy. The product is not set to print on the type of In the printer driver, make sure the media on which you want to print. appropriate media type is selected. If the problem persists, select a media type that uses a lower fuser temperature, such as transparencies or light media. The - HP LaserJet M1319 | User Guide - Page 162
paper, such as high-quality paper that is intended for laser printers. See Paper and print media on page 35. An image that appears at the top of the page (in solid black) repeats farther down the page (in a gray field). Software settings might affect image printing. The order of images printed - HP LaserJet M1319 | User Guide - Page 163
Problem Cause Solution Poor print quality or toner , use the arrow buttons to select Service, and then press OK. Use the Problems with feeding The paper has ragged edges. Use high-quality paper that is made for laser printers tray again. Adjust the media guides to the width and length of - HP LaserJet M1319 | User Guide - Page 164
in manual feed mode and print your job again. The pickup roller might be dirty or damaged. Contact HP. See www.hp.com/support/ ljm1319 or the support flyer print any pages. Problem Pages print but are totally blank. Cause The sealing tape might still be in the print cartridge. The document might - HP LaserJet M1319 | User Guide - Page 165
instructions. ● Use or make a carrier sheet to protect your originals. NOTE: Verify that the media meets HP specifications. If the media meets HP specifications, recurring feed problems indicate the pickup roller or separation pad is worn. Contact HP. See www.hp.com/ support/ljm1319 or the support - HP LaserJet M1319 | User Guide - Page 166
cartridge might have been scratched. Clean the ADF scanning strip. See Clean the scanner glass strip and platen on page 72. Install a new HP print cartridge. See Print cartridge printer driver or product software settings may be incorrect. Text is unclear. The printer driver or product software - HP LaserJet M1319 | User Guide - Page 167
problems Problem Cause Solution Poor print quality or toner that is made for laser printers. Turn the paper over Adjust the media guides to the width manual feed mode and print your job again. The pickup roller might be dirty or damaged. Contact HP. See www.hp.com/support/ ljm1319 or the support - HP LaserJet M1319 | User Guide - Page 168
narrow side leading into the ADF and the side to be scanned facing down. Use media that meets HP specifications. See Paper and print media on page 35. The print cartridge might be defective. Replace the print cartridge. See Print cartridge on page 131. The product settings might be set to reduce - HP LaserJet M1319 | User Guide - Page 169
by opening Display in Windows Control Panel. Try adjusting the resolution settings in the scanner software. See Scanner resolution and color on page 71. The original might have been loaded incorrectly. Use the media guides when you load the originals into the ADF. See Load paper and print media on - HP LaserJet M1319 | User Guide - Page 170
Problem Part of the image did not scan. The scan takes too long Cause Solution The original might have been loaded incorrectly. A colored background might be causing images in the foreground to blend into the background. Use the media guides The minimum size that the ADF supports is 148 x 105 mm - HP LaserJet M1319 | User Guide - Page 171
page 39 for instructions. ● Adjust the software settings according to how you plan to use the scanned page. See Scanner HP. See www.hp.com/support/ljm1319 or the support flyer that came in the product box. ● Use or make a carrier sheet to protect your originals. Solve scan-quality problems Problem - HP LaserJet M1319 | User Guide - Page 172
if any supplies are low or empty. No information is provided for non-HP print cartridges. ◦ If the pages do not print correctly, the problem is with the hardware. Contact HP. See www.hp.com/support/ljm1319 or the support flyer that came in the product box. 4. Try printing from a different program - HP LaserJet M1319 | User Guide - Page 173
Panel, and then, under Hardware and Sound, click Printer. 2. Right-click the product icon. 3. Click Properties, or click Printing Preferences. 4. Change the settings, and click OK. Solve connectivity problems Solve direct-connection problems If the product is experiencing connection issues while - HP LaserJet M1319 | User Guide - Page 174
error messages. Solve common Macintosh problems Table 12-1 Problems with Mac OS X v10.3, Mac OS X v10.4, and later The printer driver is not listed in Printer Setup Utility. Cause Solution The product software might not have been installed or was installed incorrectly. Make sure that the - HP LaserJet M1319 | User Guide - Page 175
When connected with a USB cable, the product does not appear in the Macintosh Printer Setup Utility after the driver is selected. Cause Solution This problem is caused by either a software or a hardware component. Software troubleshooting ● Check that your Macintosh supports USB. ● Verify that - HP LaserJet M1319 | User Guide - Page 176
12-1 Problems with Mac OS X v10.3, Mac OS X v10.4, and later (continued) When connected with a USB cable, the product does not appear in the Macintosh Printer Setup Utility after the driver is selected. Cause Solution NOTE: The iMac keyboard is a nonpowered USB hub. 166 Chapter 12 Problem solve - HP LaserJet M1319 | User Guide - Page 177
● To order supplies in the U.S., go to www.hp.com/sbso/product/supplies. ● To order supplies worldwide, go to www.hp.com/ghp/buyonline.html. ● To order supplies in Canada, go to www.hp.ca/catalog/supplies. ● To order supplies in Europe, go to www.hp.com/go/ljsupplies. ● To order supplies in Asia - HP LaserJet M1319 | User Guide - Page 178
Supplies Product name Replacement print cartridge Description Average yield for the print cartridge is approximately 2,000 pages. Part number Q2612A Cable and interface accessories Product name USB cable Fax cord Description 2-meter standard USB-compatible device connector 3-meter standard USB- - HP LaserJet M1319 | User Guide - Page 179
B Service and support Hewlett-Packard limited warranty statement HP PRODUCT HP LaserJet M1319f DURATION OF LIMITED WARRANTY One-year limited warranty HP warrants to you, the end-user customer, that HP hardware and accessories will be free from defects in materials and workmanship after the date - HP LaserJet M1319 | User Guide - Page 180
documentation in the provided shipping material. Failure to return the defective part may result in HP billing you for the replacement. With a customer self repair, HP will pay all shipping and part return costs and determine the courier/carrier to be used. 170 Appendix B Service and support ENWW - HP LaserJet M1319 | User Guide - Page 181
, date of purchase, and problem description ready. Get 24-hour Internet support www.hp.com/support/ljm1319 Get support for products used with a Macintosh computer www.hp.com/go/macosx Download software utilities, drivers, and electronic information www.hp.com/go/ljm1319_software Order supplies - HP LaserJet M1319 | User Guide - Page 182
of paper or other print media that did not print correctly. 4. In the U.S., call HP Customer Care to request new packing material. In other areas, use the original packing material, if possible. Hewlett-Packard recommends insuring the equipment for shipment. 172 Appendix B Service and support ENWW - HP LaserJet M1319 | User Guide - Page 183
C Specifications This section contains the following information about the product: ● Physical specifications ● Electrical specifications ● Power consumption ● Environmental specifications ● Acoustic emissions ENWW 173 - HP LaserJet M1319 | User Guide - Page 184
Power consumption (average, in watts)1 Product model Printing2 Copying2 Ready/Sleep3 Off HP LaserJet M1319 290 W 225 W 5 W - HP LaserJet M1319 | User Guide - Page 185
Declared per ISO 92961 Printing (18 ppm) LpAm = 49 dB(A) Ready Inaudible 1 Values are based on preliminary data. See www.hp.com/support/ljm1319 for current information. 2 Configuration tested: HP LaserJet M1319 printing simplex using A4 paper at 18 ppm. ENWW Environmental specifications 175 - HP LaserJet M1319 | User Guide - Page 186
176 Appendix C Specifications ENWW - HP LaserJet M1319 | User Guide - Page 187
D Regulatory information This section contains the following regulatory information: ● FCC compliance ● Environmental product stewardship program ● Telephone Consumer Protection Act (United States) ● IC CS-03 requirements ● EU statement for telecom operation ● New Zealand telecom statements ● - HP LaserJet M1319 | User Guide - Page 188
. It is recommended that the customer install an AC surge arrestor in the AC outlet to which this device is connected. This is to avoid damage to the equipment caused by local lightning strikes and other electrical surges. NOTE: For HP LaserJet M1319 MFP series models that include a handset, this - HP LaserJet M1319 | User Guide - Page 189
Hewlett-Packard instructions are included in every new HP LaserJet print cartridge and supplies package. You help reduce the toll on the environment further when you return multiple cartridges together rather than separately. HP is committed to providing inventive, high-quality products and services - HP LaserJet M1319 | User Guide - Page 190
The enclosed label in the HP LaserJet toner cartridge box is for the return and recycling of one or more HP LaserJet print cartridges after use. Please follow the applicable instructions below. Multiple returns (two to eight cartridges) 1. Package each HP LaserJet print cartridge in its original box - HP LaserJet M1319 | User Guide - Page 191
HP LaserJet M1319 Type Weight Location User-removable Carbon monofluoride lithium 1.5 g On formatter board No For recycling information, you can go to www.hp , your household waste disposal service or the shop where you purchased the product. Chemical substances HP is committed to providing our - HP LaserJet M1319 | User Guide - Page 192
(MSDS) Material Safety Data Sheets (MSDS) for supplies containing chemical substances (for example, toner) can be obtained by contacting the HP Web site at www.hp.com/go/msds or www.hp.com/hpinfo/ globalcitizenship/environment. For more information To obtain information about these environmental - HP LaserJet M1319 | User Guide - Page 193
of the local telecommunications company. The equipment must also be installed using an acceptable method of connection. The customer should be compliance with the above conditions may not prevent degradation of service in some situations. Repairs to certified equipment should be coordinated - HP LaserJet M1319 | User Guide - Page 194
instructions provided in the user manual. If you experience network compatibility issues, please contact your equipment supplier or Hewlett-Packard does it imply that any product is compatible with all of Telecom's network services. This equipment may not provide for the effective hand-over of a - HP LaserJet M1319 | User Guide - Page 195
Hewlett-Packard Company DoC#: BOISB-0405-06-rel.1.0 11311 Chinden Boulevard, Boise, Idaho 83714-1021, USA declares, that the product Product Name: HP LaserJet M1319f MFP Series Regulatory Model Number2) Product Options: Print Cartridge Hewlett-Packard Sales and Service Office or Hewlett-Packard - HP LaserJet M1319 | User Guide - Page 196
Class 1" laser product under the U.S. Department of Health and Human Services (DHHS) Radiation Performance Standard according to the Radiation Control for , or performing procedures other than those specified in this user guide may result in exposure to hazardous radiation. Canadian DOC regulations - HP LaserJet M1319 | User Guide - Page 197
sätt än i bruksanvisning specificerats, kan användaren utsättas för osynlig laserstrålning, som överskrider gränsen för laserklass 1. HUOLTO HP LaserJet M1319f - kirjoittimen sisällä ei ole käyttäjän huollettavissa olevia kohteita. Laitteen saa avata ja huoltaa ainoastaan sen huoltamiseen koulutettu - HP LaserJet M1319 | User Guide - Page 198
Substances table (China) 188 Appendix D Regulatory information ENWW - HP LaserJet M1319 | User Guide - Page 199
feed originals into the product for copying, scanning, or faxing. browser Short for Web browser, a software program that is used to locate and open exclusively for either voice calls or fax calls. distinctive ring A service offered by some telephone companies in some countries/regions that allows two - HP LaserJet M1319 | User Guide - Page 200
screen to initiate faxing, copying, or scanning. HP Toolbox HP Toolbox is a program that provides access to the product management and troubleshooting tools, and product documentation. HP Toolbox does not support Macintosh operating systems. ISDN Integrated Services Digital Network (ISDN) is a suite - HP LaserJet M1319 | User Guide - Page 201
the first page only or all pages. WIA Windows Imaging Architecture (WIA) is an imaging architecture that is available in Windows XP and Windows Vista. A scan can be initiated from within these operating systems by using a WIA-compliant scanner. ENWW Glossary 191 - HP LaserJet M1319 | User Guide - Page 202
192 Glossary ENWW - HP LaserJet M1319 | User Guide - Page 203
C cables part numbers 168 USB, troubleshooting 155 call report, fax troubleshooting 120 caller-ID boxes, connecting 78 calling cards 101 Canadian DOC regulations 186 canceling copy jobs 59 faxes 97 print job 46 scan jobs 70 capacity output bin 3 cartridge-door release, locating 4 cartridges HP fraud - HP LaserJet M1319 | User Guide - Page 204
14 scanning 71 specifications 3 drivers default settings 47 Macintosh settings 28 Macintosh, troubleshooting 164 operating systems supported 7 presets (Macintosh) 28 settings 20, 21, 26 supported 20 E e-mail, scanning to Macintosh 31 resolution settings 72 easy software installation 6 EconoMode - HP LaserJet M1319 | User Guide - Page 205
drivers supported 7 drivers, troubleshooting 164 faxing 32 faxing from 104 installing printing system for direct connections 27 Intel Core Processor 6 PPC 6 print settings 26 problems, solving 164 resize documents 28 scanning from control panel 31 scanning from TWAIN- compliant software 69 scanning - HP LaserJet M1319 | User Guide - Page 206
31 scanning to file 31 support 171 supported operating systems 6, 26 USB card, troubleshooting 165 Macintosh driver settings custom-size paper 28 watermarks 29 manual dialing 101 manual redial 101 material restrictions 180 Material Safety Data Sheet (MSDS) 182 media ADF, sizes supported 116 copy - HP LaserJet M1319 | User Guide - Page 207
130 redial manually 101 redialing automatically, settings 88 redistribute toner 131 reducing documents copying 59 registration, product 128 regulatory information 178 removing software Windows 22 repacking device 171 repetitive defects, troubleshooting 152 replacing print cartridges 131 reports - HP LaserJet M1319 | User Guide - Page 208
faxing 120 scanning 160 smeared toner, troubleshooting 149 software advanced installation 6 components 6 direct connection installation, Macintosh 27 easy installation 6 Readiris OCR 70 receiving faxes 93 scanning from TWAIN or WIA 69 sending faxes 104 settings 20, 26 supported operating systems - HP LaserJet M1319 | User Guide - Page 209
, troubleshooting 156 WIA-compliant software, scanning from 69 Windows default settings 47 driver settings 21 drivers supported 7 faxing from 104 pages per sheet 55 problem-solving issues 164 scanning from TWAIN or WIA software 69 software components 19, 23 software for 123 supported operating - HP LaserJet M1319 | User Guide - Page 210
200 Index ENWW - HP LaserJet M1319 | User Guide - Page 211
- HP LaserJet M1319 | User Guide - Page 212
© 2008 Hewlett-Packard Development Company, L.P. www.hp.com *CB536-90987* *CB536-90987* CB536-90987
-
 1
1 -
 2
2 -
 3
3 -
 4
4 -
 5
5 -
 6
6 -
 7
7 -
8
-
9
-
10
-
11
-
12
-
13
-
14
-
15
-
16
-
17
-
18
-
19
-
20
-
21
-
22
-
23
-
24
-
25
-
26
-
27
-
28
-
29
-
30
-
31
-
32
-
33
-
34
-
35
-
36
-
37
-
38
-
39
-
40
-
41
-
42
-
43
-
44
-
45
-
46
-
47
-
48
-
49
-
50
-
51
-
52
-
53
-
54
-
55
-
56
-
57
-
58
-
59
-
60
-
61
-
62
-
63
-
64
-
65
-
66
-
67
-
68
-
69
-
70
-
71
-
72
-
73
-
74
-
75
-
76
-
77
-
78
-
79
-
80
-
81
-
82
-
83
-
84
-
85
-
86
-
87
-
88
-
89
-
90
-
91
-
92
-
93
-
94
-
95
-
96
-
97
-
98
-
99
-
100
-
101
-
102
-
103
-
104
-
105
-
106
-
107
-
108
-
109
-
110
-
111
-
112
-
113
-
114
-
115
-
116
-
117
-
118
-
119
-
120
-
121
-
122
-
123
-
124
-
125
-
126
-
127
-
128
-
129
-
130
-
131
-
132
-
133
-
134
-
135
-
136
-
137
-
138
-
139
-
140
-
141
-
142
-
143
-
144
-
145
-
146
-
147
-
148
-
149
-
150
-
151
-
152
-
153
-
154
-
155
-
156
-
157
-
158
-
159
-
160
-
161
-
162
-
163
-
164
-
165
-
166
-
167
-
168
-
169
-
170
-
171
-
172
-
173
-
174
-
175
-
176
-
177
-
178
-
179
-
180
-
181
-
182
-
183
-
184
-
185
-
186
-
187
-
188
-
189
-
190
-
191
-
192
-
193
-
194
-
195
-
196
-
197
-
198
-
199
-
200
-
201
-
202
-
203
-
204
-
205
-
206
-
207
-
208
-
209
-
210
-
211
-
212
 |
 |
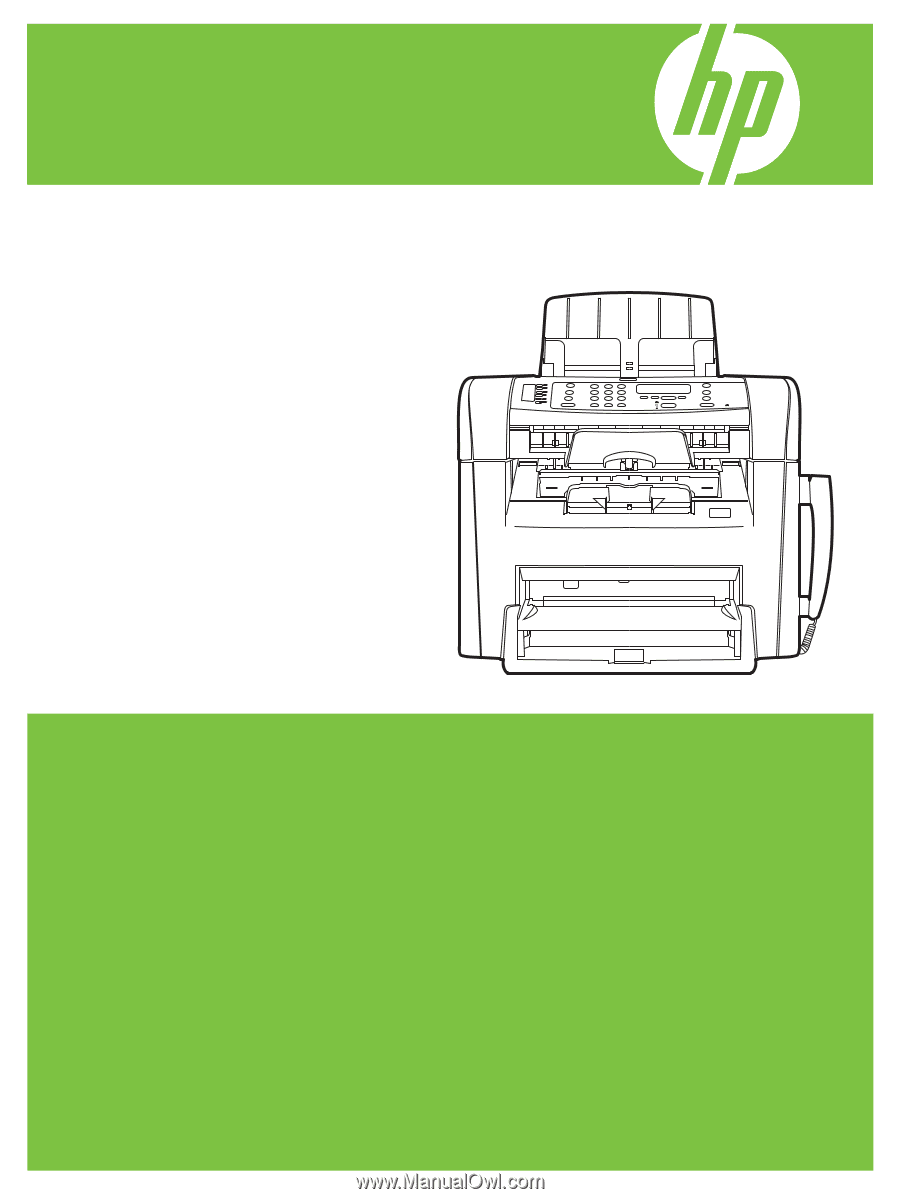
HP LaserJet M1319 MFP Series
User Guide