HP M3035 HP LaserJet M3027, M3035, M5025, M5035, and M4345 MFP - Control Panel - Page 2
Introduction, Procedure
 |
UPC - 883585038466
View all HP M3035 manuals
Add to My Manuals
Save this manual to your list of manuals |
Page 2 highlights
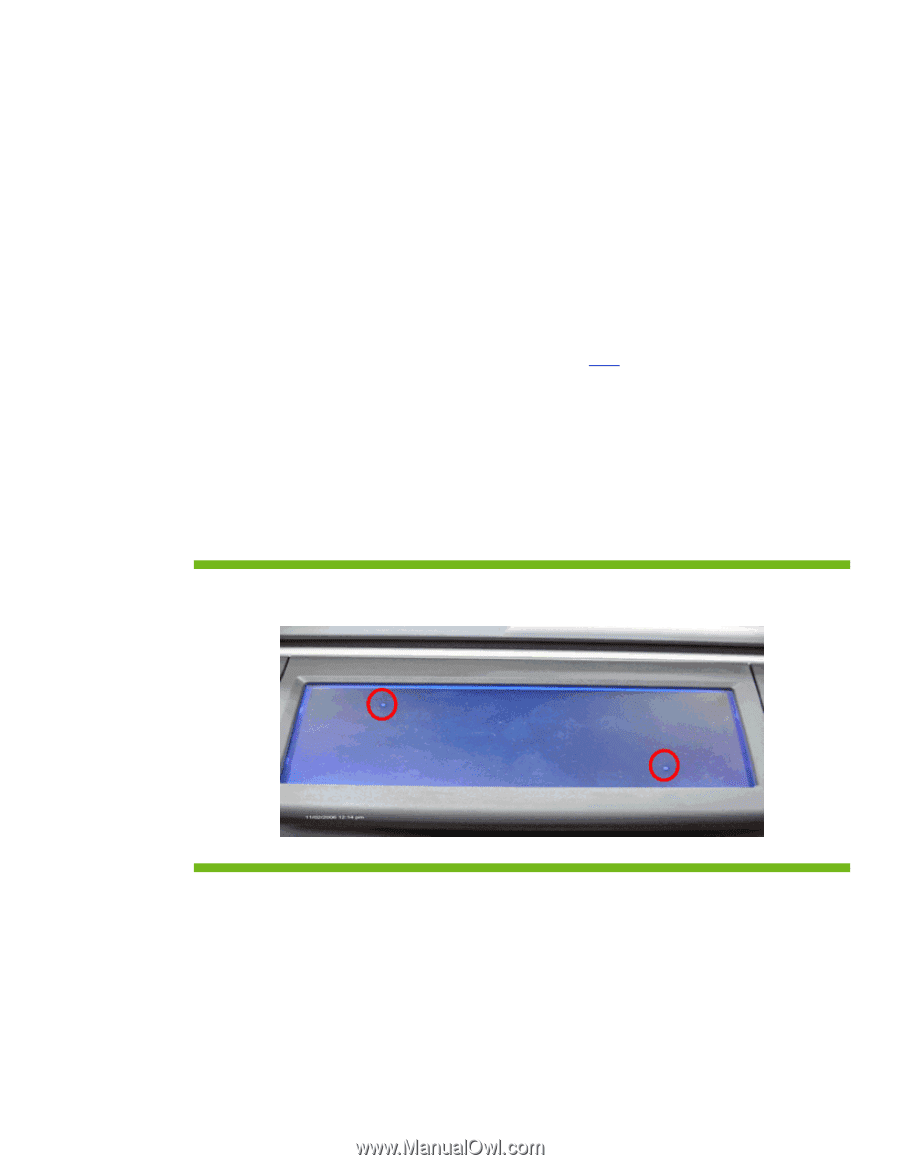
Introduction This procedure will calibrate the control panel of the HP LaserJet M3027, M3035, M5025, M5035, and M4345 MFP products. The steps for calibrating the control panel on these MFPs, are slightly different from other products. Procedure Note: For accurate calibration, use a pen; do not use your finger. 1. Power OFF the device 2. Hold down the # and C keys while powering ON the device. 3. Release keys when a small square appears at the upper left corner. 4. Touch the small square using a pen. Note: Touch the small square in the upper left corner only once; the dot will not disappear when touched. As soon as the square in the upper left corner is touched, another square appears at the lower right corner. Both squares will be shown at the LCD screen. 5. Touch the small square at the lower right corner using a pen. 6. At this point, calibration is complete and the device will continue booting up. NOTE: If the device boots up just by touching the first square from the upper left corner, then the control panel will NOT be calibrated and the entire procedure needs to be repeated until the device boots up ONLY after the second dot from the lower right corner has been touched. Figure 1. M3035 MFP LCD with the two dots present
-
 1
1 -
 2
2 -
 3
3
 |
 |