HP M8430f Getting Started Guide - Page 139
Locating the Drive and Assigning a Drive Letter, Windows Start Button, Computer, Rename, Manage
 |
UPC - 883585738908
View all HP M8430f manuals
Add to My Manuals
Save this manual to your list of manuals |
Page 139 highlights
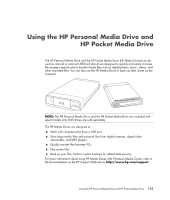
Locating the Drive and Assigning a Drive Letter When you plug the drive into an USB 2.0 connector or insert it into an HP Media Drive bay, the operating system automatically assigns a letter to the hard disk drive. The assigned letter depends on other storage devices connected to the computer. To locate the drive: 1 Click the Windows Start Button on the taskbar. 2 Click Computer. 3 Select the drive under Hard Disk Drives or Devices with Removable Storage. The default volume name of this drive is HP Personal Media Drive or HP Pocket Media Drive. You can rename the drive in the Computer window by right-clicking the drive, selecting Rename, and then typing in a new name. HP recommends renaming a drive if you have more than one external hard disk drive. You can permanently assign a drive letter to avoid the letter changing when you connect and disconnect this drive and other devices. Also, it is easier for a software program to locate the files on the HP Media Drive if a drive letter is assigned. Some programs may not be able to find files if the drive has a new drive letter. It is always best to remove the drive safely to avoid errors. See "Disconnecting the Drive." To assign a drive letter: 1 Click the Windows Start Button on the taskbar. 2 Right-click Computer. 3 Select Manage. 4 Click Disk Management. 5 Right-click HP Media Drive. 6 Select Change Drive Letter and Paths. NOTE: To avoid multiple hard disk drives from using the same drive letter when connecting and removing the drives, assign the letter Z. 7 Click Change. 8 Select a letter from the drop-down menu, and then apply the changes by clicking OK. Using the HP Personal Media Drive and HP Pocket Media Drive 129
-
 1
1 -
2
-
3
-
4
-
5
-
6
-
7
-
8
-
9
-
10
-
11
-
12
-
13
-
14
-
15
-
16
-
17
-
18
-
19
-
20
-
21
-
22
-
23
-
24
-
25
-
26
-
27
-
28
-
29
-
30
-
31
-
32
-
33
-
34
-
35
-
36
-
37
-
38
-
39
-
40
-
41
-
42
-
43
-
44
-
45
-
46
-
47
-
48
-
49
-
50
-
51
-
52
-
53
-
54
-
55
-
56
-
57
-
58
-
59
-
60
-
61
-
62
-
63
-
64
-
65
-
66
-
67
-
68
-
69
-
70
-
71
-
72
-
73
-
74
-
75
-
76
-
77
-
78
-
79
-
80
-
81
-
82
-
83
-
84
-
85
-
86
-
87
-
88
-
89
-
90
-
91
-
92
-
93
-
94
-
95
-
96
-
97
-
98
-
99
-
100
-
101
-
102
-
103
-
104
-
105
-
106
-
107
-
108
-
109
-
110
-
111
-
112
-
113
-
114
-
115
-
116
-
117
-
118
-
119
-
120
-
121
-
122
-
123
-
124
-
125
-
126
-
127
-
128
-
129
-
130
-
131
-
132
-
133
-
 134
134 -
 135
135 -
 136
136 -
 137
137 -
 138
138 -
 139
139 -
 140
140 -
 141
141 -
 142
142 -
 143
143 -
 144
144 -
145
-
146
-
147
-
148
-
149
-
150
-
151
-
152
-
153
-
154
-
155
-
156
-
157
-
158
-
159
-
160
-
161
-
162
-
163
-
164
-
165
-
166
-
167
-
168
-
169
-
170
-
171
-
172
-
173
-
174
-
175
-
176
-
177
-
178
-
179
-
180
-
181
-
182
-
183
-
184
-
185
-
186
-
187
-
188
-
189
-
190
-
191
-
192
-
193
-
194
-
195
-
196
-
197
-
198
-
199
-
200
-
201
-
202
-
203
-
204
-
205
-
206
-
207
-
208
-
209
-
210
-
211
-
212
-
213
-
214
-
215
-
216
-
217
-
218
-
219
-
220
-
221
-
222
 |
 |