HP MSA2324i HP MSA2000 I/O Module Replacement Instructions (481609-002, Octobe - Page 1
HP MSA2324i Manual
 |
View all HP MSA2324i manuals
Add to My Manuals
Save this manual to your list of manuals |
Page 1 highlights
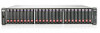
HP MSA2000 I/O Module Replacement Instructions Abstract This document details procedures for replacing a failed I/O module in an HP MSA2000 disk enclosure. © Copyright 2009, 2012 Hewlett-Packard Development Company, L.P. Printed in the US About this document • Illustrations in this document may show modules or an enclosure that differ slightly from the devices in your environment. • The Storage Management Utility (SMU) and the Command Line Interface (CLI) can be used to manage the storage enclosure. Tasks in this document demonstrate using the SMU. • For the latest product documentation, see the HP Support Center website nl (http://www.hp.com/go/hpsc). • Warranties for HP products and services are set forth in the express warranty statements accompanying such products and services. Nothing herein should be construed as constituting an additional warranty. HP shall not be liable for technical or editorial errors or omissions contained herein. To obtain a copy of the warranty for this product, see the warranty information website (http://www.hp.com/go/storagewarranty). Before you begin Observe the following precautions: CAUTION: Removing a module from an operational enclosure significantly changes air flow within the enclosure. Openings must be populated for the enclosure to cool properly. Leave modules in the enclosure until ready to install a replacement. CAUTION: Parts can be damaged by electrostatic discharge; use proper anti-static protection. Keep parts in electrostatic containers until needed and ensure you are properly grounded when touching static-sensitive components. The following illustration shows I/O module locations: 1. I/O module A 2. I/O module B Verifying module failure Check the event log, software management utilities, and device LEDs, and then confirm with HP support that the module has failed. Table 1 LED descriptions Module LED OK Description • Solid Green-Module is operating normally • Blink-System is starting up • Off-Module is not operating normally Fault/Service Required • Solid Amber-Fault condition • Blinking Amber-Hardware-controlled power-up or cache flush/restore error • Off-No fault conditions Removing the failed module This module can be replaced in an enclosure that is powered on. 1. If the I/O module is connected to a controller enclosure with a single controller, shut down the controller. IMPORTANT: In a single-controller configuration, you must shut down the controller to prevent the virtual disks from going offline. If the I/O module is connected to a P2000 G3 MSA or MSA2000 G2 controller: 1. Access the SMU and select the array in the navigation tree. 2. Select Tools > Shutdown or Restart Controller. 3. Select Operation=Shutdown. 4. Select Controller Type=Storage. 5. Select Controller=A or B, depending on the controller location. The blue OK to Remove LED on the controller (near the service port) illuminates to indicate that the controller has been shut down. If the I/O module is connected to an MSA2000 controller: 1. Access the SMU and select Manage > Restart System > Shutdown/Restart. 2. Select a controller option. 3. Select Shutdown and then click Ok. 2. Disconnect cables connected to the module. Label each cable to facilitate reconnection. 3. Turn the thumbscrews until they disengage from the module and rotate both latches downward to disengage the module from the internal connector. Then, pull the module straight out of the enclosure. HP Part Number: 481609-002 Published: October 2012 Edition: 2 *481609-002* Page 1
-
 1
1 -
 2
2
 |
 |
