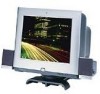
HP MX703 HP Pavilion MX50, MX70, and MX90 Multimedia Monitors - (English) Use - Page 7
Installation - help
 |
View all HP MX703 manuals
Add to My Manuals
Save this manual to your list of manuals |
Page 7 highlights
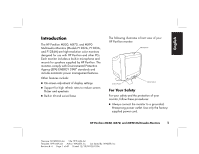
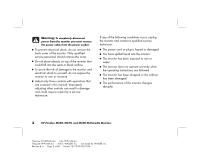
English Additional Safety Information These products have been evaluated for connection to an "IT" power system (an AC distribution system with no direct connection to earth, according to IEC950). AC Power Safety Warning Warning: Locate the monitor near an AC outlet. The AC power cord is your HP monitor's main AC disconnecting device and must be easily accessible at all times. For your safety, the power cord provided with your system has a grounded plug. Always use the power cord with a properly grounded wall outlet to avoid the risk of electrical shock. Installation Follow the instructions in this chapter to install your HP Pavilion MX50, MX70, or MX90 Multimedia Monitor. Warning: The MX monitors are heavy objects. Exercise caution, or get help when lifting, to prevent back injury. Note: Before installing the monitor, refer to your PC and video adapter documentation. You may need to make changes to accommodate the monitor. Locating the Monitor Place the monitor on a flat, sturdy surface. Choose an area that is free from excessive heat, moisture, and sunlight. Locate the monitor as far as possible from sources of electromagnetic interference, such as transformers, motors, fluorescent lighting, and other PC monitors. HP Pavilion MX50, MX70, and MX90 Multimedia Monitors 3 Filename: S01MXCUS.doc Title: HP-Print2k.dot Template: HP-Print2K.dot Author: WASSER, Inc. Last Saved By: WASSER, Inc. Revision #: 6 Page: 3 of 40 Printed: 12/15/00 02:51 PM
-
 1
1 -
 2
2 -
 3
3 -
 4
4 -
 5
5 -
 6
6 -
 7
7 -
 8
8 -
 9
9 -
 10
10 -
 11
11 -
 12
12 -
13
-
14
-
15
-
16
-
17
-
18
-
19
-
20
-
21
-
22
-
23
-
24
-
25
-
26
-
27
-
28
-
29
-
30
-
31
-
32
-
33
-
34
-
35
-
36
-
37
-
38
-
39
-
40
-
41
-
42
-
43
-
44
-
45
-
46
-
47
-
48
-
49
-
50
-
51
-
52
-
53
-
54
-
55
-
56
-
57
-
58
-
59
-
60
-
61
-
62
-
63
-
64
-
65
-
66
-
67
-
68
-
69
-
70
-
71
-
72
-
73
-
74
-
75
-
76
-
77
-
78
-
79
-
80
-
81
-
82
-
83
-
84
-
85
-
86
-
87
-
88
-
89
-
90
-
91
-
92
-
93
-
94
-
95
-
96
-
97
-
98
-
99
-
100
-
101
-
102
-
103
-
104
-
105
-
106
-
107
-
108
-
109
-
110
-
111
-
112
-
113
-
114
-
115
-
116
-
117
-
118
-
119
-
120
-
121
-
122
-
123
-
124
-
125
-
126
-
127
-
128
 |
 |
