HP Media Center 894c HP Media Center Desktop PCs - (English) Media Center Mult - Page 14
System, State, Browse, Cancel, Desktop, Start Backup, Close
 |
View all HP Media Center 894c manuals
Add to My Manuals
Save this manual to your list of manuals |
Page 14 highlights
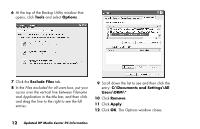
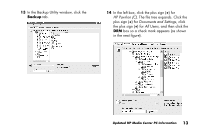
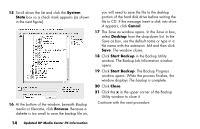
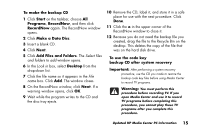
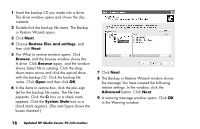
15 Scroll down the list and click the System State box so a check mark appears (as shown in the next figure). 16 At the bottom of the window, beneath Backup media or filename, click Browse. Because a diskette is too small to save the backup file on, you will need to save the file to the desktop portion of the hard disk drive before writing the file to CD. If the message Insert a disk into drive A appears, click Cancel. 17 The Save as window opens. In the Save in box, select Desktop from the drop-down list. In the Save as box, use the default name or type in a file name with the extension .bkf and then click Save. The window closes. 18 Click Start Backup in the Backup Utility window. The Backup Job Information window opens. 19 Click Start Backup. The Backup Progress window opens. When the process finishes, the window displays The backup is complete. 20 Click Close. 21 Click the x in the upper corner of the Backup Utility window to close it. Continue with the next procedure. 14 Updated HP Media Center PC Information
-
 1
1 -
2
-
3
-
4
-
5
-
6
-
7
-
8
-
 9
9 -
 10
10 -
 11
11 -
 12
12 -
 13
13 -
 14
14 -
 15
15 -
 16
16 -
 17
17 -
 18
18 -
 19
19 -
20
 |
 |
