HP Media Center m7100 Upgrading and Servicing Guide - Page 7
Replacing the Side Panel, Removing the Front Panel, Replacing the Front Panel
 |
View all HP Media Center m7100 manuals
Add to My Manuals
Save this manual to your list of manuals |
Page 7 highlights
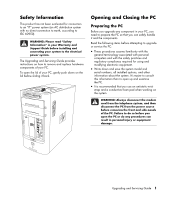
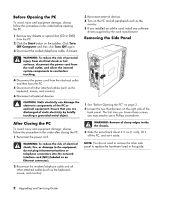
Replacing the Side Panel 1 Slide the side panel forward on the frame until it locks into place. 2 Align the thumbscrews on the side panel with the holes on the back of the chassis frame, and then tighten the thumbscrews on the side panel. 3 See "After Closing the PC" on page 2. Removing the Front Panel This procedure is necessary only when removing or replacing an optical drive, a memory card reader, or a hard disk drive. 1 Locate the three small tabs attached to the front panel on the side of the chassis. 2 Press each tab away from the center of the chassis. Press the top, the middle, and the bottom tab, and then gently remove the front panel. Replacing the Front Panel 1 Place the chassis upright, and then align the three tabs on the right side of the front panel with the correct holes on the chassis. 2 Guide the three small tabs on the left side of the front panel into the correct holes until the panel snaps into place. Upgrading and Servicing Guide 3
-
 1
1 -
 2
2 -
 3
3 -
 4
4 -
 5
5 -
 6
6 -
 7
7 -
 8
8 -
 9
9 -
 10
10 -
 11
11 -
 12
12 -
13
-
14
-
15
-
16
 |
 |
