HP Mini 110-3700 HP Mini 110 and Compaq Mini CQ10 - Maintenance and Service Gu - Page 54
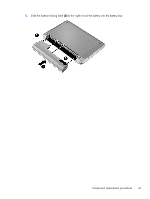
Remove the four Phillips 3.0×3.0 screws, that secure the hard drive bracket to the drive.
 |
View all HP Mini 110-3700 manuals
Add to My Manuals
Save this manual to your list of manuals |
Page 54 highlights
5. Use the tab (5) to remove the hard drive from the computer. 6. If it is necessary to replace the hard drive bracket, connector cable, cover, or screws, follow these steps: a. Disconnect the hard drive connector cable from the hard drive. b. Remove the four Phillips 3.0×3.0 screws (1) that secure the hard drive bracket to the drive. c. Remove the hard drive bracket (2). 46 Chapter 4 Removal and replacement procedures
-
 1
1 -
2
-
3
-
4
-
5
-
6
-
7
-
8
-
9
-
10
-
11
-
12
-
13
-
14
-
15
-
16
-
17
-
18
-
19
-
20
-
21
-
22
-
23
-
24
-
25
-
26
-
27
-
28
-
29
-
30
-
31
-
32
-
33
-
34
-
35
-
36
-
37
-
38
-
39
-
40
-
41
-
42
-
43
-
44
-
45
-
46
-
47
-
48
-
 49
49 -
 50
50 -
 51
51 -
 52
52 -
 53
53 -
 54
54 -
 55
55 -
 56
56 -
 57
57 -
 58
58 -
 59
59 -
60
-
61
-
62
-
63
-
64
-
65
-
66
-
67
-
68
-
69
-
70
-
71
-
72
-
73
-
74
-
75
-
76
-
77
-
78
-
79
-
80
-
81
-
82
-
83
-
84
-
85
-
86
-
87
-
88
-
89
-
90
-
91
-
92
-
93
-
94
-
95
-
96
-
97
-
98
-
99
-
100
-
101
-
102
-
103
-
104
-
105
-
106
-
107
-
108
 |
 |
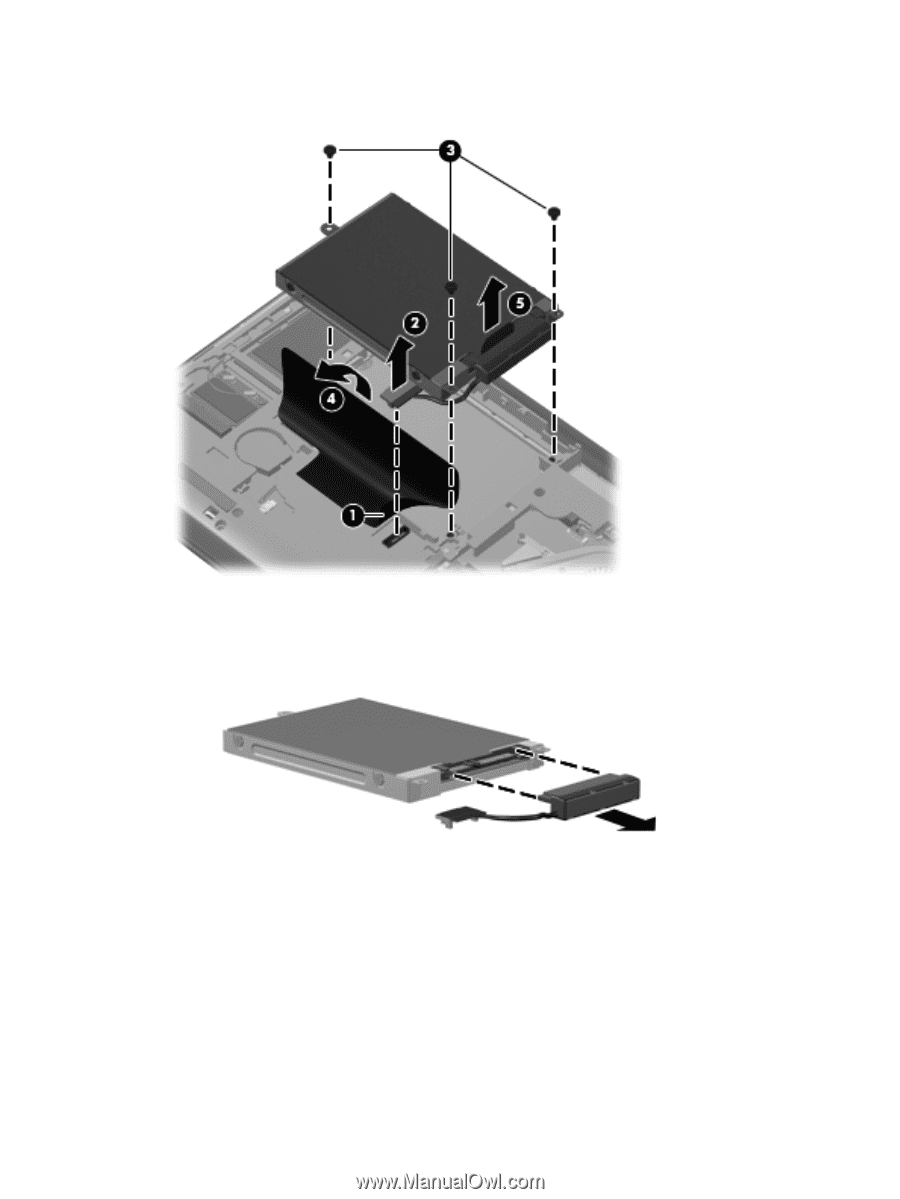
5.
Use the tab
(5)
to remove the hard drive from the computer.
6.
If it is necessary to replace the hard drive bracket, connector cable, cover, or screws, follow these
steps:
a.
Disconnect the hard drive connector cable from the hard drive.
b.
Remove the four Phillips 3.0×3.0 screws
(1)
that secure the hard drive bracket to the drive.
c.
Remove the hard drive bracket
(2)
.
46
Chapter 4
Removal and replacement procedures