HP Mini 110-3744ca HP Mini and Compaq Mini Getting Started - Windows 7 - Page 37
Replacing the memory module, WARNING, CAUTION
 |
View all HP Mini 110-3744ca manuals
Add to My Manuals
Save this manual to your list of manuals |
Page 37 highlights
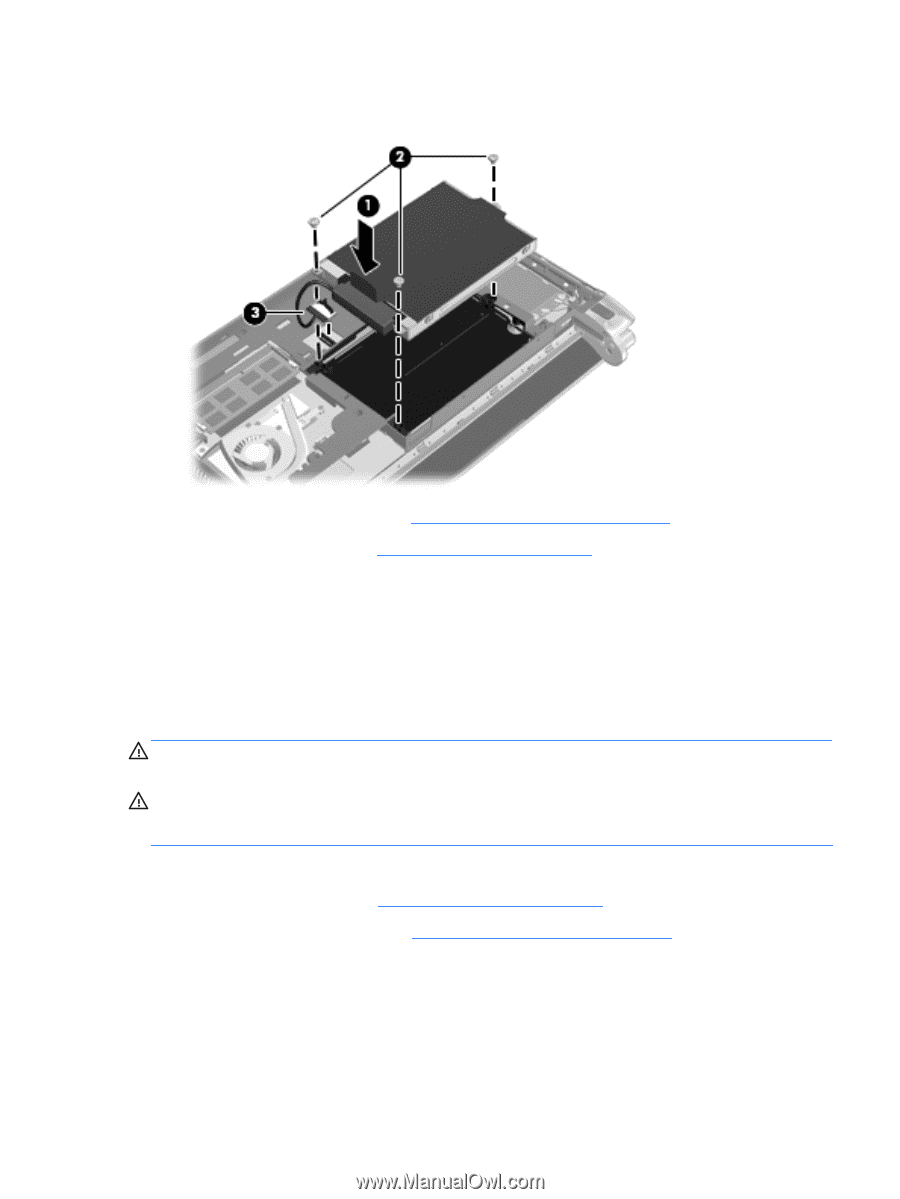
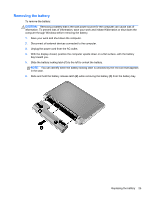
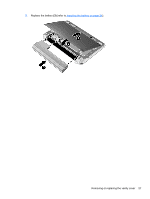
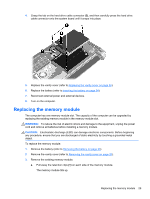
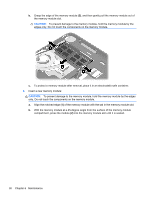
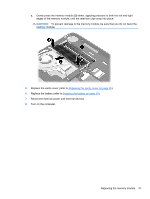
4. Grasp the tab on the hard drive cable connector (3), and then carefully press the hard drive cable connector onto the system board until it snaps into place. 5. Replace the vanity cover (refer to Replacing the vanity cover on page 26). 6. Replace the battery (refer to Inserting the battery on page 24). 7. Reconnect external power and external devices. 8. Turn on the computer. Replacing the memory module The computer has one memory module slot. The capacity of the computer can be upgraded by replacing the existing memory module in the memory module slot. WARNING! To reduce the risk of electric shock and damage to the equipment, unplug the power cord and remove all batteries before installing a memory module. CAUTION: Electrostatic discharge (ESD) can damage electronic components. Before beginning any procedure, ensure that you are discharged of static electricity by touching a grounded metal object. To replace the memory module: 1. Remove the battery (refer to Removing the battery on page 25). 2. Remove the vanity cover (refer to Removing the vanity cover on page 26). 3. Remove the existing memory module: a. Pull away the retention clips (1) on each side of the memory module. The memory module tilts up. Replacing the memory module 29
-
 1
1 -
2
-
3
-
4
-
5
-
6
-
7
-
8
-
9
-
10
-
11
-
12
-
13
-
14
-
15
-
16
-
17
-
18
-
19
-
20
-
21
-
22
-
23
-
24
-
25
-
26
-
27
-
28
-
29
-
30
-
31
-
 32
32 -
 33
33 -
 34
34 -
 35
35 -
 36
36 -
 37
37 -
 38
38 -
 39
39 -
 40
40 -
 41
41 -
 42
42 -
43
-
44
-
45
-
46
-
47
-
48
-
49
-
50
-
51
-
52
 |
 |