HP MultiSeat t100 HP Image Manager 5.0: Quick Setup Guide - Page 27
Modifying the client image to support Desktop Manager Console, Program File\HP Image Manager\client
 |
View all HP MultiSeat t100 manuals
Add to My Manuals
Save this manual to your list of manuals |
Page 27 highlights
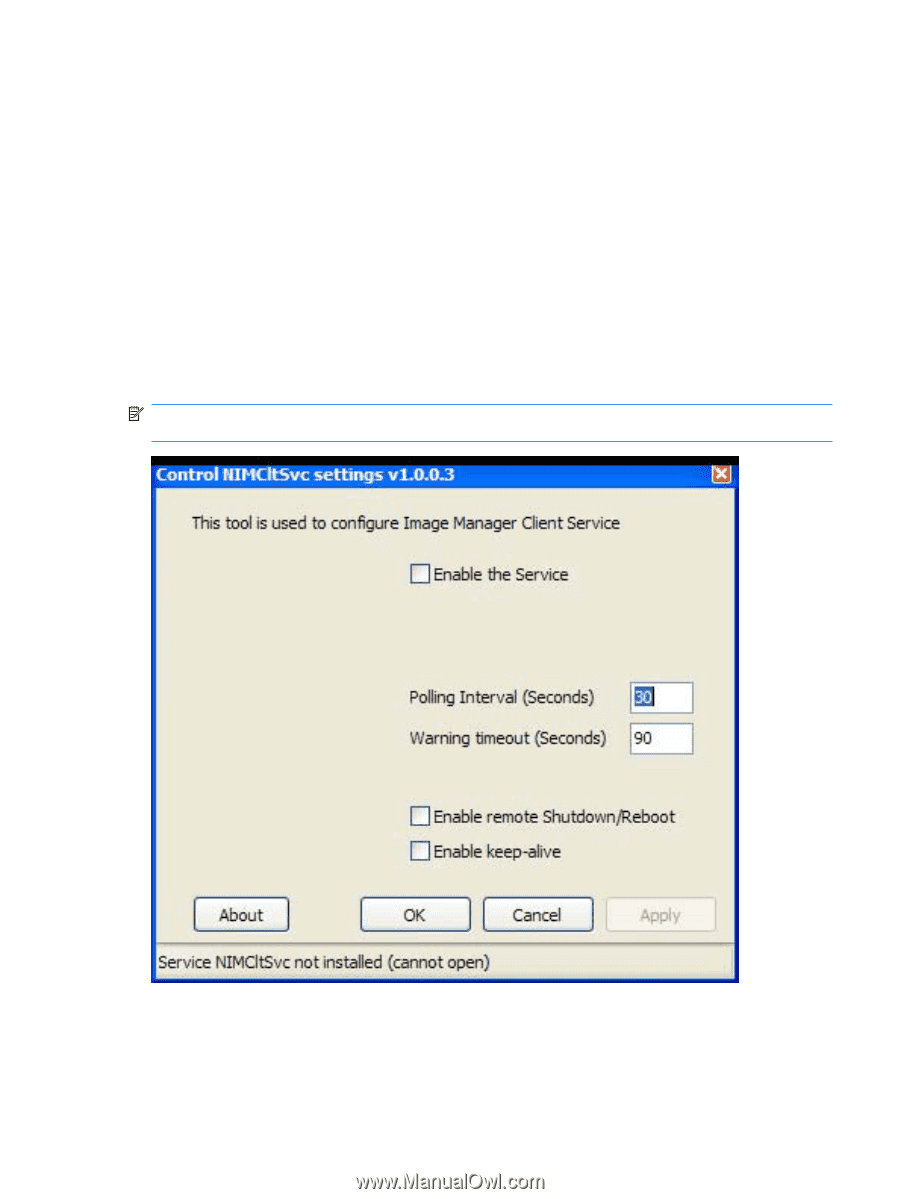
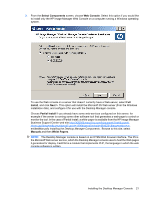
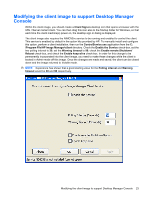
Modifying the client image to support Desktop Manager Console Within the client image, you should create a Client Sign-in desktop icon that opens a browser with the URL /client. You can then drag this icon also to the Startup folder for Windows, so that each time the client machine(s) power on, the desktop sign-in dialog is displayed. The client image also requires the NIMCltSvc service to be running and enabled to control the client. This service is enabled by default in the option kits provided by HP. To manually install and configure this option, perform a client installation, then run the ControlService.exe application from the C: \Program File\HP Image Manager\client directory. Check the Enable the Service check-box, set the two polling interval to 30, set the Warning timeout to 90, check the Enable remote Shutdown/ Reboot check-box, and check the Enable keep-alive check-box. In order for this change to be permanently incorporated into the client image, you need to make these changes while the client is booted in Admin mode off this image. Once the changes are made and saved, the client can be closed down and the image returned to Volatile mode. NOTE: Experience has shown that a good starting value for the Polling interval and Warning timeout would be 30 and 90 respectively. Modifying the client image to support Desktop Manager Console 23
-
 1
1 -
2
-
3
-
4
-
5
-
6
-
7
-
8
-
9
-
10
-
11
-
12
-
13
-
14
-
15
-
16
-
17
-
18
-
19
-
20
-
21
-
 22
22 -
 23
23 -
 24
24 -
 25
25 -
 26
26 -
 27
27 -
 28
28 -
 29
29 -
 30
30 -
 31
31 -
 32
32 -
33
-
34
-
35
-
36
-
37
-
38
-
39
 |
 |