HP NetServer LH 3/LH Installing Microsoft Small Business Server 2000 on an HP - Page 4
Installation Methods, Automatic Installation – Using the HP Navigator C, Automatic Installation
 |
View all HP NetServer LH 3/LH manuals
Add to My Manuals
Save this manual to your list of manuals |
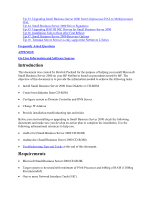
Page 4 highlights
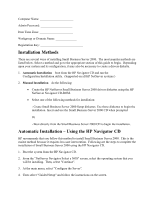
Computer Name Admin Password Date Time Zone Workgroup or Domain Name Registration Key Installation Methods There are several ways of installing Small Business Server 2000. The most popular methods are listed below. Select a method and go to the appropriate section of this guide to begin. Depending upon your system and its configuration, it may also be necessary to create a drivers diskette. 1. Automatic Installation - boot from the HP Navigator CD and run the Configuration/Installation utility. (Supported on all HP NetServer systems.) 2. Manual Installation - do the following: · Create the HP NetServer Small Business Server 2000 drivers diskettes using the HP NetServer Navigator CD-ROM. · Select one of the following methods for installation: - Create Small Business Server 2000 Setup diskettes. Use those diskettes to begin the installation. Insert and use the Small Business Server 2000 CD when prompted. Or - Boot directly from the Small Business Server 2000 CD to begin the installation. Automatic Installation - Using the HP Navigator CD HP recommends that you follow this method to install Small Business Server 2000. This is the easiest method because it requires less user intervention. Following are the steps to complete the installation of Small Business Server 2000 using the HP Navigator CD. 1. Boot the system from the HP Navigator CD. 2. From the "NetServer Navigator Select a NOS" screen, select the operating system that you will be installing. Then, select "Continue". 3. At the main menu, select "Configure the Server". 4. Then select "Guided Setup" and follow the instructions on the screen.
-
 1
1 -
 2
2 -
 3
3 -
 4
4 -
 5
5 -
 6
6 -
 7
7 -
 8
8 -
 9
9 -
 10
10 -
11
-
12
-
13
-
14
-
15
-
16
-
17
-
18
-
19
-
20
-
21
-
22
 |
 |