HP NetServer LXr 8500 Installing SuSE on an HP Netserver - Page 4
Congratulations! You just installed SuSE Linux 7.2 Professional, System Boot Configuration
 |
View all HP NetServer LXr 8500 manuals
Add to My Manuals
Save this manual to your list of manuals |
Page 4 highlights
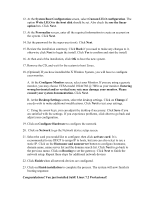
12. At the System Boot Configuration screen, select Custom LILO configuration. The option Write LILO to the boot disk should be set. Also check the use the linear option box. Click Next. 13. At the Personalize screen, enter all the required information to create an account on the system. Click Next. 14. Set the password for the super user (root). Click Next. 15. Review the installation summary. Click Back if you need to make any changes to it, otherwise click Next to begin the install. Click Yes to confirm and start the install. 16. At then end of the installation, click OK to boot the new system. 17. Remove the CD, and wait for the system to boot Linux. 18. (Optional) If you have installed the X Window System, you will have to configure your monitor. A. At the Configure Monitor screen, select your Monitor. If you are using a generic monitor, you may choose VESA model 1024x768 @ 70Hz as your monitor. Entering wrong horizontal and/or vertical sync rate may damage your monitor. Please consult your system documentation. Click Next. B. At the Desktop Settings screen, select the desktop settings. Click on Change if you do wish to make additional modifications. Click Next to test your settings. C. Using the arrow keys, you can adjust the desktop if necessary. Click Save if you are satisfied with the settings. If you experience problems, click abort to go back and adjust your configuration. 19. Click on Configure Hardware to configure the network. 20. Click on Network to go the Network device setup screen. 21. Select the card you would like to configure, then click activate card. It is recommended to use DHCP to assign IP to hosts, but you can also select to use a static IP. Click on the Hostname and nameserver button to configure hostname, domain name, name server list and the domain search list. Click Next to go back to the previous menu. Click on Routing to set the gateway. Click Next to finish the network setup. Repeat these steps for additional network devices 22. Click Finish when all network devices are configured. 23. Click on Finish installation to complete the process. The system will now finish its booting sequence. Congratulations! You just installed SuSE Linux 7.2 Professional!
-
 1
1 -
 2
2 -
 3
3 -
 4
4 -
 5
5
 |
 |
