HP OfficeJet Enterprise Color X555 Officejet Enterprise Color MFP X585/Flow X5 - Page 2
Printer Properties
 |
View all HP OfficeJet Enterprise Color X555 manuals
Add to My Manuals
Save this manual to your list of manuals |
Page 2 highlights
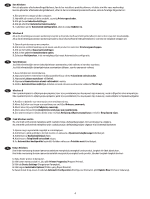
5 6 7 � EN Windows Only If you are attaching the finishing accessory before you have installed the product software, this step is not necessary. If you are attaching the finishing accessory after you have installed the product software, perform the following steps: 1. Open the printers folder on your computer. 2. Right-click the name of this product, and select Printer Properties. 3. Click the Device Settings tab. 4. Click the Installable Options section. 5. In the drop-down box next to Automatic Configuration, select Update Now. FR Windows uniquement Si vous connectez l'accessoire de finition avant l'installation du logiciel du produit, cette étape n'est pas nécessaire. Si vous connectez l'accessoire de finition après l'installation du logiciel du produit, effectuez les étapes suivantes : 1. Ouvrez le dossier Imprimantes sur votre ordinateur. 2. Cliquez avec le bouton droit sur le nom de ce produit et sélectionnez Propriétés de l'imprimante. 3. Cliquez sur l'onglet Paramètres du périphérique. 4. Cliquez sur la section Options installables. 5. Dans la liste déroulante en regard de Configuration automatique, sélectionnez Mettre à jour maintenant. DE Nur für Windows Falls Sie das Zubehör zur Fertigstellung anschließen, bevor Sie die Produktsoftware installiert haben, ist der folgende Schritt nicht notwendig. Falls Sie das Zubehör zur Fertigstellung anschließen, nachdem Sie die Produktsoftware installiert haben, führen Sie die folgenden Schritte durch: 1. Öffnen Sie den Druckerordner auf Ihrem Computer. 2. Klicken Sie mit der rechten Maustaste auf den Namen dieses Geräts, und wählen Sie Druckereigenschaften. 3. Klicken Sie auf die Registerkarte Geräteeinstellungen. 4. Klicken Sie auf den Abschnitt Installierbare Optionen. 5. Wählen Sie in der Drop-down-Liste neben Automatische Konfiguration den Eintrag Jetzt aktualisieren. 2
-
 1
1 -
 2
2 -
 3
3 -
 4
4 -
 5
5 -
 6
6 -
 7
7 -
 8
8
 |
 |