HP Officejet 5100 HP Officejet 5100 series all-in-one - (English) Mac Setup Po - Page 1
HP Officejet 5100 - All-in-One Printer Manual
 |
View all HP Officejet 5100 manuals
Add to My Manuals
Save this manual to your list of manuals |
Page 1 highlights
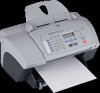
*Q1679-90107* *Q1679-90107* Q1679-90107 Macintosh setup poster hp officejet 5100 series all-in-one Supports Macintosh 9.x and OS X Make sure you are using the correct side of this poster. Macintosh users: Follow the steps in order. Windows users: See the other side of this poster. See your box for exact contents and system requirements. 1 Remove the red plastic tab Remove and discard the red plastic tab. CAUTION: You must complete this step BEFORE connecting the power cord. 2 Attach the front-panel cover Attach the front-panel cover. Make sure the cover is even with the unit and that all buttons are accessible and can move freely. 3 Attach the ADF tray extension Attach the automatic document feeder (ADF) tray extension. Press down as shown to ensure it clicks into place. Slide out the paperwidth guides. 4 Load plain white paper a b c 5 Connect the supplied phone cord Connect the phone cord to connector 1 on the HP Officejet and then to a wall jack for your phone system. If connecting a phone, modem, or answering machine, see the Reference Guide. 6 Connect the power cord and then the USB cable a b 7 Turn on your HP Officejet CAUTION: Do not connect your HP Officejet to a USB port on a keyboard or to a nonpowered USB hub. The HP Officejet automatically ejects a blank piece of paper. 8 Choose your language and country/region 11 English 12 Español 13 Français 14 Deutsch 15 Português 16 Nederlands 17 Italiano 18 Dansk 19 Suomi 20 Norsk 21 Svenska a Look at the front-panel display. Enter the code for your language on the keypad, and then confirm your selection. b Enter the code for your country/region, and then confirm your selection. If you make a mistake, press Setup, 5, and then 5 again to return to the language menu. 9 Insert the print cartridges a b Lift the print cartridge door up until it catches. Wait for the print carriage to move into view. Lift the latches. 10 Align print cartridges a When prompted, press the Enter button on the front panel to begin aligning the print cartridges. A text page and an align cartridges (test pattern) page print. Follow the instructions on the text page. b Load the align cartridges page face down in the ADF between the paper-width guides and press the Enter button again. c Discard or recycle the printouts. c Hold the black print cartridge d e Hold the color print cartridge (the thinner one) with the label (the wider one) with the label facing you as shown. Slide the facing you as shown. Slide the cartridge into the right side of cartridge into the left side of the print carriage. the print carriage. Black cartridge (15) 15 78 Color cartridge (78) HP-C4574D Black Pull the green tab to remove the blue tape from the print cartridges. Do not touch the gold-colored contacts or retape the cartridges. Lower the print-cartridge latches onto the top of the cartridges, and push down firmly until the cartridges lock into place. Close the print cartridge door. 11 Install the software a Turn on your Macintosh and wait for it to start up. Insert the HP Officejet software CD for your operating system. b Double-click the HP All-In-One Installer icon on your desktop. c Follow the onscreen instructions. You may be prompted to restart your Macintosh during setup. 12 Run the Setup Assistant Make sure you complete the Setup Assistant. Your HP Officejet must be on while you complete software installation. 13 Try your new HP Officejet What's next? • Take the product tour • Use the Director • Check the Reference Guide www.hp.com/support Copyright Hewlett-Packard Company 2002 Printed in USA, Mexico, Germany, and Singapore
-
 1
1
 |
 |
