HP Omni 27-1100 Wall Mounting Guide - Page 14
Removing the wall-mounting hardware, CAUTION, WARNING
 |
View all HP Omni 27-1100 manuals
Add to My Manuals
Save this manual to your list of manuals |
Page 14 highlights
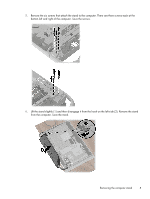
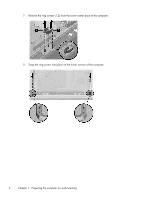
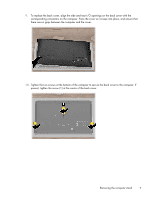
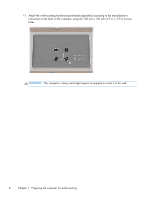
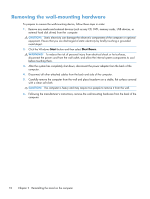
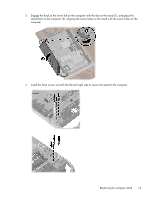
Removing the wall-mounting hardware To prepare to remove the wall-mounting device, follow these steps in order: 1. Remove any media and external devices (such as any CD, DVD, memory cards, USB devices, or external hard disk drives) from the computer. CAUTION: Static electricity can damage the electronic components of the computer or optional equipment. Ensure that you are discharged of static electricity by briefly touching a grounded metal object. 2. Click the Windows Start button and then select Shut Down. WARNING! To reduce the risk of personal injury from electrical shock or hot surfaces, disconnect the power cord from the wall outlet, and allow the internal system components to cool before touching them. 3. After the system has completely shut down, disconnect the power adapter from the back of the computer. 4. Disconnect all other attached cables from the back and side of the computer. 5. Carefully remove the computer from the wall and place facedown on a stable, flat surface covered with a clean soft cloth. CAUTION: The computer is heavy and may require two people to remove it from the wall. 6. Following the manufacturer's instructions, remove the wall-mounting hardware from the back of the computer. 10 Chapter 2 Reinstalling the stand on the computer
-
 1
1 -
2
-
3
-
4
-
5
-
6
-
7
-
8
-
 9
9 -
 10
10 -
 11
11 -
 12
12 -
 13
13 -
 14
14 -
 15
15 -
 16
16 -
 17
17 -
 18
18 -
 19
19
 |
 |
