HP P4000 HP StorageWorks P4000 10GbE SFP+ Hardware Installation Instructions ( - Page 2
HP StorageWorks P4000 10G BASE-SFP+ Upgrade Kit, which - 10g base sfp upgrade kit
 |
View all HP P4000 manuals
Add to My Manuals
Save this manual to your list of manuals |
Page 2 highlights
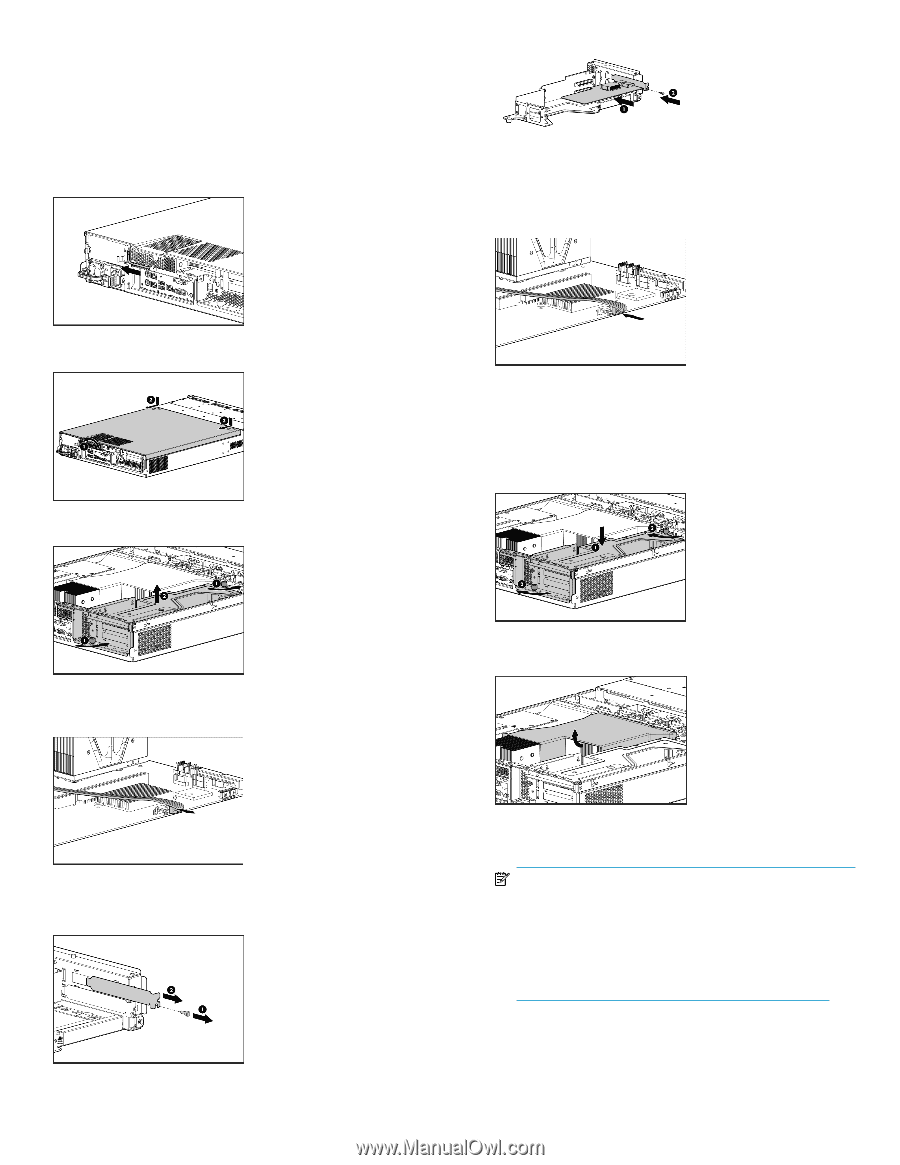
• HP StorageWorks P4000 10G BASE-SFP+ Upgrade Kit, which includes: • HP NC550SFP Dual Port 10GbE • 2GB Reg PC2-5300 2x1GB Kit • Software patch 10073 To install the hardware 1. Locate the torx tool on the back of the unit and loosen the cover screw. 7. Install the 10GbE board into the top slot in the riser board. 8. Make sure the board is fully seated in the mating connector, then tighten the anchor screw. 9. In the P4500, attach the cable connector back into the motherboard mating connector. In the P4300, the cable is not connected to the motherboard connector. 2. Push down on the cover indents, slide the cover towards the back of the unit, then lift the cover off the unit. 3. Locate the riser board assembly and using the torx tool, loosen the two riser assembly captive screws to lift the assembly straight up. 10. Install the riser assembly back into the motherboard mating connector. a. Make sure the riser board assembly is properly aligned with the motherboard mating connector and the sheet metal chassis. b. Push straight down on the assembly to fully seat it into the motherboard. 4. In the P4500, remove the single cable from the motherboard connector. The P4300 does not have the cable on the motherboard connector. 11. Using the torx tool, tighten the two riser assembly captive screws. 12. Remove the air plenum from the unit. 5. Set the riser assembly on the blower plenum and power supply bay. 6. Remove the anchor screw from the blank plate, and remove the blank plate from the riser assembly. Be sure to keep the screw. 13. Locate the empty RAM slots and open the locking latches on these two slots as shown. NOTE: Note the locating key on the RAM, and in the mating RAM slots on the motherboard. Make sure the locating key in the RAM matches up with the locating key in the motherboard slot. Failure to do so and forcing the RAM in place will damage the system motherboard and/or RAM. Page 2
-
 1
1 -
 2
2 -
 3
3
 |
 |