HP P6000 HP Controller Enclosure Management Module Replacement Instructions (5 - Page 2
Removing a management module, Installing a management module, Verifying proper operation - array
 |
View all HP P6000 manuals
Add to My Manuals
Save this manual to your list of manuals |
Page 2 highlights
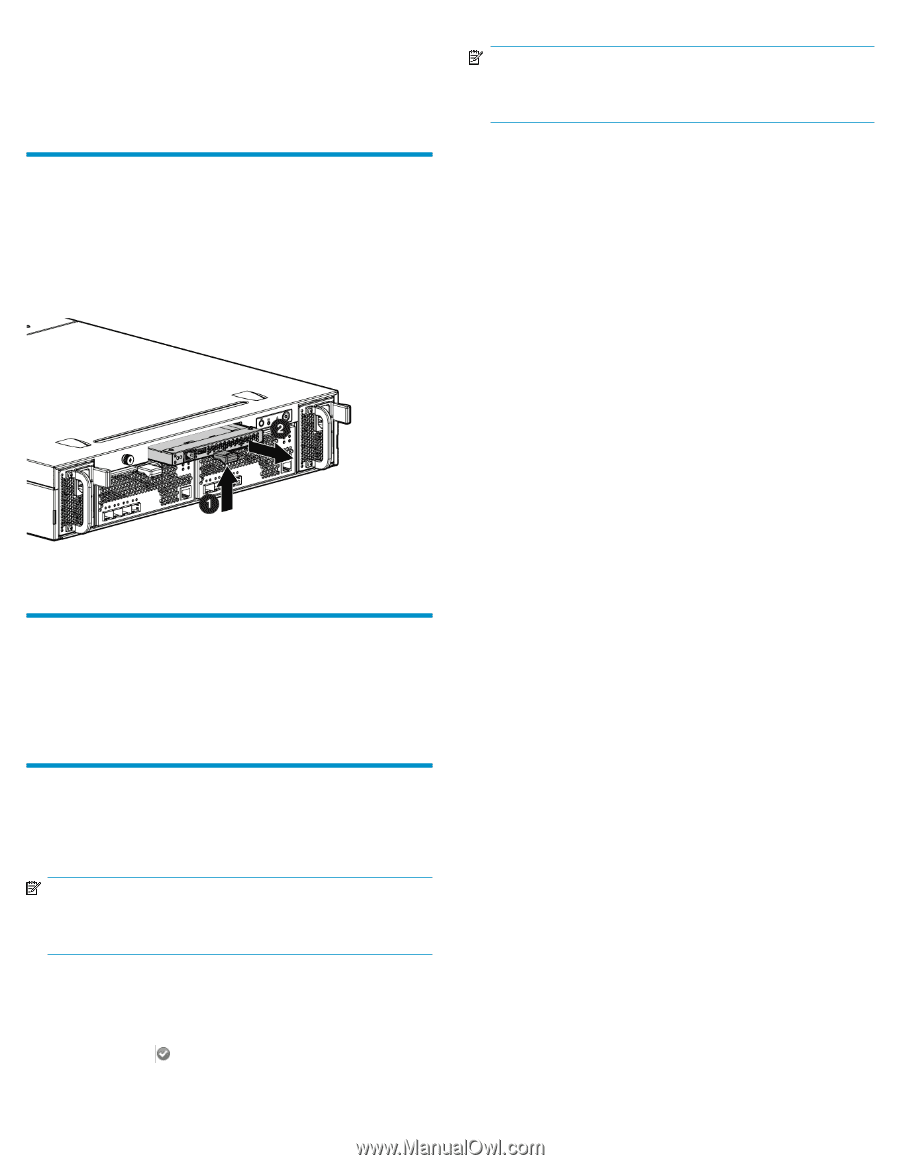
• Green-Normal operation • Amber-Fault condition (except during start up, when some cyc- ling of the LED occurs) • Off-No active remote management • Ethernet LEDs-Solid green indicates a link. Flashing yellow indic- ates activity. Removing a management module 1. Unplug the Ethernet cable from the module. 2. Lift the latch up on the module (1, Figure 2) and pull the module out slightly. 3. Position one hand under the module, and with the other hand, pull the module out of the controller enclosure (2, Figure 2). NOTE: You cannot store modifications to the management module settings if the array is not initialized. Figure 2 Removing a management module . Installing a management module 1. Insert the management module into the slot in the controller enclosure. 2. Push the module forward until a click is detected when fully seated. 3. Plug the Ethernet cable into the module. Verifying proper operation After replacing the management module, check the following to verify the component is operating properly: NOTE: Wait approximately five minutes for the system to check the component status. • Verify the green LED is lit. If not, try reseating the management module. • From HP P6000 Command View, navigate to the component as described in the Verifying component failure section, and check the status. It should be (Good). Page 2
-
 1
1 -
 2
2
 |
 |