HP P6110f Upgrading and Servicing Guide - Page 17
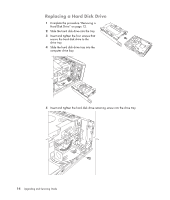
disk drive to the drive tray, and slide the hard, Remove the four screws that secure the hard
 |
UPC - 884962155776
View all HP P6110f manuals
Add to My Manuals
Save this manual to your list of manuals |
Page 17 highlights
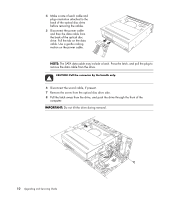
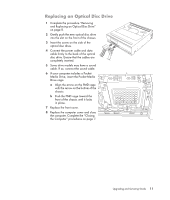
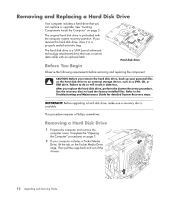
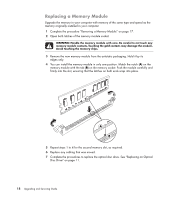
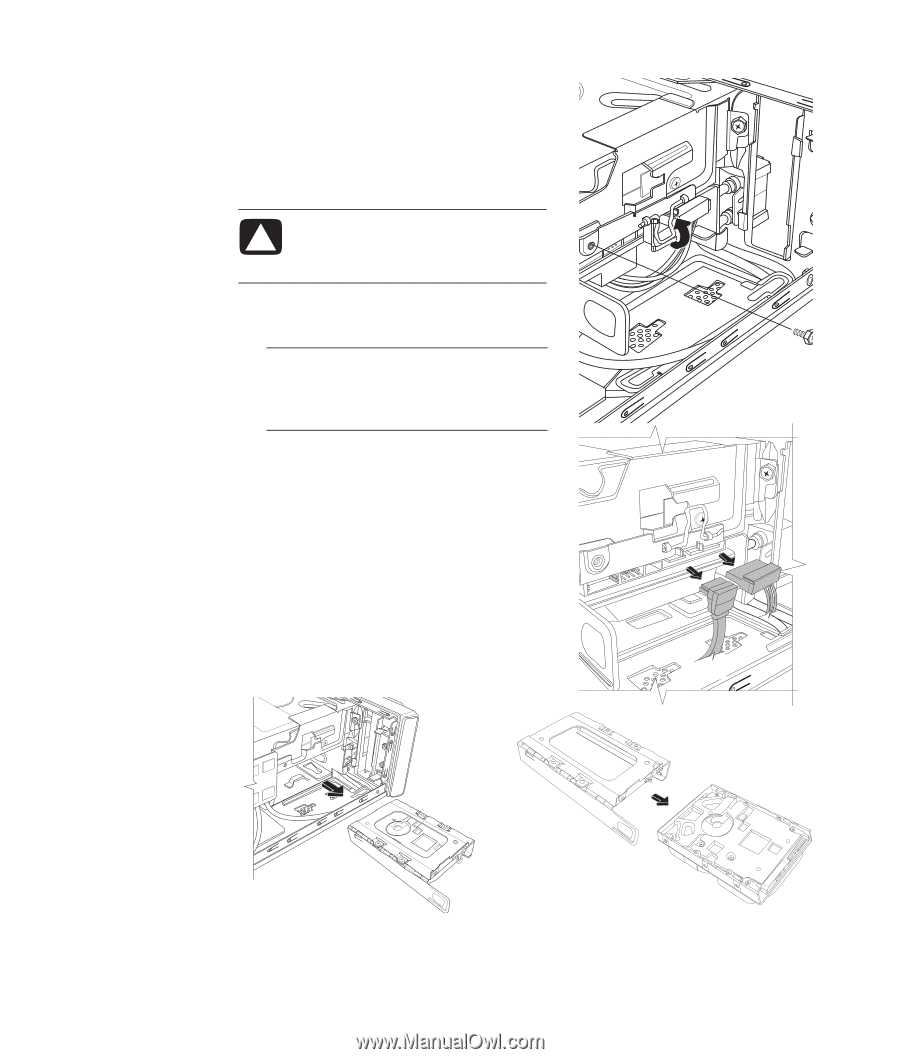
3 Make a note of each cable attached to the hard disk drive before removing the cables. 4 Lift the wire latch, and disconnect the power and data cables from the back of the hard disk drive. 5 Remove the retaining screw from the drive tray. CAUTION: Handle hard disk drives with care. Dropping or banging the hard disk drive can result in data loss. 6 Slide the hard disk drive tray out of the drive bay by pulling the tab on the drive tray. NOTE: Ensure that the computer cables are clear of the drive tray when removing. Push them away, as required, before removing the tray. 7 Remove the four screws that secure the hard disk drive to the drive tray, and slide the hard disk drive out of the tray. Upgrading and Servicing Guide 13
-
 1
1 -
2
-
3
-
4
-
5
-
6
-
7
-
8
-
9
-
10
-
11
-
 12
12 -
 13
13 -
 14
14 -
 15
15 -
 16
16 -
 17
17 -
 18
18 -
 19
19 -
 20
20 -
 21
21 -
 22
22 -
23
-
24
-
25
-
26
-
27
-
28
-
29
-
30
 |
 |
Upgrading and Servicing Guide
13
3
Make a note of each cable attached to the hard
disk drive before removing the cables.
4
Lift the wire latch, and disconnect the power
and data cables from the back of the hard
disk drive.
5
Remove the retaining screw from the drive tray.
6
Slide the hard disk drive tray out of the drive
bay by pulling the tab on the drive tray.
7
Remove the four screws that secure the hard
disk drive to the drive tray, and slide the hard
disk drive out of the tray.
CAUTION: Handle hard disk drives
with care. Dropping or banging
the hard disk drive can result in
data loss.
NOTE:
Ensure that the computer cables are
clear of the drive tray when removing. Push
them away, as required, before removing
the tray.