HP PSC 1400 Setup Guide - Page 8
Control Panel Overview - scan
 |
View all HP PSC 1400 manuals
Add to My Manuals
Save this manual to your list of manuals |
Page 8 highlights
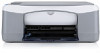
Control Panel Overview 1 on/resume 2 check paper 3 check print cartridges 4 cancel 5 number of copies 6 100% 7 fit to page 8 plain paper 9 photo paper 10 black copy 11 color copy 12 scan *Q7286-90216* *Q7286-90216* Q7286-90216 1 On/Resume button: Powers on. Use after correcting a paper jam or print cartridge problem. 2 Check Paper light: Indicates paper is not loaded correctly or there is a jam. 3 Check Print Cartridges light: Indicates a print cartridge needs to be cleaned or replaced; or the access door is open. 4 Cancel button: Stops a job. 5 Number of copies button: Sets the number of copies. An "E" indicates an error. See Chapter 1 in the User Guide. 6 100% button: Makes the copy the actual size of the original. 7 Fit to page button: Adjusts the copy to the size of the paper. 8 Plain paper button: Sets the paper type to plain. 9 Photo paper button: Sets the paper type to photo. 10 Black copy button: Starts a black and white copy job. 11 Color copy button: Starts a color copy job. 12 Scan button: Copies the original to the computer. Visit www.hp.com/support for assistance. Printed on 100% recycled paper. © Copyright 2005 Hewlett-Packard Development Company, L.P. Printed in [].
-
 1
1 -
2
-
 3
3 -
 4
4 -
 5
5 -
 6
6 -
 7
7 -
 8
8
 |
 |
