HP PageWide Color MFP 779 LaserJet Analog Fax Accessory 500 - Fax Guide - Page 107
Automatic cropping, Automatic image orientation
 |
View all HP PageWide Color MFP 779 manuals
Add to My Manuals
Save this manual to your list of manuals |
Page 107 highlights
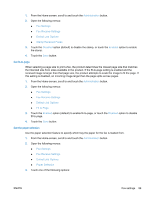
5. Select a color setting from the list of options. 6. Touch the OK button to save the changes. 7. Touch the Start button to begin scanning. Automatic page cropping The product can crop the scanned image so that it is the same size as the paper for the original document, or it can crop the image to the size of the detectable content from the original document. NOTE: To crop the image to match the paper size, scan from the document feeder or leave the scanner lid open when scanning from the flatbed glass. 1. From the Home screen, touch the Fax button. 2. Complete the fields on the first screen to specify the fax recipient information. 3. Touch the More Options button at the bottom of the screen. 4. Touch the Cropping Options button. NOTE: If the Cropping Options button is not on the first page of options, touch the More Options button again to scroll to the next page. 5. Select the appropriate cropping option: ● Crop to paper: The product crops the image to match the paper size of the original document. ● Crop to content: The product crops the image to the size of the detectable content in the original document. 6. Touch the OK button to save the changes. 7. Touch the Start button to begin scanning. Automatic image orientation For original documents that have at least 100 characters of text on the page, the product can detect which edge is the top of the page, and it orients the scanned images appropriately. If you scan several pages and some of the pages are upside-down in relation to other pages, the resulting scanned image has all pages right-side-up. If some of the pages have landscape orientation, the product rotates the image so that the top of the page is at the top of the image. 1. From the Home screen, touch the Fax button. 2. Complete the fields on the first screen to specify the fax recipient information. 3. Touch the More Options button at the bottom of the screen. 4. Touch the Content Orientation button. NOTE: If the Content Orientation button is not on the first page of options, touch the More Options button again to scroll to the next page. 5. Select the Automatically detect option. ENWW Fax settings 95
-
 1
1 -
2
-
3
-
4
-
5
-
6
-
7
-
8
-
9
-
10
-
11
-
12
-
13
-
14
-
15
-
16
-
17
-
18
-
19
-
20
-
21
-
22
-
23
-
24
-
25
-
26
-
27
-
28
-
29
-
30
-
31
-
32
-
33
-
34
-
35
-
36
-
37
-
38
-
39
-
40
-
41
-
42
-
43
-
44
-
45
-
46
-
47
-
48
-
49
-
50
-
51
-
52
-
53
-
54
-
55
-
56
-
57
-
58
-
59
-
60
-
61
-
62
-
63
-
64
-
65
-
66
-
67
-
68
-
69
-
70
-
71
-
72
-
73
-
74
-
75
-
76
-
77
-
78
-
79
-
80
-
81
-
82
-
83
-
84
-
85
-
86
-
87
-
88
-
89
-
90
-
91
-
92
-
93
-
94
-
95
-
96
-
97
-
98
-
99
-
100
-
101
-
 102
102 -
 103
103 -
 104
104 -
 105
105 -
 106
106 -
 107
107 -
 108
108 -
 109
109 -
 110
110 -
 111
111 -
 112
112 -
113
-
114
-
115
-
116
-
117
-
118
-
119
-
120
-
121
-
122
-
123
-
124
-
125
-
126
-
127
-
128
-
129
-
130
-
131
-
132
-
133
-
134
-
135
-
136
-
137
-
138
-
139
-
140
-
141
-
142
-
143
-
144
-
145
-
146
-
147
-
148
-
149
-
150
-
151
-
152
-
153
-
154
-
155
-
156
-
157
-
158
-
159
-
160
-
161
-
162
-
163
-
164
-
165
-
166
-
167
-
168
 |
 |