HP Pavilion 21-inch Displays User Guide 1 - Page 18
Turning on the Monitor, HP Watermark and Image Retention Policy
 |
View all HP Pavilion 21-inch Displays manuals
Add to My Manuals
Save this manual to your list of manuals |
Page 18 highlights
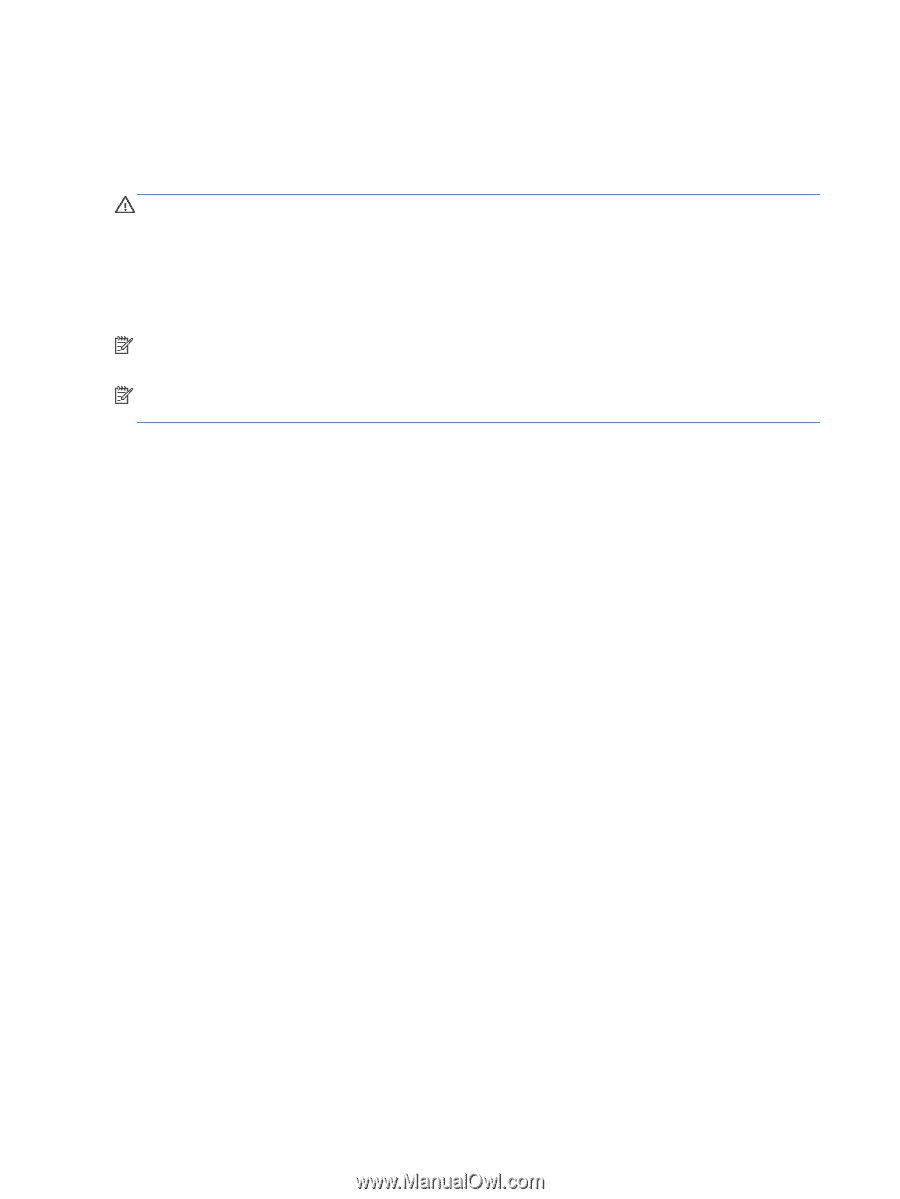
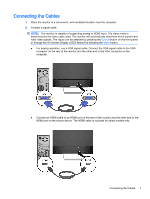
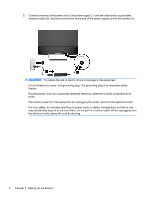
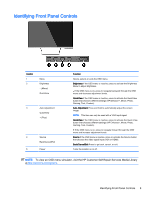
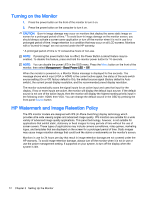
Turning on the Monitor 1. Press the power button on the front of the monitor to turn it on. 2. Press the power button on the computer to turn it on. CAUTION: Burn-in image damage may occur on monitors that display the same static image on screen for a prolonged period of time.* To avoid burn-in image damage on the monitor screen, you should always activate a screen saver application or turn off the monitor when it is not in use for a prolonged period of time. Image retention is a condition that may occur on all LCD screens. Monitors with a "burned-in image" are not covered under the HP warranty. * A prolonged period of time is 12 consecutive hours of non-use. NOTE: If pressing the power button has no effect, the Power Button Lockout feature may be enabled. To disable this feature, press and hold the monitor power button for 10 seconds. NOTE: You can disable the power LED in the OSD menu. Press the Menu button on the front of the monitor, then select Management > Bezel Power LED > Off. When the monitor is powered on, a Monitor Status message is displayed for five seconds. The message shows which input (VGA or HDMI) is the current active signal, the status of the auto-switch source setting (On or Off; factory default is On), the default source signal (factory default is Autoswitch), the current preset display resolution, and the recommended preset display resolution. The monitor automatically scans the signal inputs for an active input and uses that input for the display. If two or more inputs are active, the monitor will display the default input source. If the default source is not one of the active inputs, then the monitor will display the highest ranking priority input in the following order: HDMI, then VGA. You can change the default source in the OSD by pressing the front panel Source button. HP Watermark and Image Retention Policy The IPS monitor models are designed with IPS (In-Plane Switching) display technology which provides ultra-wide viewing angles and advanced image quality. IPS monitors are suitable for a wide variety of advanced image quality applications. This panel technology, however, is not suitable for applications that exhibit static, stationary or fixed images for long periods of time without the use of screen savers. These types of applications may include camera surveillance, video games, marketing logos, and templates that are displayed on the screen for a prolonged period of time. Static images may cause image retention damage that could look like stains or watermarks on the monitor's screen. Monitors in use for 24 hours per day that result in image retention damage are not covered under the HP warranty. To avoid image retention damage, always turn off the monitor when it is not in use or use the power management setting, if supported on your system, to turn off the display when the system is idle. 12 Chapter 3 Setting Up the Monitor
-
 1
1 -
2
-
3
-
4
-
5
-
6
-
7
-
8
-
9
-
10
-
11
-
12
-
 13
13 -
 14
14 -
 15
15 -
 16
16 -
 17
17 -
 18
18 -
 19
19 -
 20
20 -
 21
21 -
 22
22 -
 23
23 -
24
-
25
-
26
-
27
-
28
-
29
-
30
-
31
-
32
-
33
-
34
-
35
-
36
-
37
-
38
 |
 |