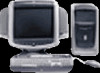
HP Pavilion 7700 HP Pavilion PC's - (English) Seagate Hard Drive U Series 5 In - Page 2
Preparing the Drive with Disk Manager, Standard DOS Installation, Loading the Operating System,
 |
View all HP Pavilion 7700 manuals
Add to My Manuals
Save this manual to your list of manuals |
Page 2 highlights
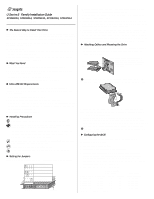
Preparing the Drive with Disk Manager Installing a Single Drive If you are installing a single drive, we recommend using Disk Manager to automatically partition and format your drive. This software is stored on the CD provided with your drive. To run Disk Manager: 1. Boot your computer from your Windows 98 or 95 startup diskette. 2. Insert the DiscWizard CD and change to the drive letter of your CDROM. 3. At the prompt, type dm. Then press ENTER. Disk Manager guides you through the installation process. 4. Proceed to the section on "Loading the Operating System." Installing a Slave Drive If you are installing a second drive, or slave, to your system, use the DiscWizard software provided with your drive. Note. If you do not want to install your drive using Disk Manager, see "Standard DOS installation" below to partition and format your drive. Standard DOS Installation ! Caution. Partitioning or formatting a drive erases all data on it. Seagate assumes no liability if you erase your data. Drive Partitioning Partitioning divides the drive into sections or partitions that function as separate logical drives (labeled C,D,E, etc.). To partition your new drive: 1. Insert a bootable DOS diskette and restart your computer. 2. Type fdisk and press ENTER. If you have two drives installed, select your new drive from option five of the FDISK menu. 3. Select "Create DOS partition or logical DOS drive" by pressing 1. Then press ENTER. 4. Select "Create Primary DOS partition" by pressing 1 again. Create your first drive partition. To make the partition bootable, mark the partition as active. 5. Verify that all space on your new drive has been partitioned. If necessary, create an extended partition with additional logical drives. Drive Formatting ! Caution. Use the correct drive letters to prevent formatting a drive that already contains data. At the A: prompt, type format x:/s. where x is the letter of your first new partition. Repeat the format process for all new partitions. Proceed to "Loading the Operating System" below. Loading the Operating System 1. Boot your computer from your Windows 98 or 95 startup diskette with the Windows CD loaded. 2. At the prompt, type x:\setup, where x is the drive letter of your CDROM drive. Continue with the Windows setup instructions. Troubleshooting If your drive is not working properly, follow these troubleshooting steps. 1. Does the drive spin up? A spinning drive produces a faint whine and clicking noise that begins when power is applied. If your drive does not spin, check that the power connector and interface cable are securely attached and the jumpers are installed correctly. 2. Does the computer recognize the drive? Verify that the drive is enabled in the system CMOS or setup program. If not, select the autodetect option and enable it. If your drive has a problem, it may not be recognized by the system. 3. Does FDISK detect the drive? Run the FDISK program located on your Windows startup diskette. Type fdisk/status to verify that your hard drive is present. 4. Does Scandisk find the drive defect-free? Scandisk is a utility located on your Windows startup diskette that scans the drive for defects. If defects are detected, this may be an indication of a problem. 5. Why won't the drive format to full capacity? Verify that your BIOS has autodetect and LBA mode enabled. Otherwise you may need to use Disk Manager to achieve the full capacity of your drive. Download the latest version from www.seagate.com or find it on your CD. 6. The computer hangs on startup. Use the alternate capacity jumper if your computer does not support higher capacity drives. The jumper limits the 40-Gbyte drive capacity to 33.8 Gbytes and limits drives with capacities of 30 Gbytes or less to 2.1 Gbytes. To reach full capacity, refer to heading 5. Note. If the above steps do not solve the problem, contact your dealer or visit www.seagate.com to download SeaTools disc diagnostics software and for more troubleshooting advice. Seagate Support Services Internet For online information about Seagate products, visit www.seagate.com or e-mail your disc questions to: [email protected]. Technical Support If you need further help installing your drive, first consult your dealer. Dealers are familiar with their unique system configurations and can help you with system conflicts and other technical issues. If you need additional help, you can talk to a Seagate technical support specialist. Before calling, note your system configuration and drive model number. Africa Australia Austria Belgium Denmark France Germany Hong Kong Ireland Italy Middle East Netherlands Norway +31-20-316-7222 +61-2-9725-3366 0 800-20 12 90 0 800-74 876 80 88 12 66 0 800-90 90 52 0 800-182 6831 +852 2368 9918 1 800-55 21 22 800-790695 +31-20-316-7222 0 800-732 4283 800-113 91 Poland Spain Sweden Switzerland Singapore Taiwan Turkey United Kingdom USA/Canada/ Latin America Other European Countries 00 800-311 12 38 900-98 31 24 0 207 90 073 0 800-83 84 11 +65-488-7584 +886-2-2514-2237 00 800-31 92 91 4 0 800-783 5177 1-800 SEAGATE or +1-405-936-1234 + 31-20-316-7222 Warranty To determine the warranty status of your Seagate disc drive, contact your place of purchase or visit our Web site at www.seagate.com for more information. RMA (Return Merchandise Authorization) Before requesting a return authorization, Run SeaTools to diagnose your drive. In addition, please verify that your drive is defective by following the troubleshooting checklist in this guide. Seagate offers comprehensive customer support for all Seagate drives worldwide. Seagate customer service centers are the only facilities authorized to service Seagate drives. Drive return procedures vary depending on geographical location and are subject to current InternationalTrade Regulations. Shipping Your Drive Caution. Back up the data on your drive before shipping it. Seagate assumes no responsibility for data lost during shipping or drive repair. Shipping a drive in an unapproved container voids the warranty. Pack the drive with foam rubber only. Do not use peanuts, bubble wrap or newspapers. Keep your original box and packing materials for storing or shipping your drive. To preserve the warranty status of your drive, any product returned to Seagate must be properly packaged in the original box or a Seagate-approved container to prevent physical and electrical damage while in transit. Electromagnetic Compliance for the European Union This model complies with the European Union requirements of the Electromagnetic Compatibility Directive 89/336/ EEC of 03 May 1989 as amended by Directive 92/31/EEC of 28 April 1992 and Directive 93/68/EEC of 22 July 1993. Compliance of this drive, as a system component, was confirmed with a test system. We cannot guarantee that your system will comply. The drive is not meant for external use (without properly designed enclosure, shielded I/O cable, etc.). Sicherheitsanleitung 1. Das Gerrät ist ein Einbaugerät, das für eine maximale Umgebungstemperatur von 55°C vorgesehen ist. 2. Zur Befestigung des Laufwerks werden 4 Schrauben 6-32 UNC-2A benötigt. Bei seitlicher Befestigung darf die maximale Länge der Schrauben im Chassis nicht mehr als 3,3 mm und bei Befestigung an der Unterseite nicht mehr als 5,08 mm betragen. 3. Als Versorgungsspannugen werden benötigt: +5V ± 5% 0,6A; +12V ±% 0,8A (1,9A fur ca. 30 Sek. fur ± 10%) 4. Die Versorgungsspannung muss SELV entsprechen. 5. Alle Arbeiten auf dem Festplatte dürfen nur von Ausgebildetem Servicepersonal durchgeführt werden. Bitte entfernen Sie nicht die Aufschriftenschilder des Laufwerkes. 6. Der Einbau des Laufwerkes muss den Anforderungen gemäss DIN IEC 950 VDE 0805/05.90 entspreche. © 2000 Seagate Technology, LLC. All rights reserved. Publication Number: 21200248-001, Rev. A, July 2000 Seagate, Seagate Technology, the Seagate logo, U Series 5, DiscWizard, SeaShell and SeaShield are either registered trademarks or trademarks of Seagate Technology, Inc. Other product names are registered trademarks or trademarks of their owners.
-
 1
1 -
 2
2
 |
 |