HP Pavilion Elite d5100 Upgrading and Servicing Guide
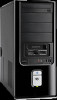
HP Pavilion Elite d5100 - ATX Desktop PC Manual
 |
View all HP Pavilion Elite d5100 manuals
Add to My Manuals
Save this manual to your list of manuals |
HP Pavilion Elite d5100 manual content summary:
- HP Pavilion Elite d5100 | Upgrading and Servicing Guide - Page 1
Upgrading and Servicing Guide - HP Pavilion Elite d5100 | Upgrading and Servicing Guide - Page 2
services. Nothing herein should be construed as constituting an additional warranty. HP shall not be liable for technical or editorial errors or omissions contained herein. HP 4,930,158 and 4,930,160 until August 28, 2008. HP supports lawful use of technology and does not endorse or encourage the - HP Pavilion Elite d5100 | Upgrading and Servicing Guide - Page 3
Table of Contents Upgrading and Servicing Guide 1 Why Read This 1 Safety Information 2 Prerequisites 2 Components-Front View 3 Opening the Computer 4 Preparing the Computer 4 Removing the Side Computer Cover 5 Locating Components Inside the Computer 6 - HP Pavilion Elite d5100 | Upgrading and Servicing Guide - Page 4
Removing and Replacing the Battery 30 Before You Begin 30 Removing and Replacing the Power Supply 32 Replacing the Power Supply 35 iv Upgrading and Servicing Guide - HP Pavilion Elite d5100 | Upgrading and Servicing Guide - Page 5
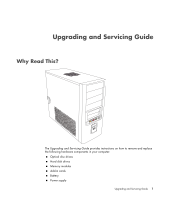
Upgrading and Servicing Guide Why Read This? The Upgrading and Servicing Guide provides instructions on how to remove and replace the following hardware components in your computer: Optical disc drives Hard disk drives Memory modules Add-in cards Battery Power supply Upgrading and Servicing Guide 1 - HP Pavilion Elite d5100 | Upgrading and Servicing Guide - Page 6
: Please read "Additional Safety Information" in your Limited Warranty and Support Guide before installing and connecting your system to the electrical power system. WARNING: Keep your hands away from the moving fan. you can be confident it is the right connection. 2 Upgrading and Servicing Guide - HP Pavilion Elite d5100 | Upgrading and Servicing Guide - Page 7
it, because it holds all your files and data. Handle hard drives according to the manufacturing guide lines. Do not drop or bang the drive. It is shock-sensitive and electrostatic-sensitive. Do not . B Personal media drive bay C 3 1/2 inch and pocket media bays Upgrading and Servicing Guide 3 - HP Pavilion Elite d5100 | Upgrading and Servicing Guide - Page 8
Ensure that you are discharged of static electricity by briefly touching a grounded metal object. HP recommends that you use an antistatic wrist strap and a conductive foam pad when working on the modem cord from the telephone system before opening the cover. 4 Upgrading and Servicing Guide - HP Pavilion Elite d5100 | Upgrading and Servicing Guide - Page 9
. Removing the Side Computer Cover This procedure applies to every upgrading and servicing section in this guide. Whenever you remove, replace, add, or upgrade a part, start by removing the side cover. WARNING: Turn off power before opening the computer cover. Allow the internal system components to - HP Pavilion Elite d5100 | Upgrading and Servicing Guide - Page 10
the Battery" on page 30. G, H Add-in cards "Adding or Replacing an Add-in or a Graphics Card" on page 24. I Power supply "Removing and Replacing the Power Supply" on page 32. The following illustration shows component locations: I A B C H D E G F 6 Upgrading and Servicing Guide - HP Pavilion Elite d5100 | Upgrading and Servicing Guide - Page 11
shut. 2 With the panel tabs aligned in the computer slots, move the rest of the panel toward the computer frame until it shuts. Upgrading and Servicing Guide 7 - HP Pavilion Elite d5100 | Upgrading and Servicing Guide - Page 12
modem/telephone cable and all other attached cables, such as the keyboard, mouse, Ethernet, and monitor cables. 2 Reconnect external devices, such as a printer. 3 Reconnect the power cord. 4 Turn on the computer and all peripherals, such as the monitor. 8 Upgrading and Servicing Guide - HP Pavilion Elite d5100 | Upgrading and Servicing Guide - Page 13
computer, slide the green plastic drive lock toward the front of the computer to unlock the drive (lock and unlock positions are marked). Upgrading and Servicing Guide 9 - HP Pavilion Elite d5100 | Upgrading and Servicing Guide - Page 14
3 Disconnect the power and data cables. Press down on the cable release tabs (1), if present. The cables should disconnect easily (2). CAUTION: Never force a cable housing) only. 4 From the inside of the computer, push the drive toward the front of the computer. 10 Upgrading and Servicing Guide - HP Pavilion Elite d5100 | Upgrading and Servicing Guide - Page 15
cover. See "Removing the Side Computer Cover" on page 5. 2 From the inside of the chassis, release the three tabs (2) forward through the slots (1). Upgrading and Servicing Guide 11 - HP Pavilion Elite d5100 | Upgrading and Servicing Guide - Page 16
of the chassis. If necessary, insert the tip of a flat screwdriver between the chassis and the shield, and pry the shield free. 12 Upgrading and Servicing Guide - HP Pavilion Elite d5100 | Upgrading and Servicing Guide - Page 17
optical bay holds an optical drive with a maximum depth of 17.15 centimeters (6 3/4 inches). The other two bays do not have this limitation. Upgrading and Servicing Guide 13 - HP Pavilion Elite d5100 | Upgrading and Servicing Guide - Page 18
raised bumps on the chassis and all the way back. It does not go into position properly if the drive is not aligned. 7 Connect the power and data cables gently but firmly into the back of the optical drive. Some drive models may have a sound cable. If so, connect the sound - HP Pavilion Elite d5100 | Upgrading and Servicing Guide - Page 19
panel into place. 2 Swing the front panel closed, and then press the left side of the front panel to latch it into place. Upgrading and Servicing Guide 15 - HP Pavilion Elite d5100 | Upgrading and Servicing Guide - Page 20
disk drive, perform the System Recovery procedure. Use the recovery discs to load the factory-installed files. Refer to the Troubleshooting and Maintenance Guide for detailed System Recovery steps. IMPORTANT: Before upgrading a hard disk drive, make sure a recovery disc is available. 16 Upgrading - HP Pavilion Elite d5100 | Upgrading and Servicing Guide - Page 21
computer and remove the side computer cover. See "Opening the Computer" on page 4. 2 Carefully disconnect the power and data cables. Press down on the latch (A) on the top of the data cable before you disconnect (1) and pull the hard drive out of the bay (2). Upgrading and Servicing Guide 17 - HP Pavilion Elite d5100 | Upgrading and Servicing Guide - Page 22
4 Pop the hard drive from its flexible carrier by twisting one of the carrier ends outward (circled) until it peels away from the drive. CAUTION: Handle hard disk drives with care. Dropping or banging the hard disk drive can result in data loss. 18 Upgrading and Servicing Guide - HP Pavilion Elite d5100 | Upgrading and Servicing Guide - Page 23
the connections so as not to bend or damage pins, reconnect the power and data cables. The cables click into place. Never force the connection discs to replace the factory-installed files. Refer to the Troubleshooting and Maintenance Guide for detailed System Recovery procedures. The other bays can - HP Pavilion Elite d5100 | Upgrading and Servicing Guide - Page 24
1 Go to http://www.hp.com/support in your Web browser. 2 Select your country/region and language. 3 From the Support and Drivers page, click See support and troubleshooting information, enter the model number may damage the module. Avoid touching the memory chips. 20 Upgrading and Servicing Guide - HP Pavilion Elite d5100 | Upgrading and Servicing Guide - Page 25
the way, if necessary. CAUTION: Do not pull the memory module out of the socket. Use the retaining clips to eject the module. Upgrading and Servicing Guide 21 - HP Pavilion Elite d5100 | Upgrading and Servicing Guide - Page 26
. Be careful to not touch any memory module contacts. Touching the gold contacts may damage the module. Avoid touching the memory chips. 22 Upgrading and Servicing Guide - HP Pavilion Elite d5100 | Upgrading and Servicing Guide - Page 27
required. 6 Replace any cabling that was moved. 7 Complete the procedures to replace the computer side cover. See "Replacing the Computer Cover" on page 7. Upgrading and Servicing Guide 23 - HP Pavilion Elite d5100 | Upgrading and Servicing Guide - Page 28
your computer, such as a TV tuner (select models only). You can also replace these cards with new cards. Modem card Graphics card 24 Upgrading and Servicing Guide - HP Pavilion Elite d5100 | Upgrading and Servicing Guide - Page 29
need to be squeezed before you pull. Do not force a cable. 4 Remove the screw or screws that hold the card to the frame (1). 2 Upgrading and Servicing Guide 25 - HP Pavilion Elite d5100 | Upgrading and Servicing Guide - Page 30
5 If it is a graphics card, unlock it by releasing the latch connecting the card to the motherboard. The latch may be hidden behind the card. The following illustration shows an example tab. WARNING: Take care with sharp edges around the graphics card slots. 26 Upgrading and Servicing Guide - HP Pavilion Elite d5100 | Upgrading and Servicing Guide - Page 31
only. Be careful to not touch any memory module contacts. Touching the gold contacts may damage the module. Avoid touching the memory chips. Upgrading and Servicing Guide 27 - HP Pavilion Elite d5100 | Upgrading and Servicing Guide - Page 32
the card, and then disconnect them. 3 Hold the top of the card, and carefully pull it straight out of the card slot. 28 Upgrading and Servicing Guide - HP Pavilion Elite d5100 | Upgrading and Servicing Guide - Page 33
Replacing a Graphics or Add-in Card When adding a card, you first have to force out the blank PCI faceplate. Be careful not to bend the EMI shields. The following figure shows a bent shield. CAUTION: A bent EMI shield could cause an electrical short. Upgrading and Servicing Guide 29 - HP Pavilion Elite d5100 | Upgrading and Servicing Guide - Page 34
and Replacing the Battery A lithium battery on the motherboard provides backup power for the computer's timekeeping capability. When the battery starts to weaken type of battery. Discard used batteries according to the manufacturer's instructions. CAUTION: Never use metal objects, such as pliers, to - HP Pavilion Elite d5100 | Upgrading and Servicing Guide - Page 35
from the battery. Lift the battery from the socket. 6 Install the new CR2032 battery in the socket, with the positive (+) side facing up. Upgrading and Servicing Guide 31 - HP Pavilion Elite d5100 | Upgrading and Servicing Guide - Page 36
. Complete the procedure "Opening the Computer" on page 4. 2 Make note of all cables plugged into the power supply, and where they are connected within the chassis, to ensure everything will be reconnected. 3 Methodically release the cables from the cable organizers. 32 Upgrading and Servicing Guide - HP Pavilion Elite d5100 | Upgrading and Servicing Guide - Page 37
opened to remove the cables, and closed to secure the cables in their routing path. 5 If it is a 700W power supply, remove the additional shipping screw as shown in the figure. placeholder:illustration of screw placement inside the chassis, for the 700W power supply Upgrading and Servicing Guide 33 - HP Pavilion Elite d5100 | Upgrading and Servicing Guide - Page 38
front of the chassis) until it clears its left-most brackets. b Move it up to clear the bottom brackets. c Angle the power supply by rotating the right side down as far as you can. d Move the whole component to the right. e Lift the power supply out of the chassis. 34 Upgrading and Servicing Guide - HP Pavilion Elite d5100 | Upgrading and Servicing Guide - Page 39
cables, using the cable organizers. 1 Replace the new power supply into the same placement it was originally. 2 Reinsert the four screws that hold the power supply in place. 3 Reconnect each cable to its component. It if other components or cables are in the way. Upgrading and Servicing Guide 35 - HP Pavilion Elite d5100 | Upgrading and Servicing Guide - Page 40
Printed in
-
 1
1 -
 2
2 -
 3
3 -
 4
4 -
 5
5 -
 6
6 -
 7
7 -
8
-
9
-
10
-
11
-
12
-
13
-
14
-
15
-
16
-
17
-
18
-
19
-
20
-
21
-
22
-
23
-
24
-
25
-
26
-
27
-
28
-
29
-
30
-
31
-
32
-
33
-
34
-
35
-
36
-
37
-
38
-
39
-
40
 |
 |

Upgrading and Servicing Guide