HP Pavilion Media Center m7500 HP Media Center PC - Software Guide - Page 50
Creating albums, Modifying a date assigned to your pictures
 |
View all HP Pavilion Media Center m7500 manuals
Add to My Manuals
Save this manual to your list of manuals |
Page 50 highlights
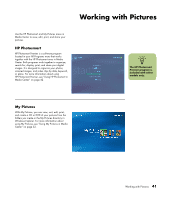
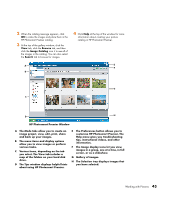
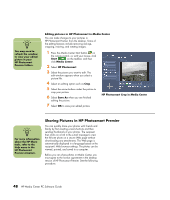
n After you create your picture albums in the HP Photosmart Premier program, you can view them in Media Center. Creating albums You can organize your pictures into albums by using the HP Photosmart Premier program. HP Photosmart Premier links your photos together into albums. HP Photosmart Premier does not move or create copies of your picture files. After you create your picture albums in HP Photosmart Premier, you can then view them in Media Center. To create an album: 1 Click Start on the taskbar, and then click HP Photosmart Premier. Or Click Start on the taskbar, choose All Programs, HP, and then click HP Photosmart Premier. The HP Photosmart Premier window opens. 2 Click the View tab. 3 Select the Image Catalog icon. 4 Select the pictures that you want to place into an album by placing a check in the check box under the image. The selected images appear in the My Selections area at the bottom of the window. 5 Select the Albums icon, and then select Create a new album. 6 Type a title using your keyboard, and then click OK. You can now view your albums in Media Center when you open Media Center, select HP Photosmart, and then select Albums. Modifying a date assigned to your pictures Digital cameras and scanners assign a creation date to digital images. HP Photosmart Premier automatically recognizes this creation date and organizes your pictures by date. The most recent images are listed first in your Image Catalog. To change a date: 1 Click Start on the taskbar, and then click HP Photosmart Premier. Or Click Start on the taskbar, choose All Programs, HP, and then click HP Photosmart Premier. The HP Photosmart Premier window opens. 2 Click the View tab, and then click Image Catalog under the Browse tab. The most recent images are listed first in your Image Catalog. 3 Select a picture or pictures to assign a new date. 4 Right-click one of the images, and then select Set Image Date and Time. 5 Select a date and time, and then click OK. 44 HP Media Center PC Software Guide
-
 1
1 -
2
-
3
-
4
-
5
-
6
-
7
-
8
-
9
-
10
-
11
-
12
-
13
-
14
-
15
-
16
-
17
-
18
-
19
-
20
-
21
-
22
-
23
-
24
-
25
-
26
-
27
-
28
-
29
-
30
-
31
-
32
-
33
-
34
-
35
-
36
-
37
-
38
-
39
-
40
-
41
-
42
-
43
-
44
-
 45
45 -
 46
46 -
 47
47 -
 48
48 -
 49
49 -
 50
50 -
 51
51 -
 52
52 -
 53
53 -
 54
54 -
 55
55 -
56
-
57
-
58
-
59
-
60
-
61
-
62
-
63
-
64
-
65
-
66
-
67
-
68
-
69
-
70
-
71
-
72
-
73
-
74
-
75
-
76
-
77
-
78
-
79
-
80
-
81
-
82
-
83
-
84
-
85
-
86
-
87
-
88
-
89
-
90
-
91
-
92
-
93
-
94
-
95
-
96
-
97
-
98
-
99
-
100
-
101
-
102
-
103
-
104
-
105
-
106
-
107
-
108
-
109
-
110
-
111
-
112
-
113
-
114
-
115
-
116
-
117
-
118
-
119
-
120
-
121
-
122
-
123
-
124
-
125
-
126
-
127
-
128
 |
 |