HP Pavilion TouchSmart 14-b100 HP Pavilion 14 Sleekbook and HP Pavilion 14 Ult - Page 75
Fan, Make special note of each screw and screw lock size and location during removal
 |
View all HP Pavilion TouchSmart 14-b100 manuals
Add to My Manuals
Save this manual to your list of manuals |
Page 75 highlights
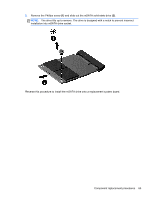
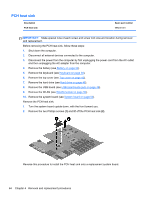
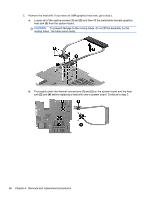
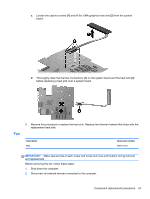
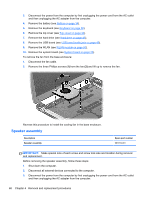
c. Loosen the captive screws (1) and lift the UMA graphics heat sink (2) from the system board. d. Thoroughly clean the thermal connections (1) on the system board and the heat sink (2) before replacing a heat sink onto a system board. Fan 3. Reverse this procedure to replace the heat sink. Replace the thermal material that ships with the replacement heat sink. Description Fan Spare part number 697914-001 IMPORTANT: Make special note of each screw and screw lock size and location during removal and replacement. Before removing the fan, follow these steps: 1. Shut down the computer. 2. Disconnect all external devices connected to the computer. Component replacement procedures 67
-
 1
1 -
2
-
3
-
4
-
5
-
6
-
7
-
8
-
9
-
10
-
11
-
12
-
13
-
14
-
15
-
16
-
17
-
18
-
19
-
20
-
21
-
22
-
23
-
24
-
25
-
26
-
27
-
28
-
29
-
30
-
31
-
32
-
33
-
34
-
35
-
36
-
37
-
38
-
39
-
40
-
41
-
42
-
43
-
44
-
45
-
46
-
47
-
48
-
49
-
50
-
51
-
52
-
53
-
54
-
55
-
56
-
57
-
58
-
59
-
60
-
61
-
62
-
63
-
64
-
65
-
66
-
67
-
68
-
69
-
 70
70 -
 71
71 -
 72
72 -
 73
73 -
 74
74 -
 75
75 -
 76
76 -
 77
77 -
 78
78 -
 79
79 -
 80
80 -
81
-
82
-
83
-
84
-
85
-
86
-
87
-
88
-
89
-
90
-
91
-
92
-
93
-
94
-
95
-
96
-
97
-
98
-
99
-
100
-
101
-
102
-
103
-
104
-
105
-
106
-
107
-
108
-
109
 |
 |
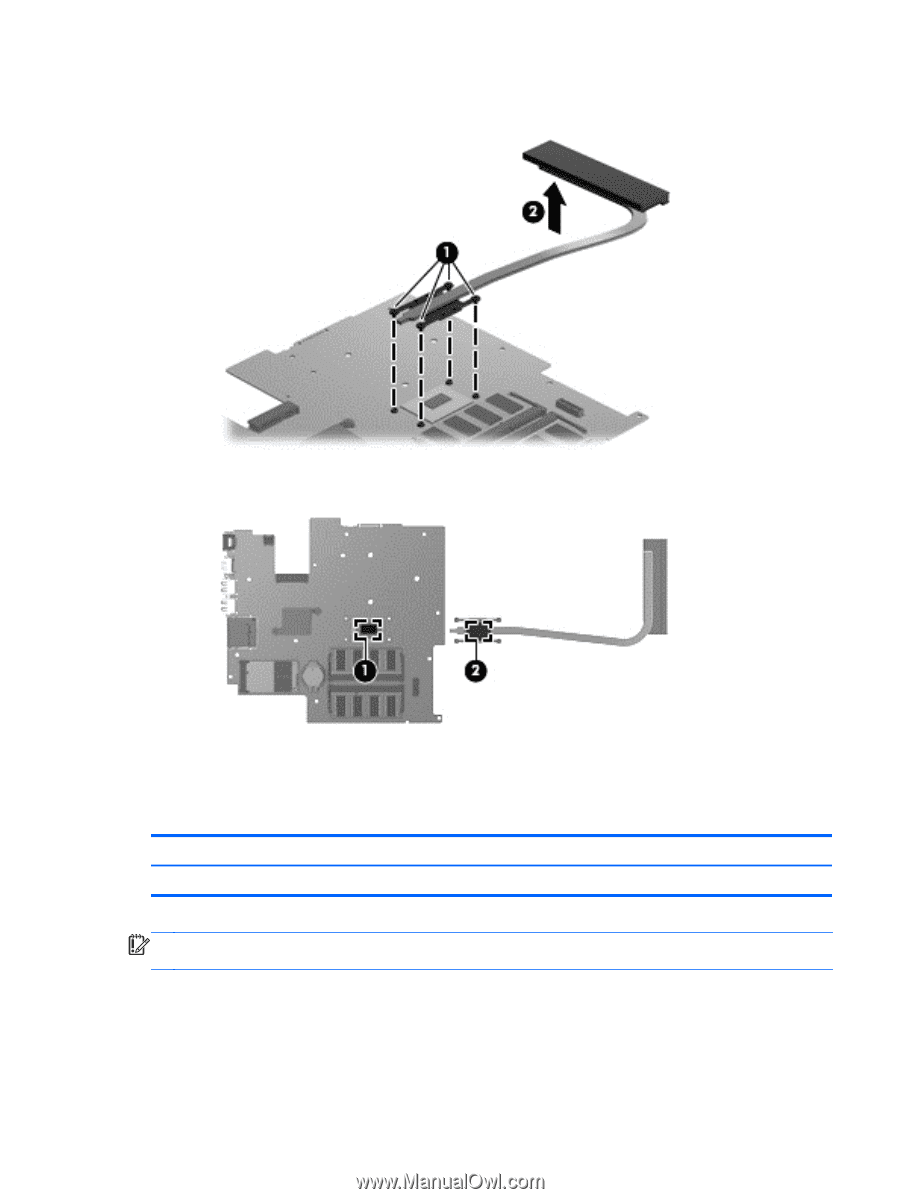
c.
Loosen the captive screws
(1)
and lift the UMA graphics heat sink
(2)
from the system
board.
d.
Thoroughly clean the thermal connections
(1)
on the system board and the heat sink
(2)
before replacing a heat sink onto a system board.
3.
Reverse this procedure to replace the heat sink. Replace the thermal material that ships with the
replacement heat sink.
Fan
Description
Spare part number
Fan
697914-001
IMPORTANT:
Make special note of each screw and screw lock size and location during removal
and replacement.
Before removing the fan, follow these steps:
1.
Shut down the computer.
2.
Disconnect all external devices connected to the computer.
Component replacement procedures
67