HP Pavilion a1000 Getting Started Guide - Page 49
Disconnecting the Drive, Safely Remove Hardware, USB Mass Storage Device, HP Personal Media Drive
 |
View all HP Pavilion a1000 manuals
Add to My Manuals
Save this manual to your list of manuals |
Page 49 highlights
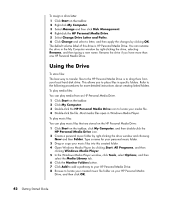
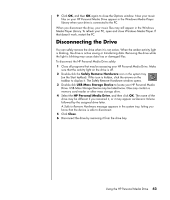
9 Click OK, and then OK again to close the Options window. Now your music files on your HP Personal Media Drive appear in the Windows Media Player library when your drive is connected to the PC. When you disconnect the drive, your music files may still appear in the Windows Media Player Library. To refresh your PC, open and close Windows Media Player. If that doesn't work, restart the PC. Disconnecting the Drive You can safely remove the drive when it is not active. When the amber activity light is blinking, the drive is active saving or transferring data. Removing the drive while the light is blinking may cause data loss or damaged files. To disconnect the HP Personal Media Drive safely: 1 Close all programs that may be accessing your HP Personal Media Drive. Make sure that the activity light on the drive is off. 2 Double-click the Safely Remove Hardware icon in the system tray (on the Start taskbar). If this icon is hidden, click the arrows on the taskbar to display it. The Safely Remove Hardware window opens. 3 Double-click USB Mass Storage Device to locate your HP Personal Media Drive. USB Mass Storage Device may be listed twice. One may contain a memory card reader or other mass storage drive. 4 Select the HP Personal Media Drive, and then click OK. The name of the drive may be different if you renamed it, or it may appear as Generic Volume followed by the assigned drive letter. A Safe to Remove Hardware message appears in the system tray, letting you know that the device is safe to disconnect. 5 Click Close. 6 Disconnect the drive by removing it from the drive bay. Using the HP Personal Media Drive 43
-
 1
1 -
2
-
3
-
4
-
5
-
6
-
7
-
8
-
9
-
10
-
11
-
12
-
13
-
14
-
15
-
16
-
17
-
18
-
19
-
20
-
21
-
22
-
23
-
24
-
25
-
26
-
27
-
28
-
29
-
30
-
31
-
32
-
33
-
34
-
35
-
36
-
37
-
38
-
39
-
40
-
41
-
42
-
43
-
 44
44 -
 45
45 -
 46
46 -
 47
47 -
 48
48 -
 49
49 -
 50
50 -
 51
51 -
 52
52 -
 53
53 -
 54
54 -
55
-
56
-
57
-
58
-
59
-
60
-
61
-
62
-
63
-
64
-
65
-
66
-
67
-
68
-
69
-
70
-
71
-
72
-
73
-
74
-
75
-
76
-
77
-
78
-
79
-
80
-
81
-
82
-
83
-
84
-
85
-
86
-
87
-
88
-
89
-
90
-
91
-
92
-
93
-
94
-
95
-
96
-
97
-
98
-
99
-
100
 |
 |
