HP Pavilion p6200 Upgrade and Service - Page 7
and into place., Tighten the side panel thumbscrew on the back of
 |
View all HP Pavilion p6200 manuals
Add to My Manuals
Save this manual to your list of manuals |
Page 7 highlights
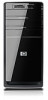
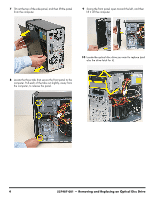
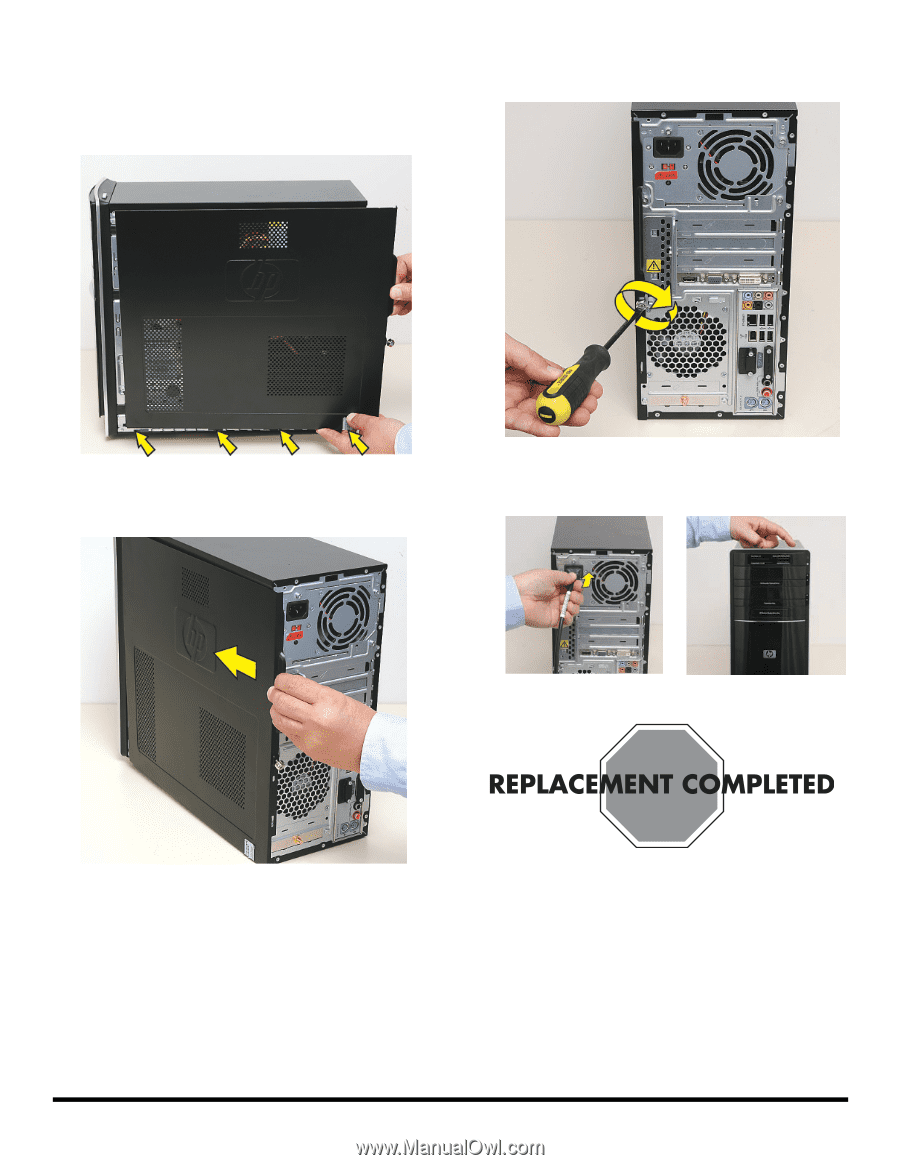
3 Place the bottom of the panel on the computer, inserting the tabs on the inside of the panel into the rail slots on the computer. Swing the top of the panel toward the computer, inserting the top tabs into the rail slots. 5 Tighten the side panel thumbscrew on the back of the computer. 4 Slide the side panel toward the front of the computer and into place. 6 Reconnect all peripherals and cables, and then turn on the computer. 570981-001 - Removing and Replacing the Front Panel 5
-
 1
1 -
 2
2 -
 3
3 -
 4
4 -
 5
5 -
 6
6 -
 7
7 -
 8
8 -
 9
9 -
 10
10 -
 11
11 -
 12
12 -
13
-
14
-
15
-
16
-
17
-
18
-
19
-
20
-
21
-
22
-
23
-
24
-
25
-
26
-
27
-
28
-
29
-
30
-
31
-
32
-
33
-
34
-
35
-
36
-
37
-
38
-
39
-
40
-
41
-
42
-
43
-
44
-
45
-
46
-
47
-
48
-
49
-
50
 |
 |
570981-001
— Removing and Replacing the Front Panel
5
3
Place the bottom of the panel on the computer,
inserting the tabs on the inside of the panel into the
rail slots on the computer. Swing the top of the panel
toward the computer, inserting the top tabs into the
rail slots.
4
Slide the side panel toward the front of the computer
and into place.
5
Tighten the side panel thumbscrew on the back of the
computer.
6
Reconnect all peripherals and cables, and then turn
on the computer.