HP Pavilion p6300 Upgrade and Service - Page 31
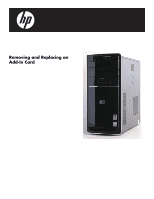
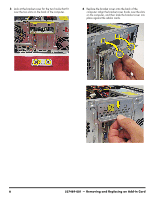
Replacing an Add-In Card, Connect any cables to the card.
 |
View all HP Pavilion p6300 manuals
Add to My Manuals
Save this manual to your list of manuals |
Page 31 highlights
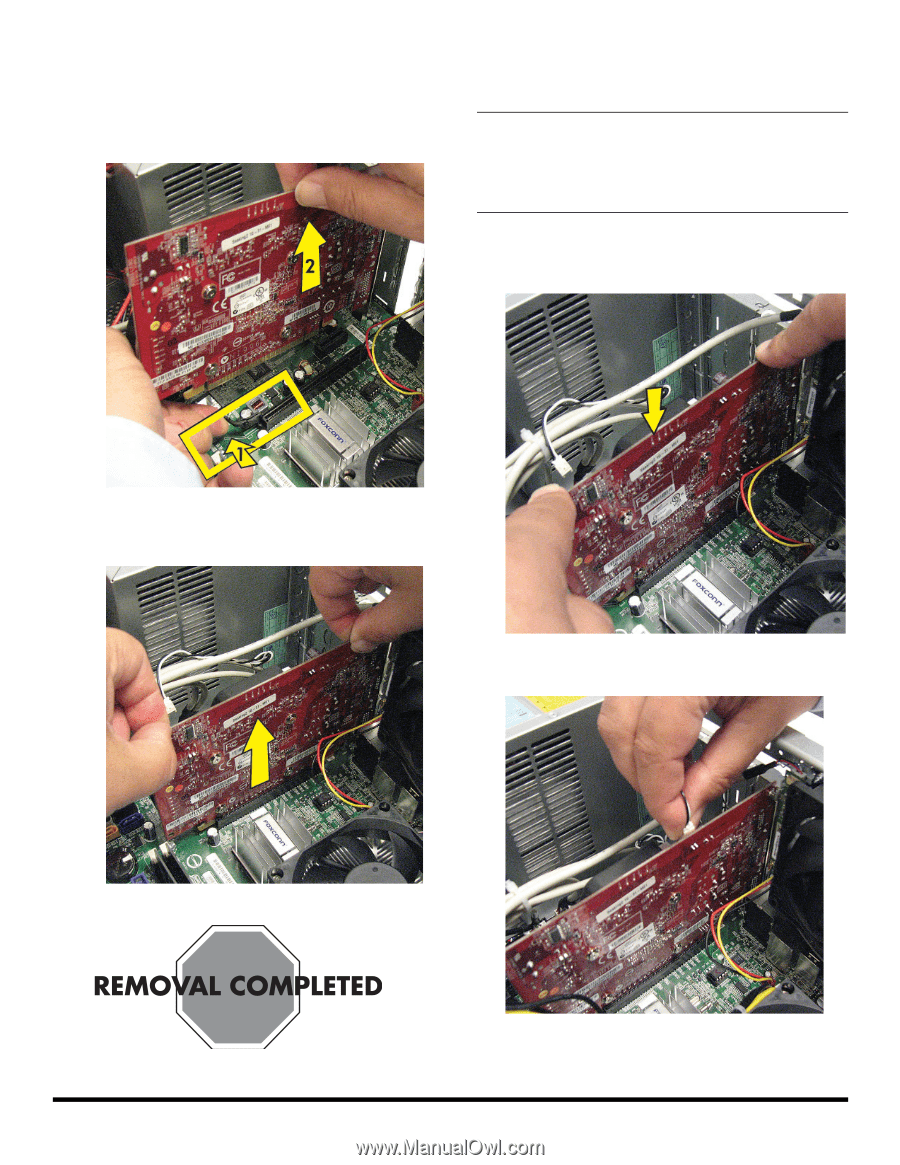
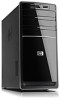
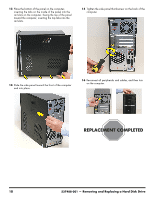
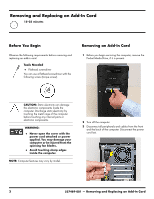
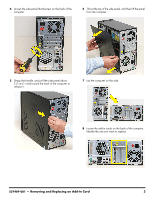
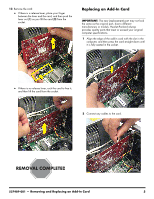
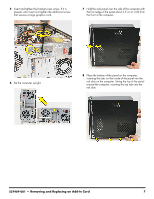
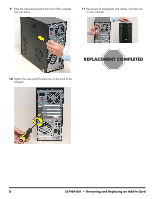
13 Remove the card: If there is a release lever, place your finger between the lever and the card, and then push the lever out (1) as you lift the card (2) from the socket. Replacing an Add-In Card IMPORTANT: The new (replacement) part may not look the same as the original part, due to different manufacturers or models. Hewlett-Packard always provides quality parts that meet or exceed your original computer specifications. 1 Align the edge of the add-in card with the slot in the computer, and then press the card straight down until it is fully seated in the socket. If there is no release lever, rock the card to free it, and then lift the card from the socket. 2 Connect any cables to the card. 537489-001 - Removing and Replacing an Add-In Card 5
-
 1
1 -
2
-
3
-
4
-
5
-
6
-
7
-
8
-
9
-
10
-
11
-
12
-
13
-
14
-
15
-
16
-
17
-
18
-
19
-
20
-
21
-
22
-
23
-
24
-
25
-
 26
26 -
 27
27 -
 28
28 -
 29
29 -
 30
30 -
 31
31 -
 32
32 -
 33
33 -
 34
34 -
 35
35 -
 36
36 -
37
-
38
-
39
-
40
-
41
-
42
-
43
-
44
-
45
-
46
-
47
-
48
-
49
-
50
 |
 |