HP Pavilion p7-1500 Upgrading and Servicing Guide - Page 7
Installing a new hard disk drive, cage, making sure the connectors on the hard
 |
View all HP Pavilion p7-1500 manuals
Add to My Manuals
Save this manual to your list of manuals |
Page 7 highlights
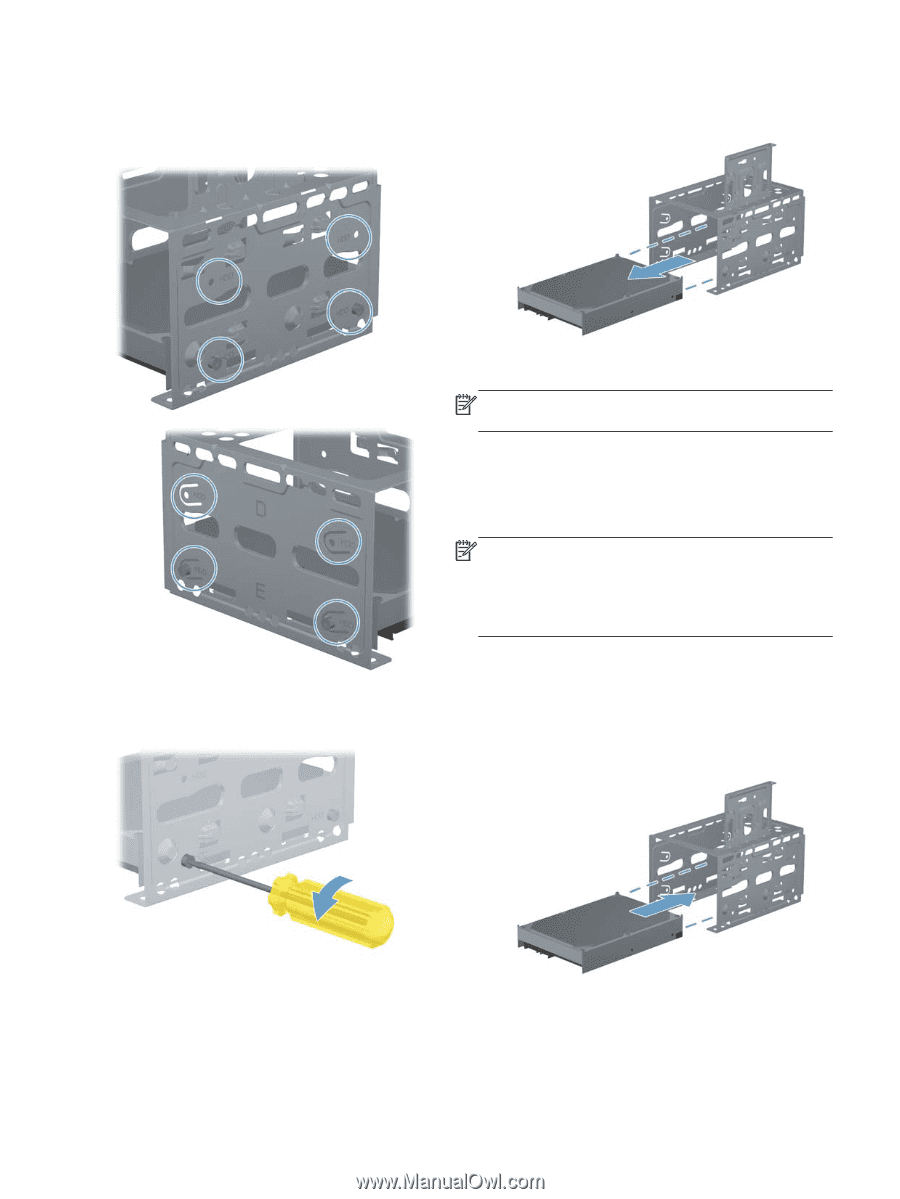
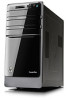
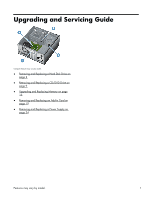
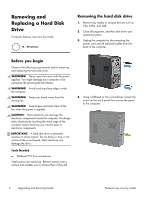
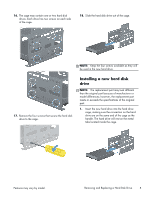
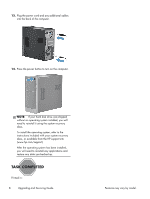
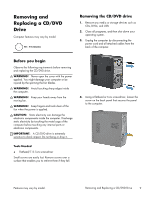
16. The cage may contain one or two hard disk drives. Each drive has two screws on each side of the cage. 18. Slide the hard disk drive out of the cage. 17. Remove the four screws that secure the hard disk drive to the cage. NOTE: Keep the four screws available as they will be used in the new hard drive. Installing a new hard disk drive NOTE: The replacement part may look different than the original part because of manufacturer or model differences; however, the replacement part meets or exceeds the specifications of the original part. 1. Insert the new hard drive into the hard drive cage, making sure the connectors on the hard drive are on the same end of the cage as the handle. The hard drive will rest on the metal tabs located inside the cage. Features may vary by model. Removing and Replacing a Hard Disk Drive 5
-
 1
1 -
 2
2 -
 3
3 -
 4
4 -
 5
5 -
 6
6 -
 7
7 -
 8
8 -
 9
9 -
 10
10 -
 11
11 -
 12
12 -
13
-
14
-
15
-
16
-
17
-
18
-
19
-
20
-
21
-
22
-
23
-
24
-
25
-
26
-
27
-
28
-
29
-
30
-
31
 |
 |